Getting Started with Airbrushes
Firstly, I’m not even going to attempt to discuss the
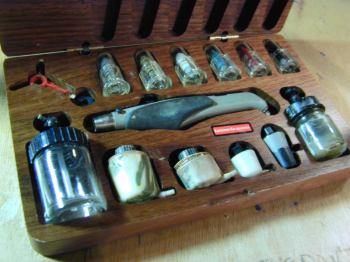
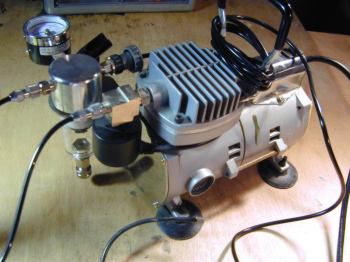
options available when purchasing an airbrush. Just went into our local art supply shop
and bought a Testor’s Aztec 4709 airbrush set and a pretty good air compressor.
Everyone has there own preference, so I’ll never know unless I buy another brand
whether or not it was the right choice. But if you’re in the process of deciding, get
a double-action brush – it’s a must if you want to be able to quickly make
adjustments to the type of spray as you work, it gives an interactive tangible feel that
can really improve your results.
Now, even after reading pages of airbrush information on the Internet – with all the
warnings on how easy it is for the airbrush beginner to get discouraged – the first
days were really really frustrating. Having read the instruction sheet & watched the
video a few times, I thought things looked straight forward enough – but like most
things in life, theory and practice are all too different.
The main issue is the number of variables that come into
play when attempting to set up your brush. These variables can be classified into 3
groups:
- Paint consistency
- Air Pressure (PSI)
- Distance of Nozzle from the spraying surface.
This in itself does seem pretty straight forward –
but it’s the balance of these elements relative to your requirements that can be so
difficult to master. The degree that each of these variables can be adjusted means that
there's not much between getting it right and getting it wrong - hence defining the set-up
for the novice difficult.
What I’ll try to do is document how I personally got
from complete novice to successfully completing my first spray-painted model – it may
not be expert advice – just how I got the confidence to start working on a model.
I’ll assume that the equipment is working ok and
you’ve got to the stage of spraying a water based paint onto scrap paper (artist
water colours are perfect for this). Make sure you understand how to correctly setup your
brush. For example, with the Aztec, if you don't have the nozzle tightened enough, it
effects the airflow and results in a poor spray quality.
Rather than trying to explain the theoretical properties of the various combinations -
what in my opinion makes the learning process so hard - I’ll show the consequences of
getting these combinations wrong. This may give the beginner a better understanding of how
these various elements can effect the results you get.
note: There’s a free guide to download from the
Testors web site. It’s on model making in general, but includes as you’d expect,
a section on airbrushing. I came across this at a crucial time in my learning process
– it confirmed what I was beginning to learn from experience, and represented
visually in an easy to understand way. I’m not here to endorse their product’s
or anything like that, but they do deserve credit for taking the time to ensure that their
customers understand the equipment. (URL is on the Links Page)
I think its easier to display the effects of an
incorrectly setup brush, and work back to the cause – this will allow you to take the
necessary steps to avoid problems. Its important to mention the consistency of the paint.
I don’t think others indicate how vital it is to develop an understanding of the
paint you are using. Getting the same consistency each time is difficult to achieve –
but knowing when to compensate to avoid poor results is important. People tend to forget
that the paint is the key ingredient in airbrushing, hence requires the most attention.
Pressure and proximity are key elements in their own right, but they act on the paint -
not the other way around.
Too close
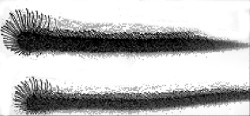
This effect (normally called spidering) is caused when
either the paint is too thin and/or the airbrush is held too close to the model. To
correct it - move the airbrush away from the surface of the model. But, if you need to
keep a fine line, reduce the pressure on your compressor. Alternatively, you could thicken
the paint slightly if you want to keep using the same air pressure.
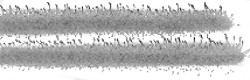
Paint too Thick

This is normally caused by low air pressure from
compressor. But again, you could argue that its a consistency issue, with the paint being
too thick, and the low pressure being insufficient to atomise the paint.
To solve this problem; Thin the paint and/or increase air pressure.
Paint Too Thin
You get this result if the paint consistency is too thin.
To fix it, add more paint and/or decrease the air pressure.
**********
These problems seem to be magnified when working on hard
plastic surfaces. I didn’t have any spare models lying around to practice – but
any old plastic container will do.
To sum up: if you find that you
are unhappy with the quality or definition of the edge of your spray line - the chances
are that the paint is too thick. You need to thin it down and back off on the air
pressure. Most describe a milk-like consistency. Well this is normally hard to visualise
inside a cup of mixing container - quite often you can go quite thin. Remember, if the
paint can't atomise the paint well, its going leave the nozzle too thick, and not in the
fine mist needed for smooth edges. Backing off on the pressure also reduces the speed and
volume of paint delivered to the nozzle - this means that you don't have to work as fast,
and that you can work closer to the surface - hence allowing finer lines.
I know its taking the easy way out, but I'd suggest
working on a 1/25th scale kit (I did a Jadgpanther). Working with the larger
scale really does allow the beginner a margin of error that you simply won’t get with
a smaller model. For example, when I sprayed the camouflaging lines, there was too much
overspray at the edges – but by working at a larger scale, I could fit a smaller
nozzle, and redefine the edges. If you prefer, work on a scrapped model first, you can
still go ahead and get a larger scale when you get the confidence.
Having worked on a number of models larger than 1/35th,
have to say I find quite a difference on how you handle the airbrush. With 1/35th you have
to work more instinctively - there's less time to build effects up compared with 1/25th or
1/16th. An airbrush really does come into its own at these scales. No doubt in time, I may
evolve my skills to work in the smaller scale's - but I'm starting to develop a strong
preference for large kits. Of course this has a number of draw-back's - price & range
to name but two. But in terms of the finished article, frankly 1/35th kits just don't have
the same presence.
Back to the airbrush. Using double action will allow you
to adjust the response of the brush on-the-fly. Backing off on the amount of paint
delivered to the nozzle is crucial to adjusting the spray pattern.
You really have to keep faith - it just seems to fall together - you just need to be
patient. I'm a long way from being expert - but went from despair to reasonably
confident once I acquired the essence of controlling the set-up. Sorry I can't be
more specific - but it really is a state of mind more than anything.
Good luck.
