|
NOTE:
This tutorial is translated from www.joshonen.ch.vu.
Full
credit goes to the author Joshua Muheim! Translation by thegnat.
Creating
a skeleton with bones
Now you know the basics of animating a skeleton. In this tutorial you
will learn how to create such a skeleton with bones by your own.
Its quite simple, but you'll need experience to create a skeleton that
fits your animation needs.
Lets start over. Click on the Joint-Button, to activate the Bone-Creation-Tool.
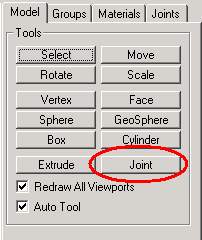
Explanation: With the Joint-Tool you dont create bones, furthermore
the joint connections, that are connected with bones:
To create a skeleton, leftclick in 2D view; that will create a joint.
Every time you leftclick in 2D view, it will create a joint that always
is connected with a bone.
Do exactly that! Leftclick for a first time in 2D-window:
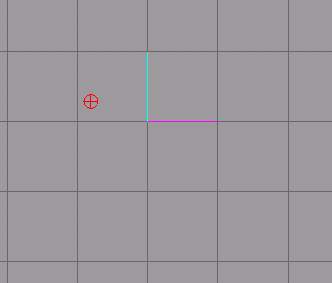
The red circle is our first joint. Click another time:
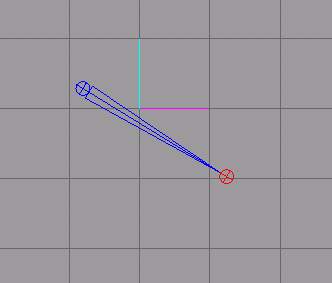
The old (unselected) joint turns blue and the new one is red. The first
and the new joint are connected with a bone.
Click another time in 2D view:
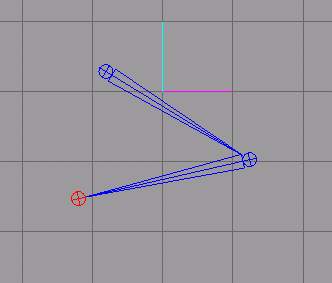
Always the same result: the last 2 joints went blue and the new one
is connected with the 2nd. (Keep in mind: Only the last 2 created joints
are connected with each other! :P )
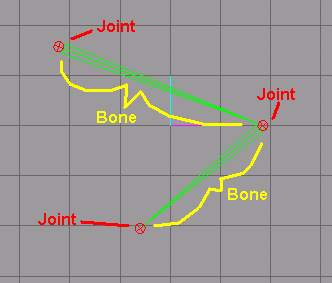
Now we dont want to continue the bone-row, but we want to continue from
an older joint to create a branching.
Activate the Select-Joint-Tool:
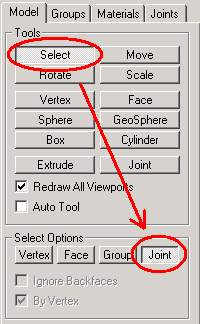
Now select the joint, that you want to connect with the new bone, by
clicking on it:
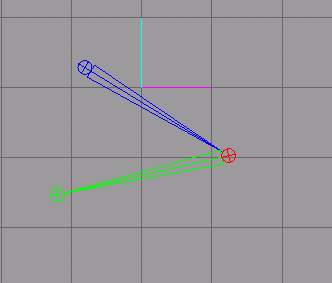
The selected joint is now red coloured.
Click again on the Joint-Creation-Tool:
Lets do the same as before: click somewhere you want in 2D-view to get
a new joint with a bone as connection:
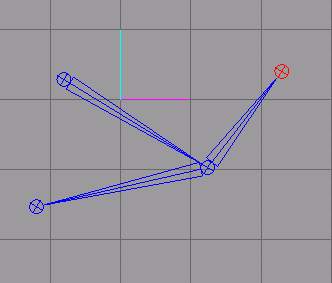
Tadaah!!! Thats all! :D
Lets do a usable skeleton for our model!
Load the model we created in the 2nd to the last tutorial (where we
duplicated the right side onto the left side)
////////////////////
Now zoom the frontview (rightclick -> Maximize), until
you get a good overview about your model.
Creating the skeleton. Click Joint (if its not activated anymore).
The first bone we will set seems to be useless on the first look: we
place it from the ground to the pelvis of the model! First click on
the ground (1st Joint) then on the pelvis (2nd Joint):
As I said, this bone seems useless...I'll explain its use later.
Lets set the joints for the left leg:
(Don't forget the last small bone (6. Click)! It will be the
foot bone.)
Do the same for the right leg. To do this, select the joint on the pelvis
(Select -> Joint)...

...click on Joint...
...and repeat the process we've done for the left leg.
Well done! Now the created bones must be alligned in sideview. To do
so we'll need the front- and sideview. To small the front view-window
down rightclick and select Maximize.
You will notice that the bones, we created, stand straight on the ground.
We must allign them to the legs.
Select the following joints in front-view (hold Shift-Key to
select multiple joints):
Now we want to move the skeleton. Click on Move:
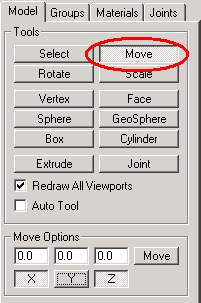
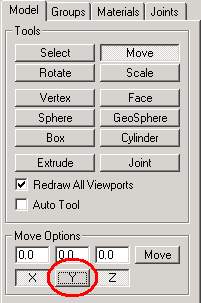
TIP: to prevent up- and down-movement, deactivate the Y-Direction!
:)
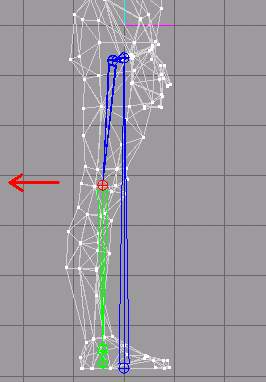
Move the joints slightly to the left in side-view:

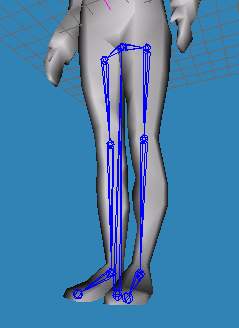
Select both knee-joints and move them slightly to the left:
Move the lowest joints to the toes:
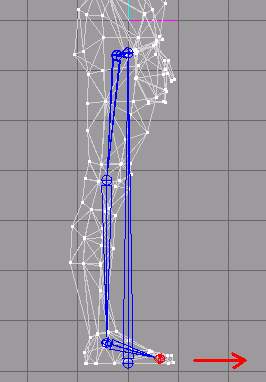
If its done it should look like this:
Because we don't have endless time we will let the rest of the skeleton
remain and go to the next tutorial. Connecting the Mesh (the
faces of the model) with the skeleton. Cu there! :)
|