|
NOTE:
This tutorial is translated from www.joshonen.ch.vu.
Full
credit goes to the author Joshua Muheim! Translation by thegnat.
Assigning the
mesh to the bones
Welcome to tutorial #11! :D
Today we will learn, how to connect the mesh (the faces) to the skeleton,
we've created in the last tutorial. Open the file you created in the
last tutorials!
If you had some problems with the past
tutorials:
DOWNLOAD
FILE REDZAC_MDL_TUT11A.ZIP!
Gleich ich Voraus will ich sagen, dass ich im folgenden Tutorial immer
zwischen den Bezeichnungen Joints und Bones hin und her
wechsle. Dies soll nicht verwirren, es ist immer dasselbe gemeint. Natürlich
gibt es einen Unterschied, aber der ist für uns hier nicht wichtig.
Dann los!
First I want to mention, that we don't connect the faces to the bones
- furthermore we connect the vertices to them.
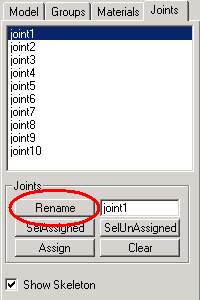
Lets go. Click on Joints in the upper right:
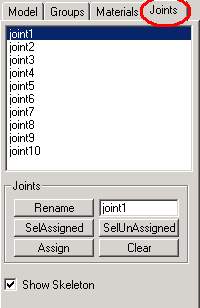
Here are all joints listed. But they don't tell us very much. ;) We
are going to change this!
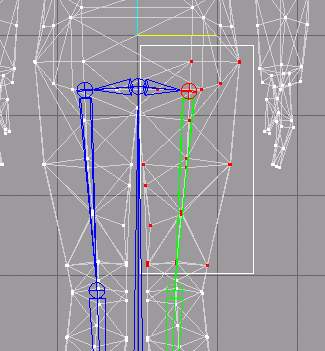
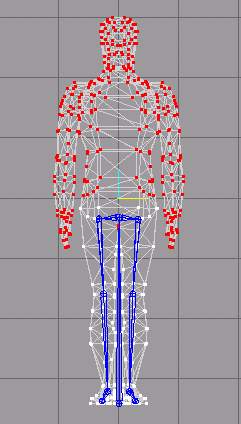
Click on Joint01!
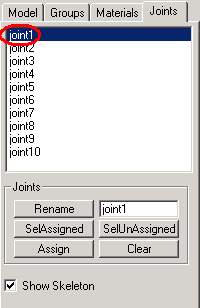
You will see that the joint, we created first in the last tutorial,
went red and all connected joints and bones are now green:
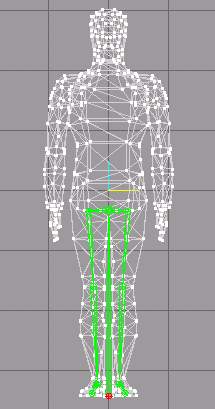
That means that with the selected joint also all other joints are active,
because they are in the same hierarchy like the lowest joint. If you
move the selected joint, all its "children" will move
too.
In the last tutorial we wondered for what the bone between the legs
should be good. Now it clears upr: we created a joint on a good visible
place to be able to move the whole skeleton. This will be very helpful
when we animate foot steps and thing like that.
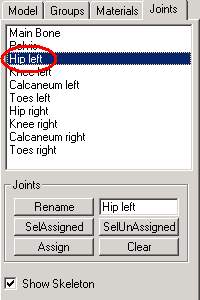
Back to our next goal: we want to give the joints some meaningful names!
Type the desription in the following entry field...
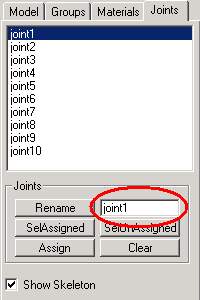
...and confirm the new name with Rename:
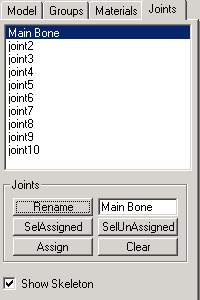
So e.g. type the following name for the
Joint01 into the entry field and confirms with Rename:
"Main Bone"
The display is changed immediately:
Repeat these steps with all joints, use the following names:
Joint02 - Pelvis
Joint03 - Hip left
Joint04 - Knee left
Joint05 - Calcaneum left
Joint06 - Toes left
Joint07 - Hip right
Joint08 - Knee right
Joint09 - Calcaneum right
Joint10 - Toes right
Now it should look like:
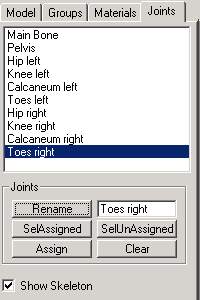
Remind: I have always chosen right and left from the view of the model!
The next step is again a little tricky, where you have to do a little
try and error. Often we dont know which vertices we must assign (in
problem zones) to which joint. This is primarily the case in the shoulder
area at a human model. The legs will be done easier. :)
Assign the vertices to the bones (joints) as follows: select the wanted
joint in the joints-window and add, with the shift-key hold,
the vertices. Then confirm with Assign:

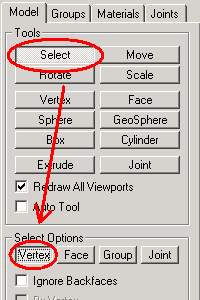
Now do it by your own! First activate the Vertex-Selection-Tool (make
sure, that "Ignore Backfaces" is deactivated!:
Now change back to the joints table and selectHip Left...
Hold the Shift-key down and select the following vertices:
Now click Assign:
To control if the vertices really are assigned to the joint, select
the wanted joint and
click Select assigned:
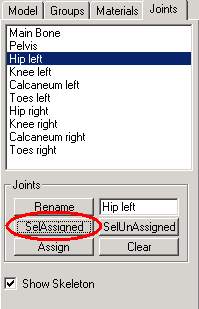
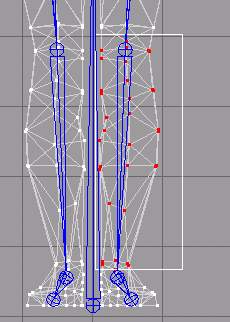
The assigned vertices are now red coloured:
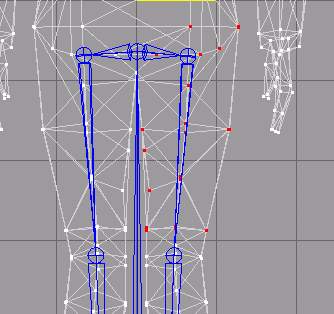
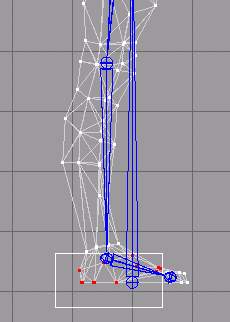
Well done! If we now move the bone in the animation mode, the assigned
vertices will move synchronous:

That looks a bit strange now, but we don't have assigned all vertices
to their bones yet! :P
Do the same with the other bones!
Assign the following vertices to Knee left (don't forget to deactivate
the animation mode, if you have activated it!):
Vertices for Calcaneum left:
Vertices for Toes left:
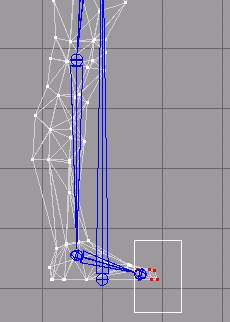
If you move a bone in animation mode, you mightl notice something:

By mistake we have assigned not only the Vertices but also the ones
of the right leg to the left skeleton leg. ;D
That doen't matter because if we assign those, we didn't wanted to assign,
to another bone they will be disconnected from the other bone.
Do the same with the bones and vertices on the right side! To prevent
reassigning the already assigned vertices, you better hide them (select
and choose Edit -> Hide Selection)!
If you are done, we will assign the rest of the vertices to bones (joints).
All vertices must be assigned to a bone before we can start animating.
(also some exporters need that, before you can export to another format).
.................. :0
Ready? That was hard work, wasn't it? :P
Anyway, lets go further!
If you had some problems with the past
steps:
DOWNLOAD
FILE REDZAC_MDL_TUT11B.ZIP!
Unfortunately we don't have the skeleton for the rest of the body, so
we assign all left vertices to the joint pelvis!
The easiest way to do that is to select Pelvis, then Select
unassigned...
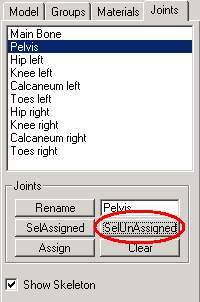
...and accept with Assign.
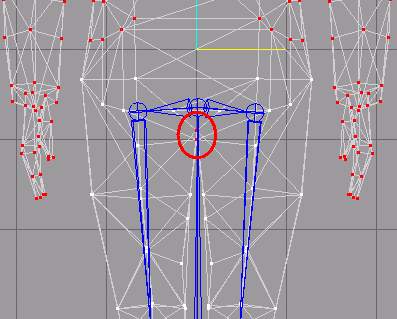
By clicking on Select unassigned all vertices are selected, which
are not assigned to a bone yet:
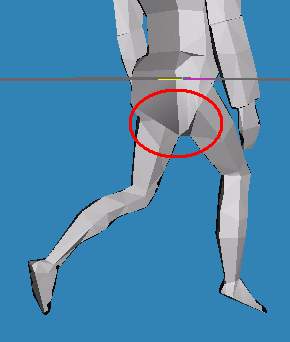
Take care that the 2 vertices between the legs are not assigned yet!
If they are, include them into your actual selectionand assign them
to the pelvis, else there will be weird deformations in the animation
process.
Very good! :)
The model is now ready for animation! It already can do some very complicated
moves, only by rotating/moving some bones!
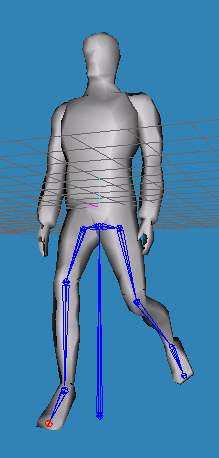
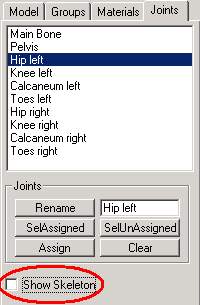
Btw., you can hide the skeleton by deactivating Show Skeleton:
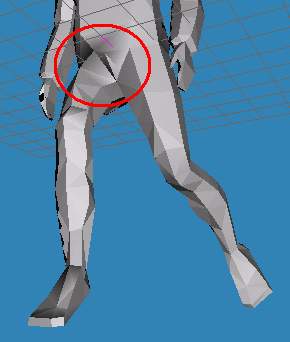
You sure have noticed those ugly distortions, look here:
Or there:
But, as i said: until you have assigned all vertices the right way,
it will take some time to experiment with. We are not going to correct
these "errors" - for further practice this model will be good
enough. And that we are going to do in the next tutorial, creating a
Walk-Cycle! :)
|