THE AMBUSH
AT SINNOTT’S CROSS
Contents
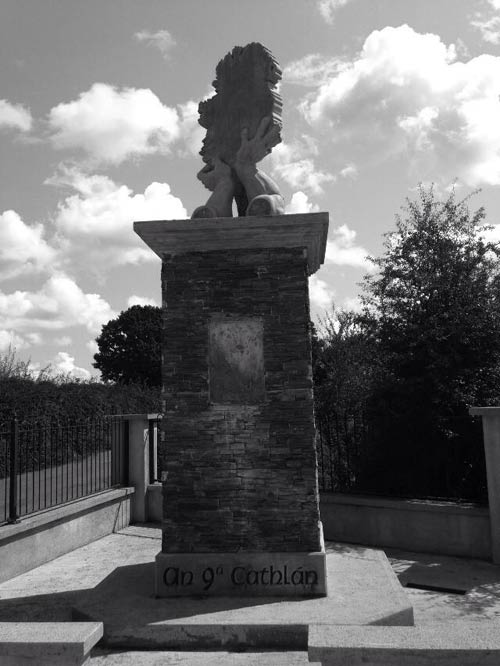
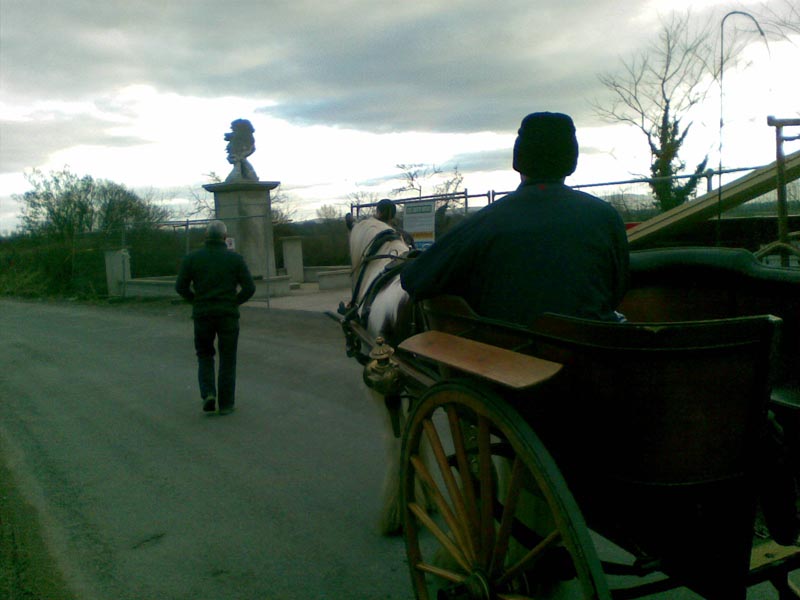
Sinnott's Cross Monument
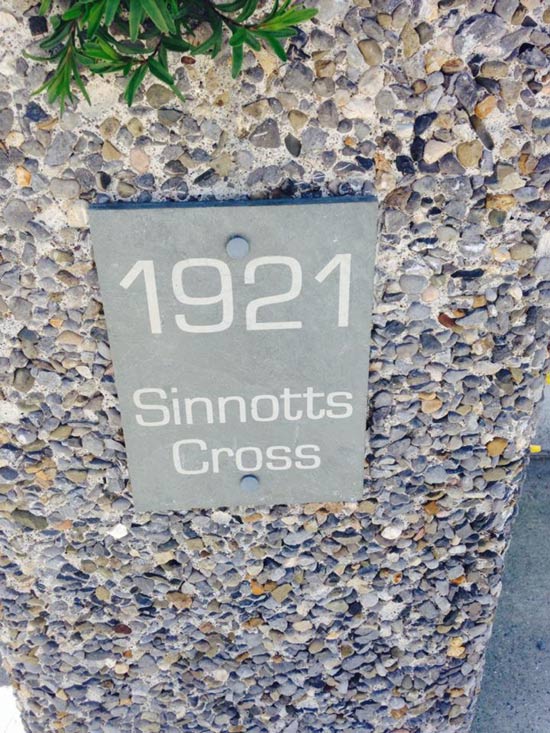
In recognition of the local people who risked their lives, and of those who provided vital support to them, it was decided to build a monument at Sinnott's Cross, Mooncoin (the site of a Black and Tan ambush - the only wholly successful ambush in County Kilkenny during the War of Independence), to commemorate all who played a part in the struggle for Irish independence from the area during the years 1919– 1921. So this is Mooncoin's version of the Garden of Remembrance in Parnell Square in Dublin. The land used for the monument was kindly donated by Jimmy Dunphy and family.
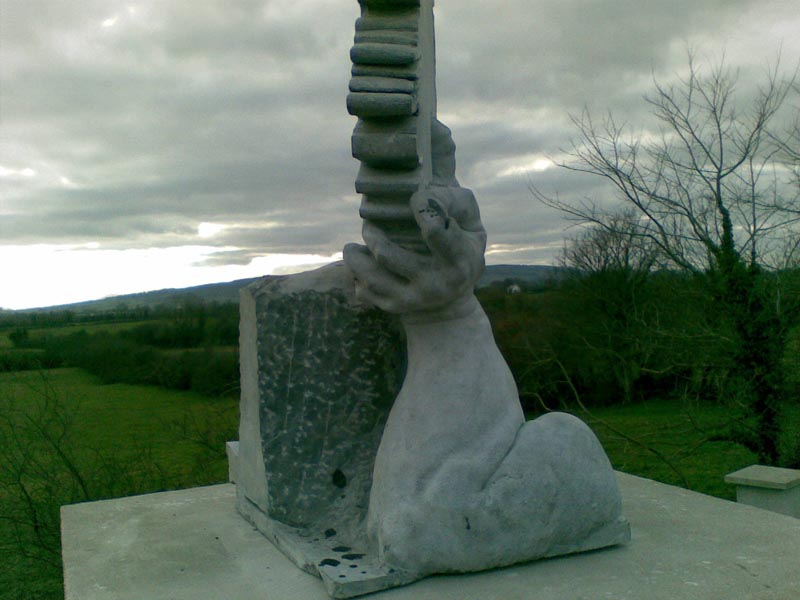
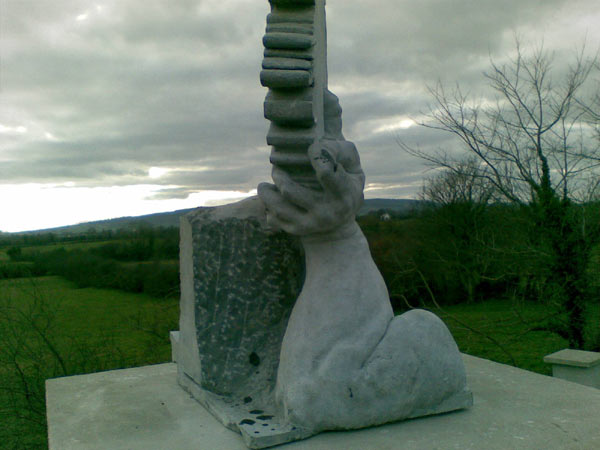
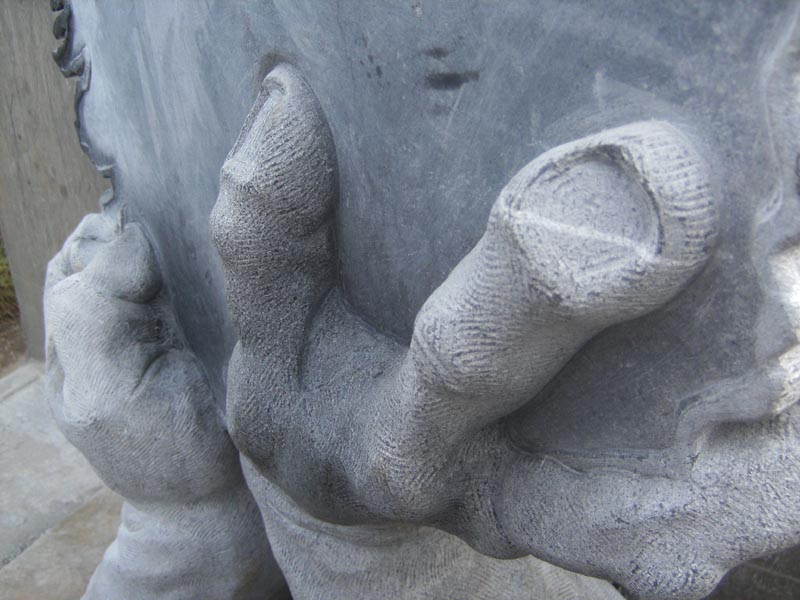
Construction started in April 2007 on the foundations and basic structure of the monument site. The actual sculpture was raised into position on 22nd of February 2009. The sculpture depicts a map of ireland resting on two pairs of hands. This is to symbolise the coming together of all the people, supporting Ireland, and taking its destiny in their hands. The sculpture is made from Kilkenny limestone, quarried in north Kilkenny. The sculpture was created by Kilkenny based artist Ruairí Carroll (Threecastles).
The committee would be hugely grateful for any donations, no matter how big or small, to maintain this ambitious project. Please contact 00353 (0)87 269 3095.
Please click the thumbnails below to enlarge the pictures. Two thesis's on the Sinnott's Cross Ambush and the War of Independence in general in Kilkenny, can be viewed by clicking the links below (in pdf format). Likewise, select the links underneath the pictures below to view a video of the Ambush monument site through the years. The story of the ambush is also told below.
1) Thesis 1: The War of Independence in County Kilkenny - Conflict, Politics and People
2) Thesis 2: Sinnott's Cross Ambush and War of Independence in South Kilkenny
|
|
|
|
Sculptor Ruairí Carroll (Kilkenny) decides the final positioning of his piece of art on the plinth at Sinnott's Cross -Feb 2009 |
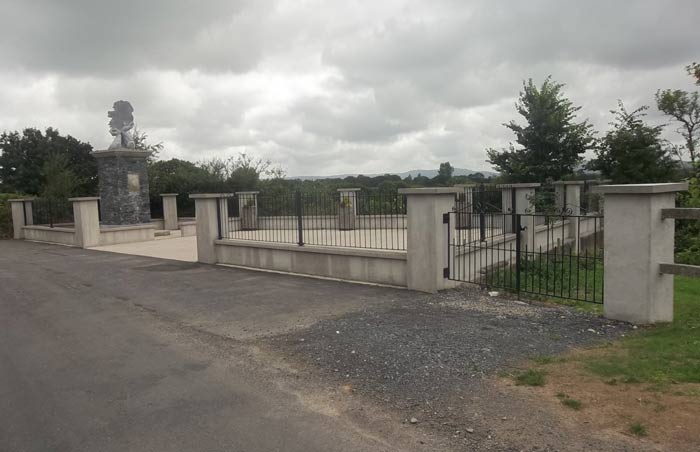
Sinnott's Cross Monument - 2014 |
|
|
|
|
|
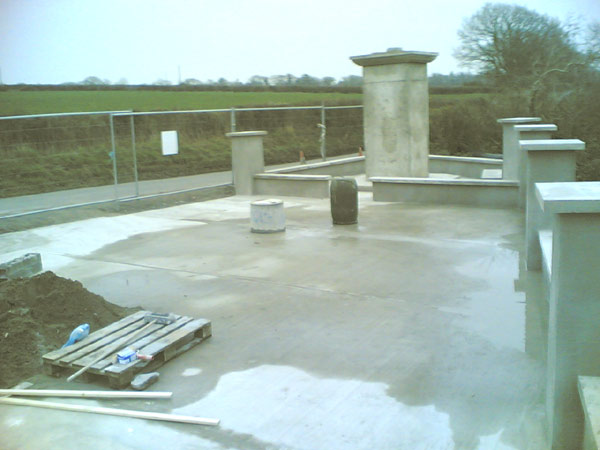
| Sinnott's Cross Monument Site before construction (2004) and the work carried out March 2008. |
Sinnott's Cross Monument - 2014 |
|
Sinnott's Cross Video 2004-2012 (Click to download)
|
Tubrid, Mooncoin,
South Kilkenny – 18th June 1921
Background
Michael Collins (nationalist icon from Cork), along with Richard Mulcahy, were the main driving forces behind the Irish Independence movement after 1918. Michael Collins was the IRA Director of Intelligence and was actively involved in providing funds and arms to the IRA units that needed them. In early 1921 Michael Collins sent a dictate to the commanders in Kilkenny City ordering them to proceed with ambushes and other activities in County Kilkenny. The reason for Michael Collins' anguish was the fact that a lot of the British army resources, including the Black and Tans, were being focused on Cork, Tipperary and Dublin. So Collins needed the British to start spreading their resources more widely, so to take the pressure off other areas. In this vicinity, most of the activities during the War of Independence were focused in west Kilkenny and east Tipperary (with the 7th Kilkenny Battalion in Callan being the most active). In light of this order by Collins and others in high command in Kilkenny, an ambush occurred near Sinnotts cross, Mooncoin, Co Kilkenny in June 1921.
It is with great credit to these Mooncoin men that they actually proceeded with an ambush, mostly acting on their own volition. Many battalions around they county did little in military terms. It would have been easy and less dangerous to do nothing, while waiting for others to do the 'dirty work'. But these local men felt it was the right and most justified thing to do. Remember, they had nothing to gain in the short term, but perhaps had a lot to lose. These losses could have included their farms, their jobs, their family's safety, their freedom or their own lives. Marshall law was running in Kilkenny at this time in 1921 which meant they could be executed without trial. In fairness to these Mooncoin men, they were ordinary people. They did want war or killing, but they obviously felt that the war which had come to their door, was a necessary evil. No country had freed itself completely from an Imperial ruler up to that time by peaceful means. Sometimes its hard for people to understand the need for this by looking through the lens of the Ireland today. But it was because of their sacrifice that we now live in a republic with its own parliament, culture and identity. Has bad as some people like to give out about our Taoiseachs today, in the 1800s the Prime Minister of the UK was of course the Prime Minister of Ireland, and as had happened on few occasions, had never actually set foot in Ireland!
Now just to set the national scene as it was in June 1921 when the Sinnott's Cross ambush occurred. The country was in turmoil for nearly two years at this stage due to the 'Tan War' as it was called, or what we now call the Irish War of Independence. People in Mooncoin would have been glued to the daily newspapers. In general, the tide of sympathy was turning towards the Irish revolutionaries even from people that would previous have had moderate views. If we flash back just 8 months before the Sinnott's Cross Ambush, the world was following Terence MacSwiney hunger strike in England. His subsequent death was an international sensation reaching the front pages in the U.K. and America. Kevin Barry was hung the following week, the first Irish republican execution since Casement in 1916. Then just a few weeks later (7 months before Sinnott's Cross), the Croke Park massacre occurred, a reprisal for the killing of British detective earlier that day (Bloody Sunday mark 1). Then to make matters worse, Crown Forces (mostly the Auxiliary Division) burnt down much of Cork City centre, just 6 months before Sinnott's Cross. As a quick summary, the Black and Tans were a mercenary force setup by the British (classed as counter-terrorist/counter insurgency). A policy of 'reprisals' was approved by the government in London. In many ways, the Black and Tans and the Auxiliaries had a licence to 'do what they liked' with little repercussions or accountability from their superiors. History would show that this backfired badly on the British, as the majority of people that were affected by these forces, were law abiding and innocent people. The Black and Tans enemy basically became all Irish people, which is why they burned down creameries and farmhouses in response to IRA attacks. This ironically was beneficial to Michael Collins and the leaders as people really started backing them when they saw what their Prime Minister in the London had allowed. So in a nutshell, the Irish Republicans had declared war on anyone in a British uniform (or their associates), the forces in Ireland had basically declared war on everyone Irish, as they trusted no one. That was their downfall.
To focus on the Mooncoin area during the War of Independence; the
9th Battalion of the Kilkenny Brigade IRA (mostly from the Mooncoin area) consisted of local farmers and labourers,
mostly in their twenties, and few of whom had any military experience. Indeed,
before the ambush at Sinnott’s Cross, in June 1921, possibly the only
two IRA rebels with any experience of warfare, were James
‘The Solider’ Walsh (a signal officer) and Phil Henebery, both of
whom had fought with the British army during the First World War. The Battalion Quartermaster, Ted
Moore (Rathcurby) would often recall that, if it hadn’t been for Henebery’s
military experience during the ambush, all would have been lost for the rebels.
As we shall see later, both of these men (Moore and Henebery) played a particular
role in the ambush. Although‘Big’ Pat Walsh
(Clogga) was generally regarded as being the O/C of the Clogga Company, and although
many later thought that either himself or Dick Brennan (Knockanure) was in charge
at Sinnott’s Cross, it would seem that it was actually Ned ‘na Coille’
Walsh (Portnascully) who led the men on that day. Which makes sense, as he was overall commander of the 9th Kilkenny IRA Battalion. Our information comes from
an interview with Martin Murphy (Grange), done some time in the 1960’s,
when he said “The man in charge was Ned ‘na Coille’ Walsh
although some others thought later that Dick Brennan was in charge (Brennan would become a Kilkenny IRA anti-Treaty leader during the Civil War). Ted Moore
was Quartermaster”.
Build-up to the
Ambush
The seeds of the ambush were sown
some six months earlier, when the Dublin High Command (as mentioned, led by Michael Collins and Richard Mulcahy) made efforts to increase
republican activity all over the country. They were concerned at the pressure
that was being put on Cork and Tipperary and wanted to force the British to
spread their resources. This resulted in a visit to Mooncoin by the legendary
Ned Aylward of Callan. Aylward was a veteran of the Hugginstown attack and Nile-Mile-House
ambush and had taken part in the dramatic escape from Garryricken House three
month prior to Sinnott's Cross. In April, Aylward travelled south where he encouraged the 9th Battalion to
ambush a cycle patrol of Black and Tans. At the
time there were two patrols in the area. The first came from Lower Kilmacow,
passed through Upper Kilmacow and continued on to Clogga Creamery. Here, they
would meet a similar patrol, which came from Fiddown RIC Barracks, through Cloncunny and
Sinnott’s Cross. The two patrols would stop and talk to each other for
a while, swapping stories and sharing cigarettes, then return to their respective
barracks in Kilmacow and Fiddown. It was the ‘Kilmacow’ patrol,
which Aylward suggested they ambush and he inspected a site between Upper and
Lower Kilmacow. Several of the local IRA refused
to carry out this ambush however, on the basis that they needed more time to
prepare. Aylward promised that they could keep any arms that they captured,
but Ted Moore and Jack ‘na Coille’ Walsh in particular, were adamant
in their refusal. Aylward left the area shortly after and returned to the fight
in west Kilkenny. He would not have to wait long for the Mooncoin men to act,
however. They must have begun their preparation shortly after. The local IRA certainly needed time
to prepare. They had little or no ammunition and only a few shotguns to take
on the heavily armed Crown forces (who had rifles). To make matters worse, they would only have had the barest of military training. As can be imagined, the first priority
was to secure ammunition. They made buckshot cartridges by mixing powder from
rifle bullets and cut up nails and steel. This would make the average shotgun more deadly. In order to hide the ammunition, Jack
Larressy (of Larressy’s Shop in Clogga) constructed a timber box within
which the ammunition was placed and subsequently hidden in a boggy are near Clogga.
In later years, Jack would recall that the timber he had used was from his shop,
and had the words ‘Larressy’s Shop’ printed on it. If the British
ever found the box, they wouldn’t have had far to look to know who had
made it!
A further problem was to ensure that
the British troops would actually arrive, as the rebels did not want to wait
for several hours in a ditch, before realising that there would be no one to
ambush. As has been said earlier, there were two established patrols in the
area. However, the British would frequently alter their routine, sometimes not
coming at all. As Jack ‘na Coille’ recalled some forty years later;
‘the military and RIC were stationed in Fiddown and in Kilmacow. A patrol
passed occasionally from Piltown to Clogga. That was their route. We knew the
times they passed. Sometimes it would be at 6 or 7 a.m. but it was always before
dinnertime or earlier’.
As things turned out, the British did not arrive ‘before dinnertime or earlier’ and the men had to wait until approximately
3.00pm that day. Whatever about the time, it was vital
that they ensured that they did actually arrive. In order to ‘draw out’
the patrols, the IRA caused various disturbances in the area. This was (and
remains) a common feature of guerrilla warfare, where the rebels would give
the enemy some reason to leave the safety of their barracks, and venture out
into the countryside. Here, the rebels could attack them with impunity and with
better chances of escape in the labyrinthine mix of fields and boreens that
makes up the south Kilkenny landscape. We are aware of two such ‘disturbances’,
which the local IRA caused. It is known that they stole a teapot from the house of
a woman with pro-British sympathies in Ardera, and a clock from Roger and Mary Mennell
then living at Clogga mills, knowing full well that the thefts would be reported to the British.
The Mennell family were English Quakers who subsequently left the country in 1924, having
had enough of the Irish political unrest. Some effort has been made to track them
down and it is known that they left Ireland for Tasmania, surely the furthest
possible place on earth from Sinnott’s Cross! Indeed, one man recounted a humorous
story about the Mennell's and the clock, which the IRA had stolen from them.
It would seem that there was a particular IRA man who, at subsequent
meetings of the Battalion in the months following the ambush, would declare
(to the chagrin of his colleagues) ‘Ah lads, it is all over now. Would
you ever give the clock back’.
The Ambush
On the evening before the ambush,
Jack Larressy was assisted by a young Mick Shea (Clogga) in bringing the box
of ammunition from the bogs to a safe place close to the ambush site. At the
age of 17, Shea must have been one of the youngest to have such a direct involvement
in the ambush, although several of the scouts would also have been in their
teens. The men themselves were mostly in their mid twenties, although Ned Foran
(Ardera) was only twenty and ‘Big’ Pat Walsh had just turned thirty-one. As the Friday night drew on, the
men must have been full of nervous energy. They would have been dressed and
ready to go shortly after the clock struck twelve, as they had to be at the
ambush site at 3.00am. The reason for their early arrival was to ensure that no
one would see them traveling to Sinnott’s Cross. They went, for the most
part, through the fields and, when they eventually arrived, every man who had
volunteered for the ambush was there.They immediately held a meeting to
finalise their strategy. We know very little of what was said, but we do
know this; Jack ‘na Coille’ wanted to station some men down a small
boreen, which ran approximately 100 yards away from the ambush site. He wanted
men there in order to broaden out the ambush area and to ensure that the British
would have no-where to run once the shooting started. In his own words, ‘we
put our scouts out. We neglected one position. It was a boreen going up from
the road but they left this position unoccupied although I wanted to occupy
it when we arrived at the ambush site. The others were afraid that someone up
this boreen could be seen by people passing the way’ [now the home of the Dunphy family].This fear of being seen governed
much of IRA strategy as there were many people living in the area who would
have been in favour of the British presence or perhaps, just did not want trouble at their door. Secrecy was all-important
therefore and the boreen was left unoccupied. Following the meeting, the men began
their long wait. We know that Patsy Fitzgerald (Cashel) and Jim Malone (Kilnaspic)
brought buckets of much needed tea down to the men at some stage during the morning.
Scouts were positioned along the
roads before and after the ambush site to keep a vigilant eye for anyone passing. Even with the scouts, the men would
have had to keep deadly silent in the ditch. They could not smoke or laugh as
any sound would give them away and the British would be alerted to their presence.
The only factor in the men’s favour was the mild weather. Newspapers of
the time report that this period was in the middle of a long draught, which
wasn’t to end until the following month. Thus, even if they were cold,
tired and hungry in the ditch, they were not wet. In later years, Jack ‘na Coille’ Walsh remembered that, as the day wore on, they began to suspect that the British
were not coming. Whenever the British arrived,
the IRA would have been notified by the scouts, well in advance. It must be
recalled that south Kilkenny had not seen much activity during the War of Independence up to this point
and the British would not have expected any trouble. In nearby Piltown, their had been a shootout on the Bessborough estate two months previously between Aylward's Column and Crown Forces but very little had occurred since. Indeed, the Black and Tans may have been
playing mouth organs as they cycled along, pleased to be out of the confines
of the barracks.
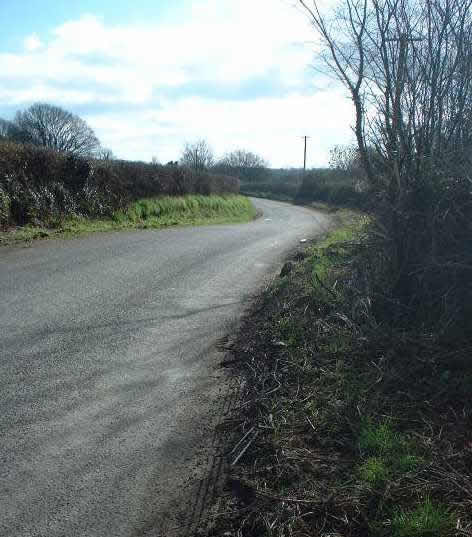
The soldiers cycled along in pairs.
They traveled from Fiddown, up through Cloncunny and over the little stream
that still runs near Sinnott’s Cross. As they rounded the bend, the
IRA began to steady their weapons, and prepared to fire.The ambush was meant to go like this:
The IRA would wait until the British cycled into the ambush bend. When the last
soldiers was in sight, one of the IRA (more than likely Dick Brennan of Knockanure)
was to fire the first shot, thus giving the signal to the rest of the men to
shoot. Brennan was stationed with two other men, in a small boreen on the right (not to be
confused with the boreen that Jack ‘na Coille’ had wanted staffed
earlier on which was after the ambush site on the left). This second boreen ran onto the road, just as it turned into the
ambush bend (it no longer exists). If all went to plan, the British would be surrounded on all sides. It might be said that the inevitable
happened and, the one thing that could have gone wrong, went wrong. Brennan's
gun jammed, possibly as a result of the ammunition getting damp in Jack Larressy’s
box. While he was desperately trying to fire the weapon, the British cycled
into the ambush area…and casually through it, oblivious to the shotguns
pointed at them from behind the ditch. After a few moments of uncertainty,
Pat ‘The Fox’ Walsh (Swithin Walsh's, Clogga) realised that Brennan
was unable to fire and so he took the initiative. He raised his shotgun and
fired, thus giving the signal to the rest of the men and a hail of bullets flew
over the ditches at the unfortunate British on their bikes. Although there may
have been anything up to twenty-five rebels, it is likely that many of their
guns jammed, either because of the ammunition they were using or simply because
the guns themselves were old and untrustworthy. In any event, the vital seconds,
which had been lost by Brennan's gun jamming, saved the lives of some of the
Crown Forces. When the British realised that they
were being ambushed, they knew enough to keep on cycling. They kept their heads
down and sped through the ambush area, hoping that they would not be hit by
one of the bullets flying at them from behind the ditch. When they got past
the ambush site, they noticed the boreen which Jack ‘na Coille’ had wanted staffed earlier. They went up the boreen and established a defensive
position. While the British were settling into
the boreen, the IRA saw that one soldier was lying on the road, hit by a
bullet. Phil White John and Ted Moore jumped over the ditch and ran to him.
He had been fatally wounded but had not yet succumbed. As he struggled to free
his legs from the frame of his bicycle, the two rebels cut the rifle strap from
his shoulder and captured his rifle. They made their escape as the British began
to shoot back from the defensive position that they had established. Both the
men escaped unharmed. The same could not be said of the
Black and Tan who died within 15 minutes from the loss of blood. His name was Albert Bradford and
was only 21 at the time, having served less than 10 months before being shot
at Sinnott’s Cross. He was born in Essex and had served as a soldier during the First World War and was a
labourer before coming to Ireland. Furthermore, and although the IRA
was unaware of it at the time, a second soldier had been hit. His name was John
Stuart and he was injured in the left arm. His injury case was heard a few weeks after Sinnott's Cross from which he received over £1000 in compensation and was sent home to England.
After Moore and Henebery had captured
Bradford’s rifle and made their escape back over the ditch, it became
clear to the rebels that their shotguns and buckshot ammunition were no match
for the powerful British rifles and rifle grenades. The British could not see
the exact position of the rebels as a result of the thick scrub which covered
them but they had no lack of ammunition and so they simply peppered the area
with gunfire. The rebels realised that retreat
was the only option, and they began to withdraw. They had planned their retreat
well in advance; some of the men travelled south to Mooncoin,
others (under the command of ‘Big’ Pat Walsh) escaped to Kilmacow
and more again traveled up the glen to Kilnaspic and the safety of its hills.
Much as the retreat was planned, however, there was to be a sting in the tail
for two of the retreating groups. For the men who traveled up the
glen to Kilnaspic, they suddenly found themselves fired upon by a British soldier
who had been straggling behind the rest of his patrol. He had heard the shooting
and hid while the fracas continued. However, when the shooting stopped, he came
out of hiding and spotted the IRA men making their escape. He traveled up the
road, which leads to Kilnaspic, shooting down at the men travelling up the Glen,
along by the stream. He was too far away to be effective however, and soon gave
up the chase.
For the rebels under the command
of ‘Big’ Pat Walsh, there was to be an even greater shock. As mentioned above, the British had two patrols in the area, one of which
traveled to Clogga from Fiddown and the other from Kilmacow. This particular
group of rebels were making their escape to Kilmacow from the ambush site and
happened upon the second patrol making its way to Clogga. In the words of Martin
Murphy, “All our lads got away in different directions. Some went in the
direction of Mooncoin. I went in the Kilmacow direction under Pat Walsh. We
had to cross the Kilmacow police patrol’s track that was taking them to
Clogga and we had only barely crossed when the police patrol swept along and
we had to throw ourselves down”.Following the retreat of the IRA,
the British emerged from the cover of the boreen. They commandeered a creamery
lorry, which was travelling from Fiddown to Clogga Creamery and brought Bradford initially to the Menndells in Clogga Mills, before returning
back to the Fiddown RIC Barracks. It is also recorded that when
the IRA made their escape, the Crown Forces came out of hiding and began firing large
amounts of ammunition underneath a nearby bridge. It is likely that the Black and Tans fired into thin air in order to use up ammunition, and be in a position
to claim that they had a much bigger fight than they actually had, especially since one of their men had been killed. They also reported that they had caused casualties to the IRA which did not actually occur.
The Aftermath
After their long wait and the gun
battle, the IRA escaped from Sinnott’s Cross without anyone being captured
or injured. They may well have stayed on the run for some time after, but there
is no record of any of them being badly maltreated in reprisals. James 'the soldier' Walsh recounted the story that he was hunting cattle up the New-Line in Clogga in the days after the ambush, when stopped to be searched by the Black and Tans, completely forgetting he still had bullets in the lining of his jacket. However, he managed to stop the search having told them he was 'one of them' having fought in the First World War.
Today, the
remains of an IRA underground hideout can still be found a few hundred yards
off the Affady road. It is extremely unlikely that the IRA holed up here after this ambush for
it is no more than a mile from the ambush site, and couldn’t have held
any more than a handful of men for any length of time. It would seem that Roger Mennell, who
had been so badly treated by the IRA, managed to persuade the soldiers to refrain
from burning 'Clogga down to the ground' as had been threatened. He promised the Crown Forces that none of the local Clogga men
were involved in the fighting, and that any reprisals would only play into republican
hands. Nevertheless, the soldiers were not
going to take it lying down and they swept the area for information on the IRA
men. The following story was related by one of Mooncoin’s oldest
inhabitants, John Kinsella who has since passed away. He was only 11 years old at the time of the ambush,
but told the story with the utmost clarity in 2003:
“About
a half an hour after the ambush the soldiers came into our house in Cloncunny.
My father had a man painting a hay barn. He was standing on some scaffolding.The soldiers
came in and shook him down from the scaffolding and hit him with his rifle.
Then a soldier (possibly the same one) hit my brother Mikey in the mouth with
a grenade and broke his lip and some teeth.There was a
girl in the house at the time called Mai Walsh. She was visiting from England
and had a slight English accent. When she saw how the soldiers were behaving
towards the men, she shouted at them “Oh you pig, you mustn’t
hit him, he is only 16”. Then she told the soldiers “We are English
and we will complain about you when we get back”.
The (English)
soldier replied, “F**k you and England”. He grabbed her by her
ponytail, swung her around and then hit her on the back of the neck with his
rifle.”
As this story illustrates, the soldiers
who fought and died for the Crown had little knowledge or interest in why they
were there. The Irish War of Independence was an opportunity for many of them
to escape meagre economic conditions at home in England, and they travelled
across the Irish Sea to do a well paid job and nothing more.
The men of the 9th Battalion also
fought, but not for financial gain. In all likelihood, if the war had not occurred,
they would have remained anonymously working on their farms in rural Ireland.
Instead, they took part in an epic struggle for freedom and brought the worlds
most powerful empire to the negotiating table.
|
|
|
 |
 |
 |
 |
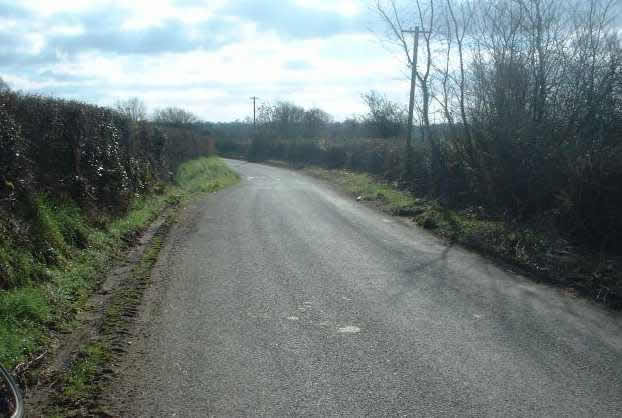
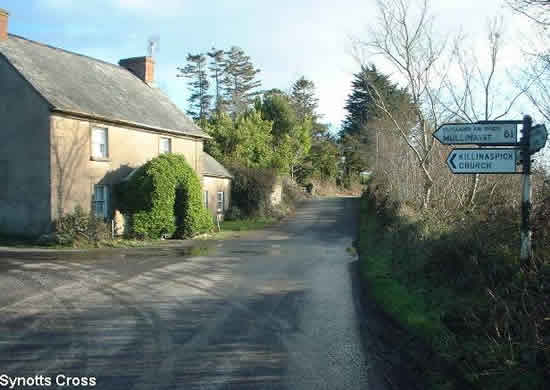
Sinnott's Cross |
Ambush turn before the monument |
Brothers, Pat 'the Fox' Walsh and James Walsh (Clogga). Pat 'Fox' was probably the oldest surviving member when he died in Leeds in 1987. |
Sinnott's Cross Monument 2009 |