Building a Raku Kiln
Because of so many images used, this page
will take about 90 seconds
to download but should be worth the wait.
I always had an interest in Raku, but never seemed to find the time to
do anything about it. That was until the Ceramics Society of Ireland organized
a Raku workshop over a weekend at Grennan Mills Studios in Thomastown, Co
Kilkenny, last Spring. My brother, Edwin and myself, travelled down for the
two and a half day event. It was a hands on workshop, with everyone bringing
a selection of ware to glaze and fire. Unfortunately, my back trouble reared
its ugly head on the Friday and so prohibited me from being as active as I
would have liked to. Everyone was given the opportunity to carry out the many
tasks associated with a raku firing.
There was also a raku kiln building workshop going on as the firings proceeded.
This was given by Billy Essles, from Dublin. He gave a short demonstration
before some of the potters present started making their own kilns. It was
with the information gleaned from Billy's designs and the two larger kilns
belonging to Grennan Mills Studios, that gave Edwin and myself the courage
to have a go at building a kiln ourselves last summer. We decided to build
quite a large kiln because it would allow us to fire tall sculptural work
sometime in the future. As it turned out, we're glad we didn't make it any
smaller. We have no problem filling it with regular ware when raku firing.
The two photos below may take a while to download, but I think are worth waiting for, if you want to see a professionally made college kiln.
Below that again are a series of smaller photographs illustrating the building of my kiln in stage form.
The Raku Kiln under Construction.
Some of the materials were salvage, while items like ceramic fibre, nicrome wire, burner, tongs and furniture were purchased.
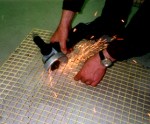
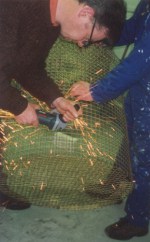
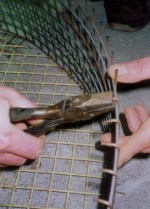
2. I found an angle grinder the most suitable implement for cutting the mesh.
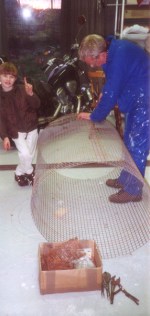
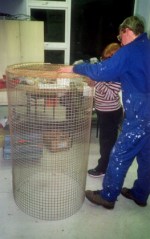
3. Edwin ties the mesh to form a cylinder
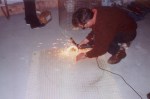
1. The outer wall and roof and base were first cut from one inch box steel
mesh.
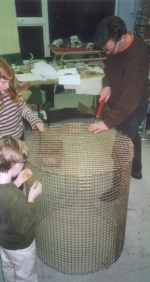
5. Attaching one of the ends of the outer frame.
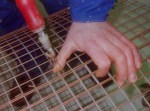
4. We used small wire ties which were twisted using a special implement, somewhat like a spiral torque screw driver. What you end up with are ties like the ones found on bags of clay. Quick and easy while still very strong.
8. Further tightening up was then carried out
7. The kiln outer body was made initially as one piece, which was then cut about 12" from one end to form a base and top section.
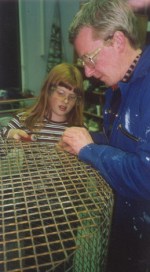
6. Edwin assisted by my daughter Sorcha.
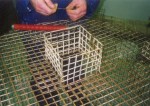
11. The flue was constructed from four rectangular pieces wired together.
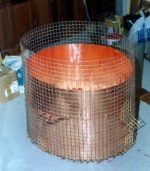
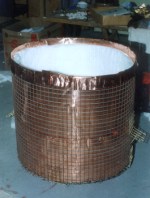
10. THe whole wire frame or tube was lined with a layer of thin copper sheet to act as an insulator and to also prevent damage to the ceramic fibre from constant handling and transportation.
9. The wire ends were left uncut and folded inwards to act as a retainer for the fibre.
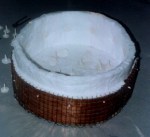
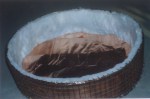
12. The almost complete base. Two layers of 1" ceramic fibre were stitched to the inside of the tube.
The fibre was left several inches longer on the inner sheet of fibre to allow a fold over the rim to the outer wall.
14. A view of the top section, shown inverted, with the copper lining almost completed.
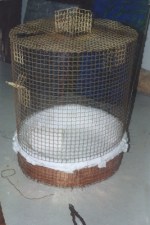
13. With the base almost finished we check the fit of the top section before going to the next stage. You can see now that the inner layer of fibre has been cut in eight places to allow it fold over the rim.
15. The top section with one layer of fibre. As with the base, the second layer of fibre will be left eight inches proud to allow it fold over the rim. This method of finish on the rims ensures a good firm seal when the two sections are placed together.
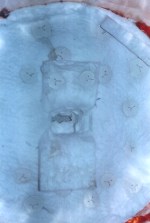
17. A view up the kiln to the flue, which is located in the centre.Again notice the ceramic buttons holding the fibre firmly in place.
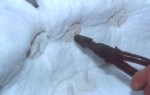
16. Two layers of 1" ceramic fibre make up the insulation on the inner side. These are held in place by ceramic buttons. Nicrome wire is doubled and passed through from the outside of the tube. It then passes through two small holes in the button and is twisted tight. These buttons were made from a grogged stoneware clay and measure 2" in diameter.
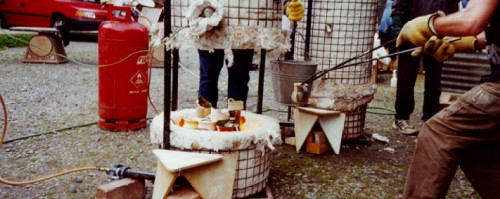
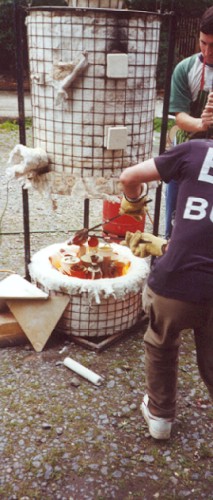
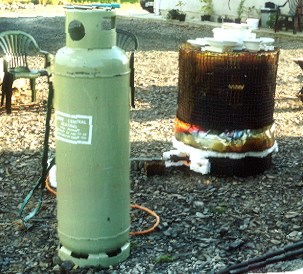
The kiln on its maiden firing. Notice how the copper went several shades of purples to rich yellows from the heat. It was still possible to touch the outer parts of the wite frame and not get burnt.
Recently glazed pots can be seen drying on top for the next firing.
THe burner is a Venturi type and had no bother in delivering the BTU's to attain the required temperature of 1000 degrees centigrate, although now we only fire to about 950°C and find it does fine.

Overall, its been a very worthwhile and learning experience. Building the kiln was the easy part, even though it took several months, but the trying part of the whole project is the firing. To date about 40% of the ware we fire is lost to fracture during the smoking process. Large platters are most vunerable. But, the process is so interesting that every four to six weeks we are drawn back to it.
Up-Date- 2005..........Since the building of this kiln, I have constructed
a pendulum type frame around the kiln which allows the top half to be
lifted evenly and without much effort from the base. The success rate
is now almost 90% due to invaluable advice from fellow potters but in
particular
Irene Poulton.
e-mail leonlynch@eircom.net