it might affect the accuracy of the chain slack gauge (The
bolts that hold the rubber block in place also hold the
side stand in place on the NT400J)


How to inspect chain tension:
Warning: Never inspect drive chain while engine is running
Note: If the lower chain slider rubber block is missing
it might affect the accuracy of the chain slack gauge (The
bolts that hold the rubber block in place also hold the
side stand in place on the NT400J)
Alternative method.

How to tighten the chain.

faults.
When an O Ring chain reaches the natural end of it life
it starts to wear much quicker, Sometimes they develop
a tight spot or some other defect. Sometimes one link
on the chain wears much faster that the other links which
can cause a click sound when accelerating. Sometimes
even a new high quality chain can develope stiff links,
Strictly speaking the chain should then be replaced.

Some low quality sprockets can be defective when new or
develop a defect as they wear. You should only use
sprockets from a reputable manufacturer. Look at the
picture -> to see examples of sprocket wear or damage. If the sprocket teeth show any sign of "hooking" then they
should be replaced when replacing the chain.
Too tight a chain can damage the splines on the
countershaft and bearings. Too loose a chain can
cause kicking which can damage the chain.
Check the chain tension, then rotate the chain and
check the tension again, repeat this until you have
checked the entire chain. If there is a difference
in slack then the chain has a tight spot and needs
to be replaced. I'd guess that a difference in slack
of more than 10-15 mm is a problem.
Check rear wheel bearings, rear sprocket carrier bearings
and swing arm bearings.
Check to see if the rear sprocket can be turned a little
without turning the wheel, If there is free play then
the rubbers need to be replaced.
Usually caused by improper chain tension or severely
misaligned sprockets.
Usually caused by adjusting the chain tension with a
hammer and screwdriver. It might be possible to weld
new teeth to the carrier or make a special tool that
can reach around to good teeth.
Honda recommend the use of 90W gear oil to lube the
chain, however it's very messy. Drier chain lubes are
available, however the drier lubes don't lubricate as
well as the oily ones resulting in shorter chain life.
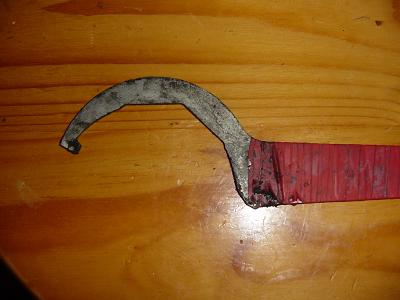
I made my own 115 mm C-spanner by using one of those
large octagonal spanners for removing the heating
element from one of those large copper water heaters.
Trouble shooting
A click or knock sound comes from the chain during acceleration.
Grinding sound from chain.
Chain wearing too fast.
Chain kicking.
Sprockets wearing on one side.
Worn gearbox output shaft.
Mis-aligned sprockets.