
|
|
Rivers of Colour!
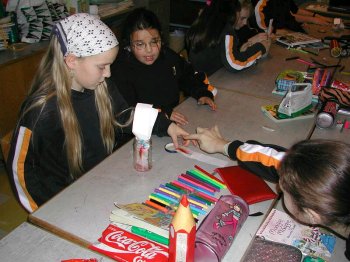 Experiment: To investigate how colours are produced by separating them using chromatography.
Materials:
You will need-Method:
A jam jar with lid
Blotting paper
Water
Markers
A few smarties and/or M&Ms
What you have to do-
1) Fill your jam jar to about 2½ cm with water.Results:
2) Cut a thin stripe of blotting paper.
3) Colour a circle on the blotting paper with your markers, about 3 cm from the bottom.
4) Dip the blotting paper into the jar and leave it for a few minutes.
5) Repeat this again using 2 or 3 different colours.
Now try this -
1) Put some water on the Jam Jar lid.
2) Get a piece of Blotting paper and put one end in the water.
3) At the side were the blotting paper isn't in the water put a Smartie or a M+M.
What happened?
The colours spreads eg. If you use purple, pink and blue will go up the blotting paper at different rates. ( If you mix blue and pink You will get purple) Conclusions:
Water makes colours separate.
Experiment: To make a pin hole camera
Materials:
Experiment: To find the part of your eye that has literally a 'blind spot'.
Materials:
Experiment: To show how light is made up of seven colours.
Materials:
Find your Blindspot
Experiment: To find the part of your eye that has literally a 'blind spot'.
Materials:
Experiment: To show that light travels at different speeds through different liquids.
What do you notice?
Now try this
We were able to see the ruler because light was reflected from it. However, when light travels through different mediums - such as water and oil - it travels more slowly. Different substances slow light down by different amounts, depending on their optical density.
When light passes from one substance or medium to another, the change in the speed of light at the boundry between the substances causes the light to bend. The bending of light is called refraction. Refraction caused the light to bend and make the ruler appear larger.
Experiment: To show that two eyes are better than one!
Materials:
Conclusion:
Experiment: To show how the eye reacts to light.
Materials:
Conclusion:
Materials:
Conclusion:
 Sight Seeing!
You will need-
Method:
An empty toilet roll
Two elastic bands
Greaseproof Paper
Tinfoil
A sharp pencil
What you have to do-
1) Get an empty toilet roll.
Results:
2) Stretch greaseproof paper around one end of the toilet roll.
3) Put an elastic band at the end of the paper to make it tight.
4) Get some tinfoil and wrap it around the other end of the toilet roll.
5) Put the second elastic band on that to make it tight.
6) Make a hole in the centre of the tinfoil.
What happened?
When the small hole is pointed towards a bright light source, an image appears upside down on the greaseproof paper.
Conclusions:
The pinhole camera works like the eye. Light goes through the hole and is turned upside down on the 'screen' (retina in the eye).
You will need-
Method:
One piece of white paper
A dark coloured marker
What you have to do-
1) Draw a cross on the left side of your page and a circle on the other side.
Results:
2) Colour or shade in the two shapes.
3) Hold the piece of paper just in front of your face place your right hand over your right eye.
4) Stare (concentrate!) at the circle while moving the paper away from your face.
What happened?
The cross disappears when the paper is a certain distance from your eyes.
Conclusions:
The image of the cross is focused on the eye's blind spot - the part where the optic nerve leaves the back of the eye. There are no light sensitive cells here and the cross disappears.
You will need-
Method:
A circular piece of card
Red, Orange Yellow, Green, Blue, Indigo, Violet markers.
Protractor
Ruler
Short pencil
Sellotape
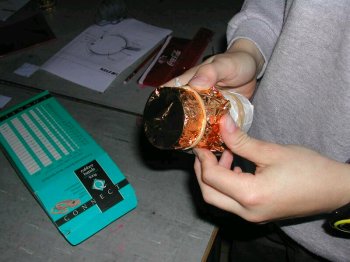
What you have to do-
1) Mark out seven segments on your card of 52 degrees.
Results:
2) Colour each segment with each of the colours.
3) Piece a hole in the middle of your card with a short sharp pencil.
4) Sellotape the pencil into the hole.
5) Spin it like a top - as fast as you can.
What happened?
When we spun our colour top, the colours mixed together and produced white.
Conclusions:
Light is made up of seven colours.
You will need-
Method:
One piece of white paper
A dark coloured marker
What you have to do-
1) Draw a cross on the left side of your page and a circle on the other side.
Results:
2) Colour or shade in the two shapes.
3) Hold the piece of paper just in front of your face place your right hand over your right eye.
4) Stare (concentrate!) at the circle while moving the paper away from your face.
What happened?
The cross disappears when the paper is a certain distance from your eyes.
Conclusions:
The image of the cross is focused on the eye's blind spot - the part where the optic nerve leaves the back of the eye. There are no light sensitive cells here and the cross disappears.
Bend some Light!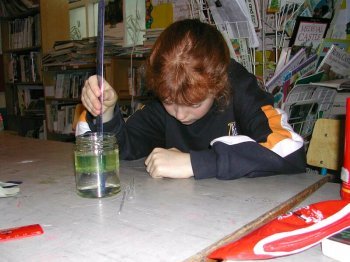 Materials:
You will need-
Method:
Jam jar
Ruler
oil
Water
What you have to do-
1) Fill the jam jar half full of water.
Results:
2) Insert a ruler into the jar.
The ruler seems to have a break where it meets the water - observe from the top and to the side to see this better.
Look at the jar from the side and move the ruler to and from the glass side of the jar. Observe the ruler - does it appear to change in size.
3) Gently pour some oil down the ruler, so that it sits on the surface of the water.
4) Closely look at the ruler in the jar. Does it change size in the oil? In which liquid does it appear bigger - oil or water?
What happened?
The part of the ruler in the water should appear magnified. The oil should magnify the ruler even more.
Conclusions:
The sections of the ruler appeared to be of different sizes. The section that appeared largest was in the oil. We know that the ruler actually could not have changed - therefore, something must have happened to make it seem larger.
You will need:
Method:
Two eyes!
Two fingers!
What you have to do-
1) With both eyes open, stretch your arms out in front of you and put both index fingers together in front of your face.
Result:
2) Close one eye and repeat step one.
It's harder to do this with one eye closed. Fingers tend to miss each other!
Two eyes are better than one, because one eye only shows half the picture.
You will need:
Method:
Two eyes!
Torch
Partner
What you have to do-
1) Shine a torch into your partner's eye. Make sure your torch is not too bright.
Result:
2) Observe the change that takes place. Why?
3) Switch partners and repeat steps 1 and 2.
The little hole in the centre of your partner's eye - the pupil - got smaller when introduced to the light from your torch.
The eye works very like a camera. The iris (coloured part of the eye) closes over the pupil because it needs to control the amount of light entering the eye. In a camera, if light was not controlled, our film would be overexposed. Too much light for too long could damage parts of the eye.
Water Magnifier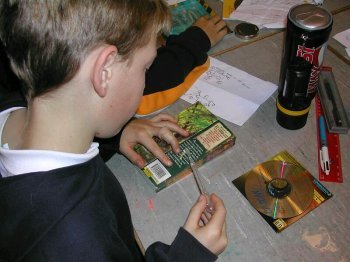 Experiment: To examine how refraction can cause water to act like a home made magnifying glass.
You will need:
Method:
1 eye dropper
A book - something with small print
A transparent plastic sheet
Water
Oil
What you have to do-
1) Place the sheet of plastic over a page of print from your book. This should protect your book.
Result:
2) Fill your eye dropper with water
3) Very carefully, put one drip of water on to the plastic
4) Examine how the print looks as seen through the water. Does it appear different in any way?
5) Raise the plastic over gthe print. Notice anything?
The water magnified the print quite a lot.
As we saw in an earlier experiment, when light rays hit water, they slow down and are refracted - or bent.This causes the print in your book to apppear larger.
 ColourWheels