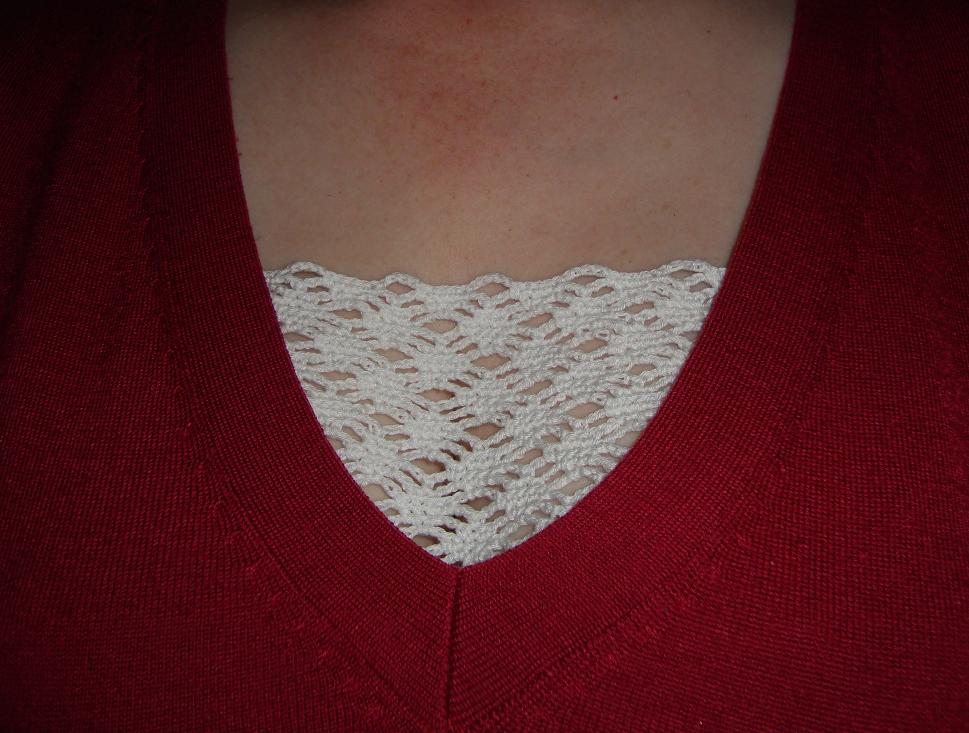
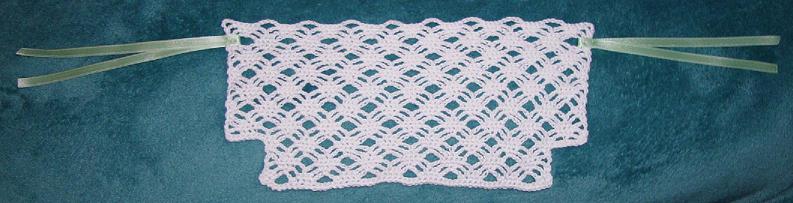
Lacy Cleavage Cover Insert / Chemisette
CROCHET PATTERN
(USA Terms used)
by Linda Z. O'Halloran
August 2010
At first I planned to tie the piece to the bra straps with ribbon, but it tended to untie.
I wanted to avoid putting permanent fasteners onto the bras or the tops,
and I wanted it to be easily used with different tops.
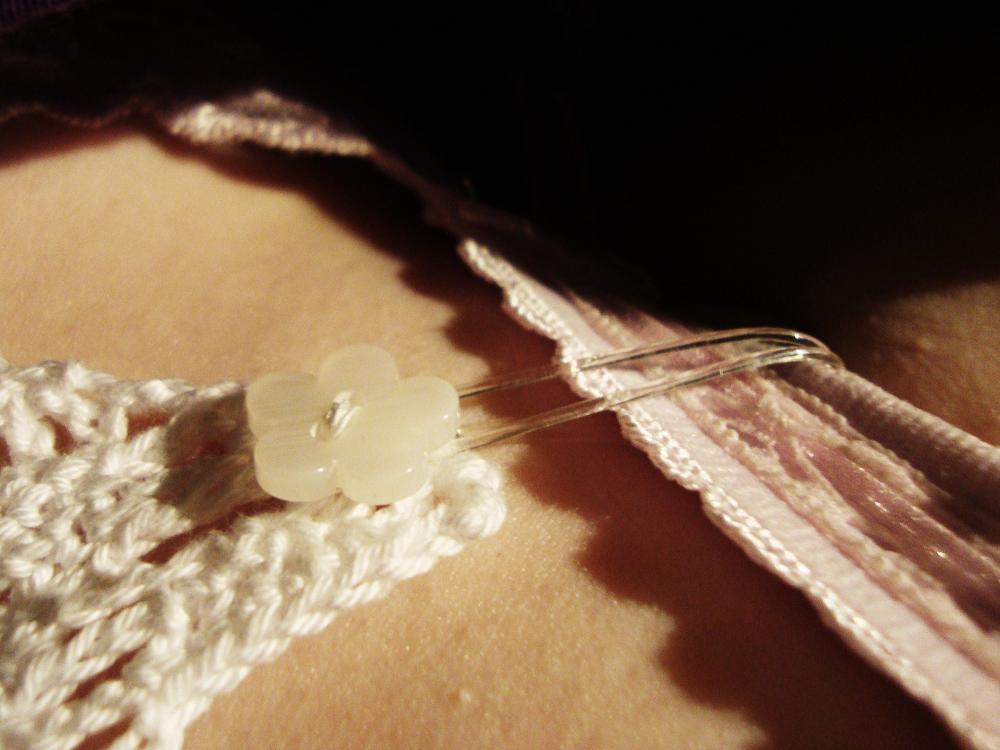
Button & Elastic Attachment
Method --
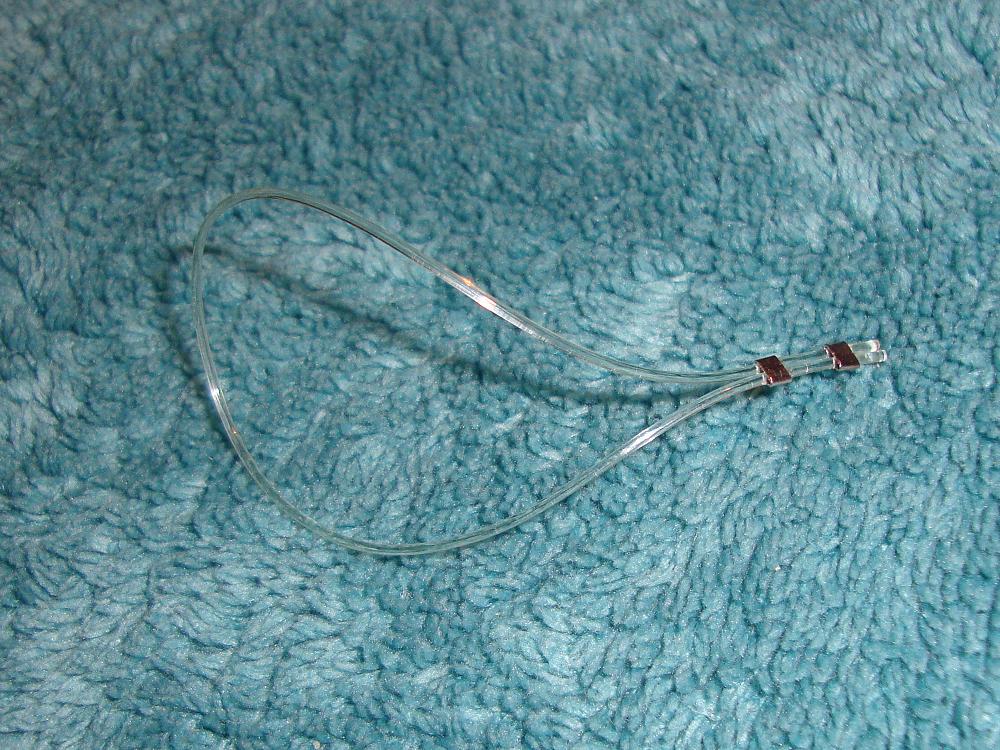
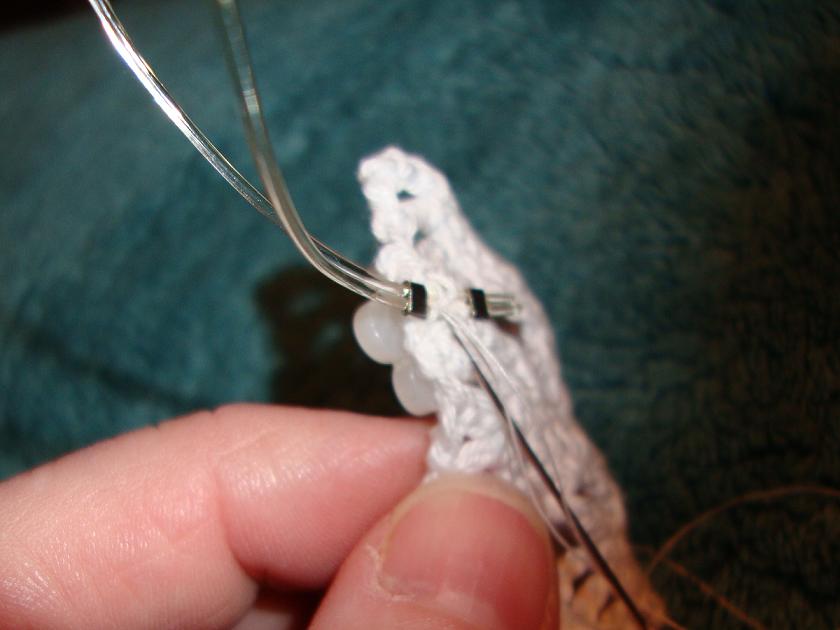
Using 1mm diameter stretchy plastic thread (from a jewellry supply
store), I placed
2mm crimping beads as shown & crimped to secure a
loop. (Superglue could also be used.)
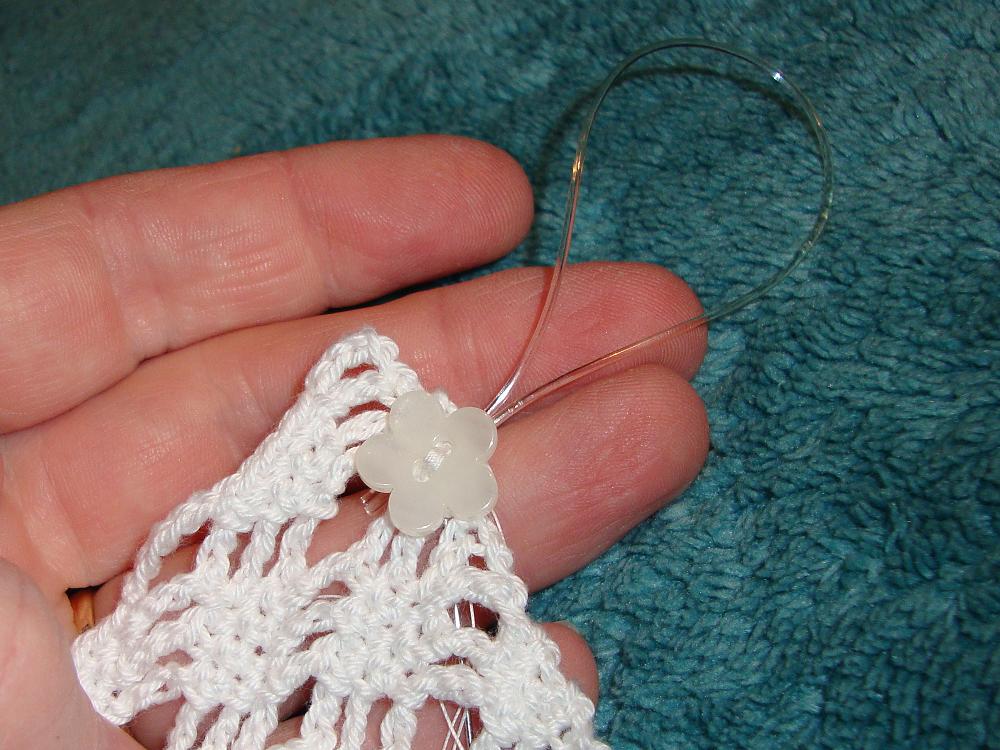
I sewed the button & the elastic to the crocheted piece. The
elastic folds
around the bra strap
and hooks back onto the button. I also used a button sewn to the
center
front of the bra,
& looped the crocheted piece over that, so it was secured in 3
places.
Ribbon
Attachment --
Crochet Thread (probably size #5 or #10) - I used cotton here.
(1 ball/ skein makes at least 3 covers.)
2.0mm crochet hook
Attachment accessories:
Sewing thread /needle
Fastening Supplies:
1 yard satin ribbon (1/4" wide)
OR
snaps
OR
hooks & eyes
OR
1mm diam. Elastic Thread,
1/2" diam. Buttons (3),
Superglue and/or
2mm diam. Crimping Beads to secure the elastic (& pliers to crimp the beads).
Gauge:
1 diamond-shaped pattern repeat is about 1" tall & 1.25"wide.
The entire piece (after slight stretching & blocking, to open up the stitch pattern) = approx. 9" wide (at top) & 4" long.
Detailed crochet instructions are available at www.anniesattic.com or www.crochetpatterncentral.com
~~~~~~~~~~~~~~~~~~~~~~~~~~~~~~~~~~~~~~~~~~~~~~~~~~~~~~~~~~~~~~~~~~~~~~~~~~~~~~
ERRATA: (October 2011) - Thanks to Stephanie Gillette!
Row 7 had and extra repeat of "sc into next sc, sc into next ch3-arch," in the middle,
which has now been removed & corrected.
The section with widening instructions has been clarified /corrected (see below).
~~~~~~~~~~~~~~~~~~~~~~~~~~~~~~~~~~~~~~~~~~~~~~~~~~~~~~~~~~~~~~~~~~~~~~~~~~~~~~
Method:
(Stitch Pattern found in Harmony Guide "220 More Crochet Stitches", p. 22, # I.30)
Chain 58 (or number required, as long as it is a multiple of 8 + 2)
1. sc in 2nd ch from hook, sc across, turn.
2. ch1, sc in each of 1st 3 scs,
* ch 5, miss 3 sc, sc in next 5 scs, rep from *, omit 2 scs at end, turn.
3. ch 1, sc into 1st 2 scs (missing the 3rd sc),
*ch 3, 1 sc into next ch5-arch, ch3, miss 1 sc, sc into next 3 scs, rep from *, omit 1 sc at end, turn.
4. ch 1, sc into 1st sc,
*ch3, sc into next ch3-arch, sc in next sc, sc in next ch3-arch, ch3, miss 1 sc, sc in next sc, rep from *, turn.
5. ch5, sc into next ch3-arch, sc into next 3 scs, sc into next ch3-arch,
*ch 5, sc into next ch3-arch, sc into next 3 scs, sc into next ch3-arch, rep from *,
at end, ch2, dc into last sc, turn.
6. ch1, sc into 1st dc, ch3, miss 1 sc, sc into next 3 scs,
*ch3, sc into next ch5-arch, ch3, miss 1 sc, sc into next 3 scs, rep from * to last ch2-arch,
then ch3, 1 sc into 3rd of 5 chains at beg of previous row, turn.
7. ch1, sc into 1st sc, sc into next ch3-arch, ch3, miss 1 sc, sc into next sc,
*ch3, sc into ch3-arch, sc into next sc, sc into next ch3-arch, ch3, miss 1 sc, sc into next sc, rep from *,
at end ch3, sc into ch3-arch, sc into last sc, turn. (corrected October 2011)
8. ch1, sc in 1st 2 scs,
*sc into next ch3-arch, ch5, sc into next ch3-arch, sc into next 3 scs, rep from *,
omit 1 sc at the end, (after 1st time doing row 8, go to ** to increase the width at each end.
On subsequent pattern repeats, simply turn here).
Rows 3 thru 8 are repeated for the pattern.
**To Widen:
After the first row 8 (without turning) I widened the piece by one pattern repeat at each end.
Before starting back at the beginning of row 3, ch9, turn,
Sc
in
2nd
ch from hook and in next ch. (ch3, miss 2 ch, sc in next ch)
twice.
Sc in next 2 sc. Continue as written in row 3 beginning from * .
At the end of this row (after sc in last 2 sc), ch 9, turn.
Sc in 2nd ch from hook, ch3, miss 2 ch, sc in next 3 ch, ch3, miss 2
ch, sc in next sc.
Continue as written in row 4 beginning from * . (Corrected
Oct. 2011)
then continue repeating rows 3 - 8, until the piece is the desired length (I did about 4 inches),
End with either row 5 or row 8.
Fasten off.
Cut ribbons to desired lengths, if using.
Or cut elastic jewellry thread to about 3.5--4 inches long and see photos above for attaching.
If you have any questions, improvements or comments, feel free to email Linda.