How to make a Poser Mat pose look better in Daz Studio
This is just a quick tutorial on how to make textures look better in Daz studio
For the example I am using the Pharaoh dress for V4 and One of Chohole's free mats for the dress. (To save time while testing the setting I will only have the dress loaded in the scene.).
After each step you will see a screen shot with a render showing the changes made to the dress.
Step 1
Load the dress and apply the texture map.
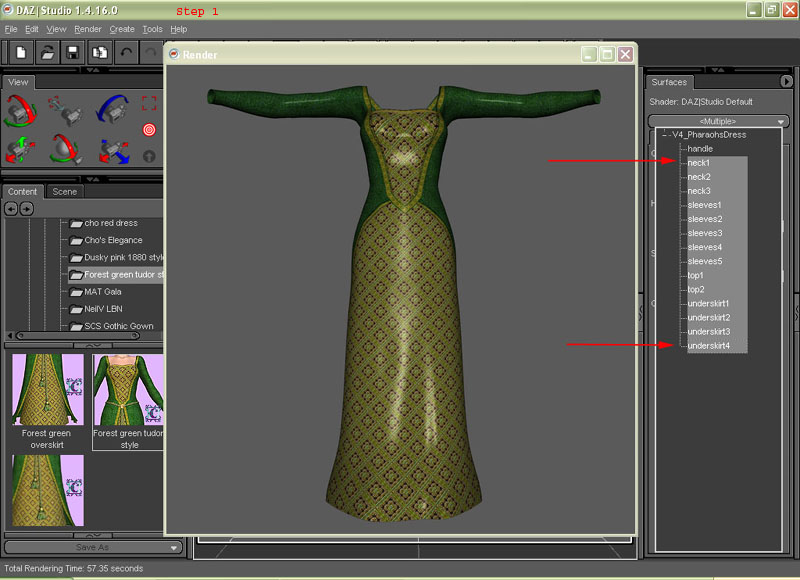
Open the surfaces tab and select the dress to make my like easer I always select all the different sections of the dress by clicking on the top one (neck1) the press and hold the shift key I select the bottom one (underskirt4) you will notice I did not select the handle as we don’t need to change any settings for that. Also if you need to select on a few of the surfaces you can use ctrl and click each one you wish to select.

Step2
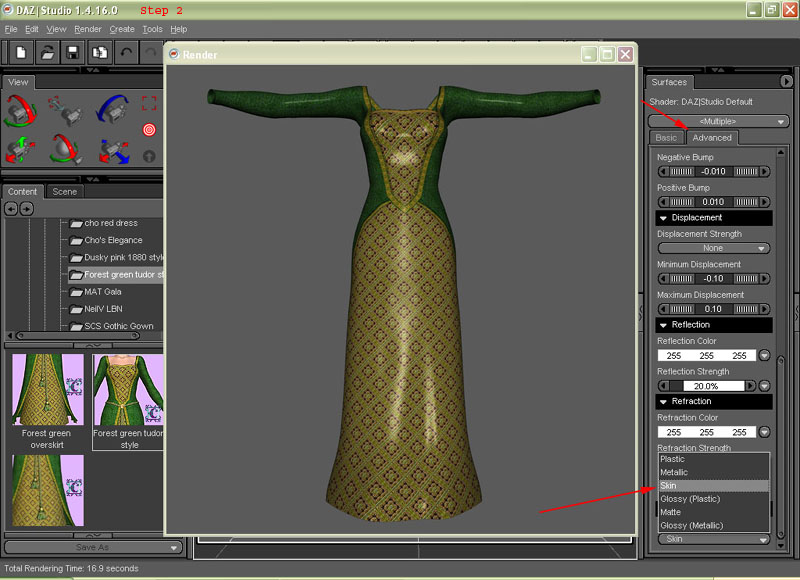
Click on the advanced tab and scroll down to the bottom
under lighting model select skin
Step 3
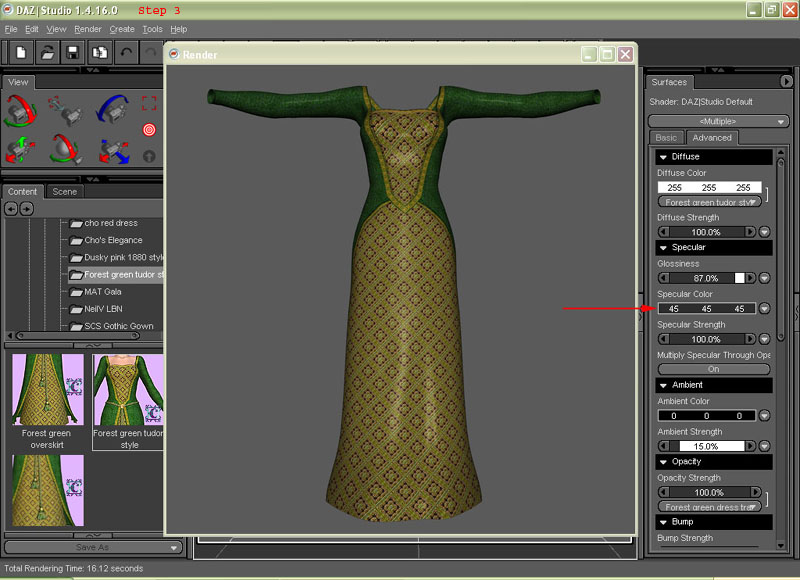
Next we are going to change the Highlight/Specular Colour I have quite a dark one set up but you can play around with what you think is best.
Step 4
Next I adjust Glossiness a lot of people suggest 85% I use 90 % a lot it's just down to your own taste.
and I will quite often turn down the ambient strength as well this time to 5% this setting will depend on the type of outfit and type of render you are doing. you may also need to change the ambient colour at the same time.

As you can see each step has made an improvement on how the texture looks and is just a case of playing with these settings to get a look that you like. if the outfit does not have a bump map this is as far as you need to go. but there is another step which is below.
Step 5
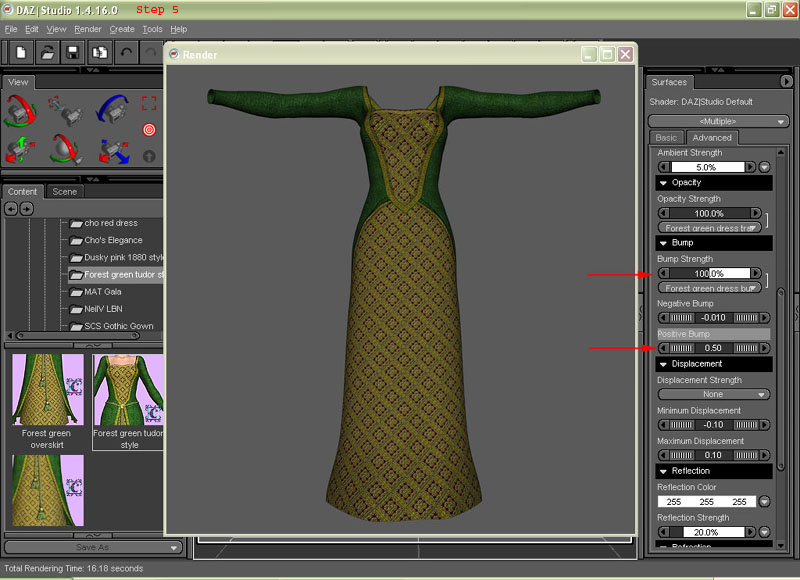
next you need to adjust the bump map.. I find that setting the bump strength to 100% and then playing around with the Positive or negative bump gives the best effect below is shown with as 0.50 Positive bump (I quite often use 0.25 but it will depend on what you are trying to achieve) . this is the point I find myself having to render the scene a lot to get the effect I want but by having only one item in the scene it should not take that long to render.
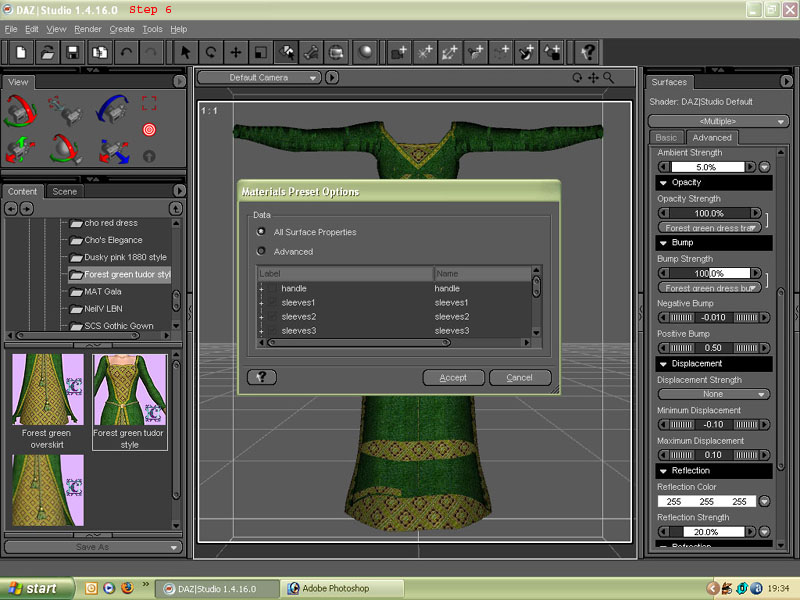
Step 6
The last step is optional if you wish to use your settings again or you are setting up some items to use in render you may wish to save the surface settings to do this go to (After making sure you have the correct item selected)
File
Save as
Material Preset
as you can see you can just select all surface properties
or go into advanced and just select a few of them depending on what settings you wish to save.
And now the outfit should look a bit more like the sample render that made you download/buy the outfit/texture.