Bikers Workshop Series
Part 8;
Fitting new GL1500 Mufflers.
By Steve Saunders.
The stock mufflers on the GL1500
Goldwing tend to rust after a few years. It doesn't really matter how much you
clean them because the design means that they tend to collect condensation which
turns into water, then the dreaded tinworm rots them from the inside out. There
is a drain hole in each muffler (near the front) to allow some water out, but
the hole is really in the wrong place as the mufflers almost always rot at the
ends near where the tailpipe is welded on.
Replacing mufflers on the GL1500 Goldwing is easy
enough and you really don't need a tutorial for the task. But I did have a
camera handy on the day I did the job so you may as well have the benefit of the
images.
Click the thumbnails for a bigger image.
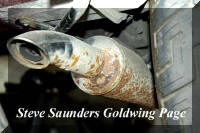
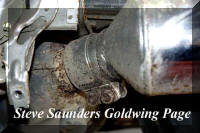
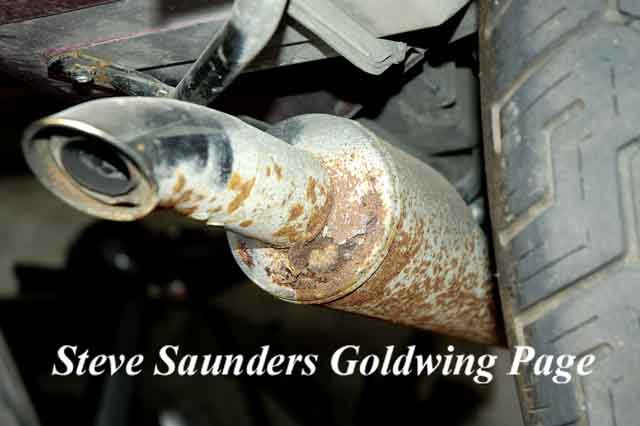
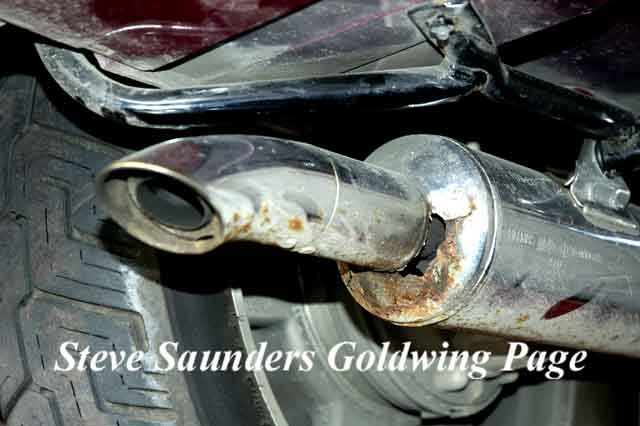
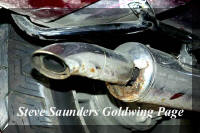 This is a common sight on a GL1500 Goldwing. The
mufflers rot from the inside out and eventually the ends just blow off. Believe
it or not, these mufflers are on a 1997 GL1500SE with only 7,700 miles that was
always stored in a dry garage! I replaced them in April 2004 and they had been
almost as bad as this since 2002, but the owner of the Goldwing wasn't using it
much so he didn't bother replacing them until 2004.
This is a common sight on a GL1500 Goldwing. The
mufflers rot from the inside out and eventually the ends just blow off. Believe
it or not, these mufflers are on a 1997 GL1500SE with only 7,700 miles that was
always stored in a dry garage! I replaced them in April 2004 and they had been
almost as bad as this since 2002, but the owner of the Goldwing wasn't using it
much so he didn't bother replacing them until 2004.
 First thing to do is remove the two side undercowls.
The small bolts to remove are highlighted here, same on the other side of the
bike.
First thing to do is remove the two side undercowls.
The small bolts to remove are highlighted here, same on the other side of the
bike.
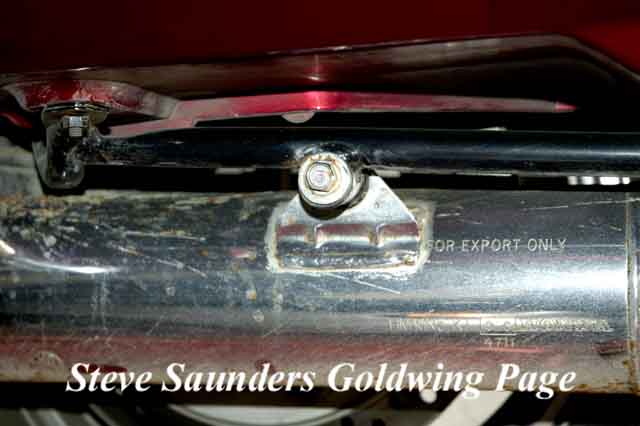
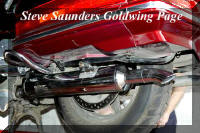
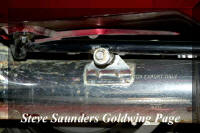 The bolt holding the muffler to the frame. The actual
nut is not welded to the frame, so you will need to get a 12mm spanner to it in
order to prevent the whole lot turning.
Tip; Make sure and note that
the lug on the muffler sits on the INSIDE of the mount on the sub-frame. Lots of
folks have mistakenly refitted them with the lug on the outside and the view
from the rear looks rather silly!
The bolt holding the muffler to the frame. The actual
nut is not welded to the frame, so you will need to get a 12mm spanner to it in
order to prevent the whole lot turning.
Tip; Make sure and note that
the lug on the muffler sits on the INSIDE of the mount on the sub-frame. Lots of
folks have mistakenly refitted them with the lug on the outside and the view
from the rear looks rather silly!
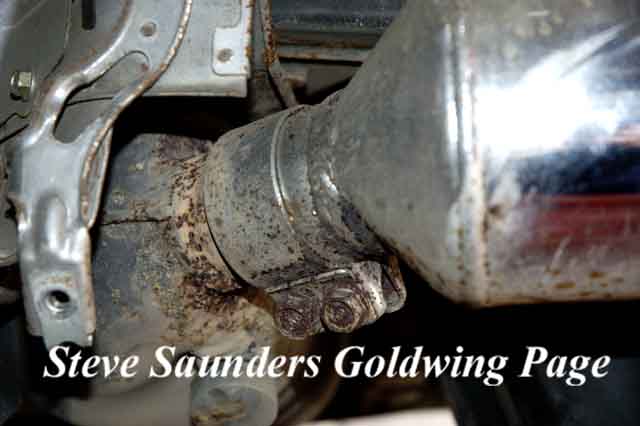
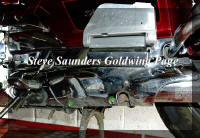
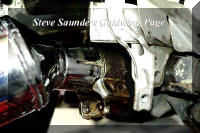
 The clamp holding the left muffler to the collector
box. The bolts often break when trying to remove them, use plenty of WD40 or
similar. It's a good idea to buy a pair of clamps just in case the rusted ones
fall apart. When you get the bolts out, spread the clamp a little bit.
The clamp holding the left muffler to the collector
box. The bolts often break when trying to remove them, use plenty of WD40 or
similar. It's a good idea to buy a pair of clamps just in case the rusted ones
fall apart. When you get the bolts out, spread the clamp a little bit.
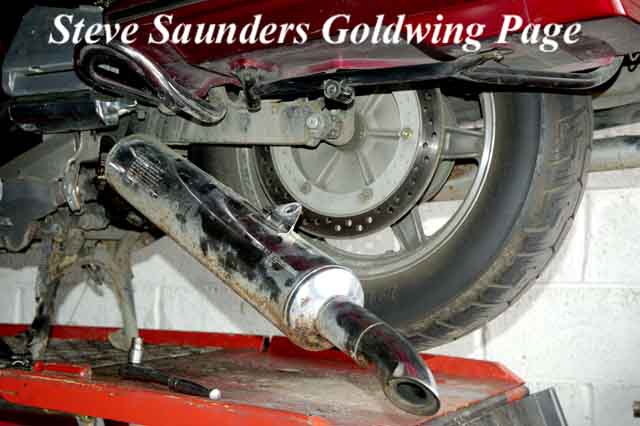
 Gently rock the muffler from side to side, then swivel
it outwards and pull it off. Tip;
While you have access to the collector box, clean off any visible rust with a
wire brush or steel wool. Then spray some Very High Temperature (VHT) paint on
as much of the box as you can get to. This simple step may extend the life of
the (very expensive to replace) collector box by several years.
Gently rock the muffler from side to side, then swivel
it outwards and pull it off. Tip;
While you have access to the collector box, clean off any visible rust with a
wire brush or steel wool. Then spray some Very High Temperature (VHT) paint on
as much of the box as you can get to. This simple step may extend the life of
the (very expensive to replace) collector box by several years.
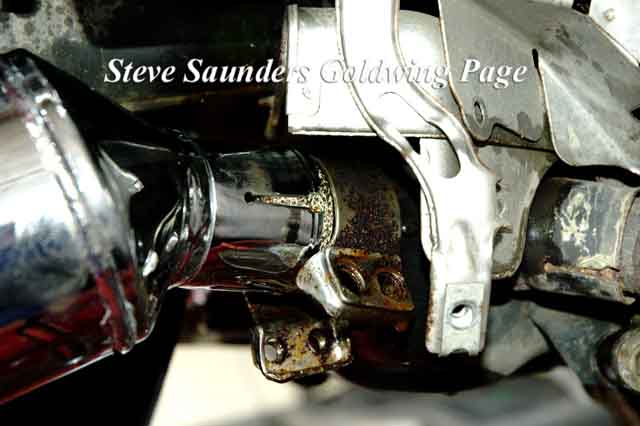
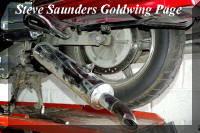
 The right side muffler being slipped on. A new gasket
and lots of WD40 helps. The old clamps were salvaged for re-use on this
Goldwing. After you swivel the muffler into position and put the frame bolt into
its slot, put the bolts into the clamp and tighten them up. Using copper grease
on the bolts may slow down the rate at which they will seize up later on.
The right side muffler being slipped on. A new gasket
and lots of WD40 helps. The old clamps were salvaged for re-use on this
Goldwing. After you swivel the muffler into position and put the frame bolt into
its slot, put the bolts into the clamp and tighten them up. Using copper grease
on the bolts may slow down the rate at which they will seize up later on.
 New mufflers fitted. Replace the cowls, using copper
grease on the bolts.
New mufflers fitted. Replace the cowls, using copper
grease on the bolts.
Bikers Workshop
Menu
Home
 This is a common sight on a GL1500 Goldwing. The
mufflers rot from the inside out and eventually the ends just blow off. Believe
it or not, these mufflers are on a 1997 GL1500SE with only 7,700 miles that was
always stored in a dry garage! I replaced them in April 2004 and they had been
almost as bad as this since 2002, but the owner of the Goldwing wasn't using it
much so he didn't bother replacing them until 2004.
This is a common sight on a GL1500 Goldwing. The
mufflers rot from the inside out and eventually the ends just blow off. Believe
it or not, these mufflers are on a 1997 GL1500SE with only 7,700 miles that was
always stored in a dry garage! I replaced them in April 2004 and they had been
almost as bad as this since 2002, but the owner of the Goldwing wasn't using it
much so he didn't bother replacing them until 2004.