Bikers Workshop Series
Part 7;
Fitting Hondaline CB Radio To GL1800.
By Steve Saunders.
The Hondaline CB radio for the GL1800 is an AM only unit,
just like the units made for previous Goldwings. Installation on the GL1800 is
simple enough and there are no real pitfalls to be wary of. Many people worry
that removal of the top shelter is a big job, but in reality it isn't. Thirty
minutes is all it takes second time round, even your first time removing the
shelter should take no more than an hour and that's allowing for a tea-break as
well!
Click the thumbnails for a bigger image.
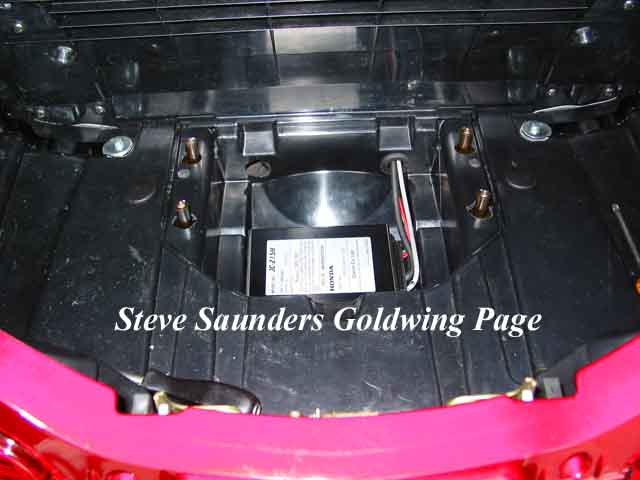
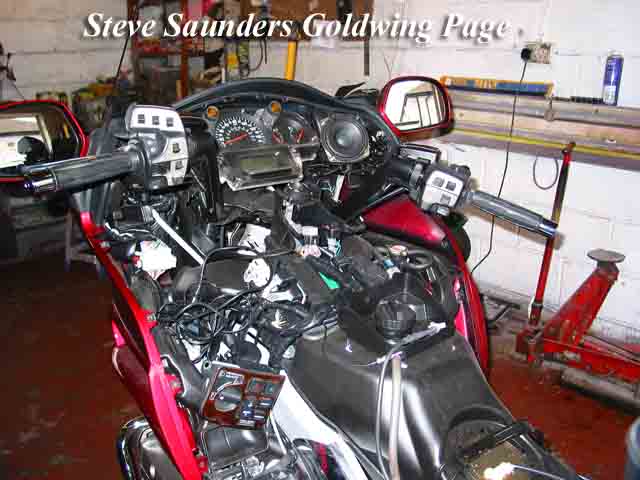
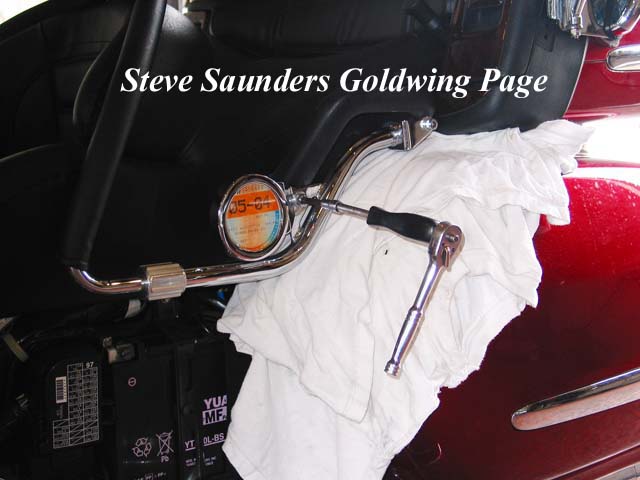
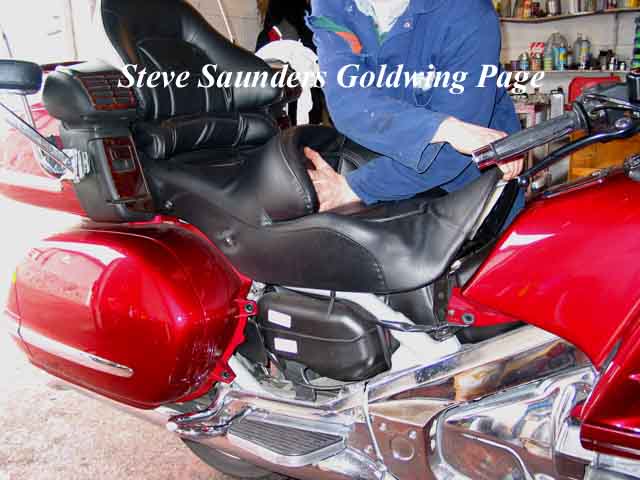
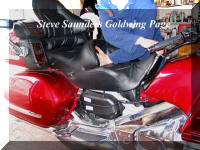 First disconnect the battery. Then it's off with the side panels and saddle. When you remove the Allen bolts, firmly push the
riders backpad rearwards until the two white tabs at the front of the saddle
clear the shelter bracket, then look under the front part of the saddle and
ensure that the lug under the saddle is clear of the bracket. Then just lift the front up and away. Check that the
rubber spacers under the saddle (where the bolts go through) are still in place.
Tip; Use plenty of soft cloths to cover
any panels that are even remotely at risk from falling bolts, screwdrivers etc.
First disconnect the battery. Then it's off with the side panels and saddle. When you remove the Allen bolts, firmly push the
riders backpad rearwards until the two white tabs at the front of the saddle
clear the shelter bracket, then look under the front part of the saddle and
ensure that the lug under the saddle is clear of the bracket. Then just lift the front up and away. Check that the
rubber spacers under the saddle (where the bolts go through) are still in place.
Tip; Use plenty of soft cloths to cover
any panels that are even remotely at risk from falling bolts, screwdrivers etc.
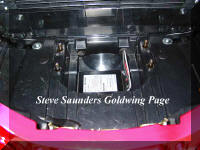 I've gone straight to the point where you plonk the Hondaline CB radio into the trunk.
The holes where the CB radio and CD player wire harnesses pass through the trunk
can be made by leaving the trunk in place. Just get a 28mm holesaw and heat it
up with a butane torch or the gas cooker and melt the holes through from the
saddle side of the trunk, you don't really need to remove the trunk as the
instructions suggest. If you are just fitting the CB radio then you only need to
make one hole on the right side, the outline for both holes is already there. If
you really like punishing yourself and want to remove the trunk anyway, see Part
6; Fitting Hondaline CD Player To GL1800, detailed
instructions for trunk removal can be found there. If you are fitting the
Hondaline CD player with the later type mounting kit (2002
on), then you will indeed have to remove the trunk. There is a plastic cover
that should be fitted over the CB radio, but if fitting the CD player Honda
suggest leaving the cover off. Why is a mystery, perhaps it's to allow more air
to reach the CB and stop overheating.
I've gone straight to the point where you plonk the Hondaline CB radio into the trunk.
The holes where the CB radio and CD player wire harnesses pass through the trunk
can be made by leaving the trunk in place. Just get a 28mm holesaw and heat it
up with a butane torch or the gas cooker and melt the holes through from the
saddle side of the trunk, you don't really need to remove the trunk as the
instructions suggest. If you are just fitting the CB radio then you only need to
make one hole on the right side, the outline for both holes is already there. If
you really like punishing yourself and want to remove the trunk anyway, see Part
6; Fitting Hondaline CD Player To GL1800, detailed
instructions for trunk removal can be found there. If you are fitting the
Hondaline CD player with the later type mounting kit (2002
on), then you will indeed have to remove the trunk. There is a plastic cover
that should be fitted over the CB radio, but if fitting the CD player Honda
suggest leaving the cover off. Why is a mystery, perhaps it's to allow more air
to reach the CB and stop overheating.
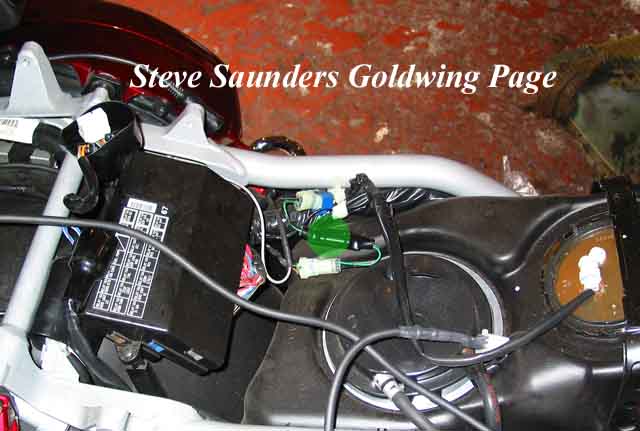
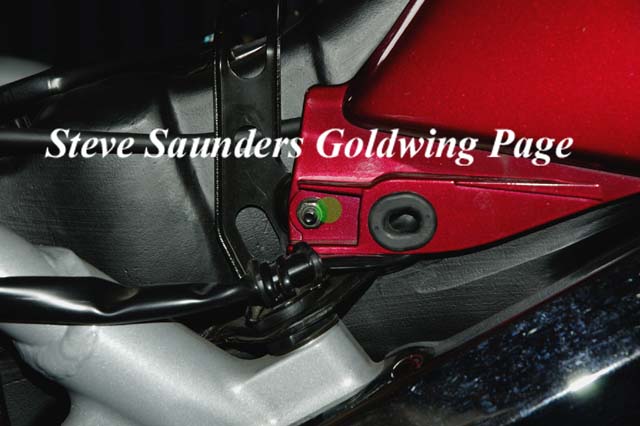
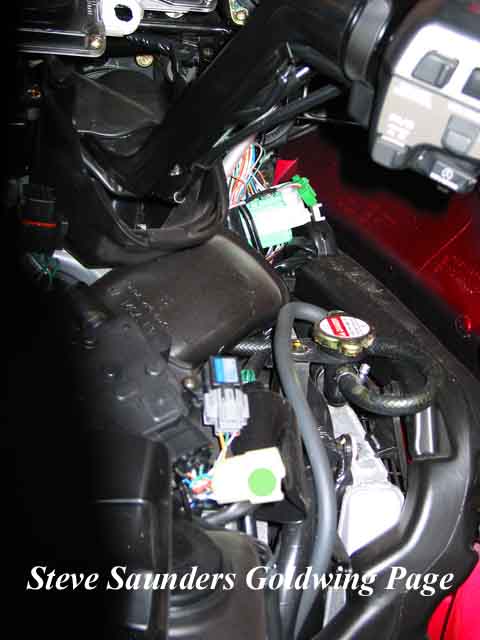
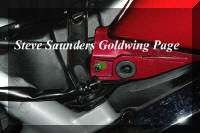
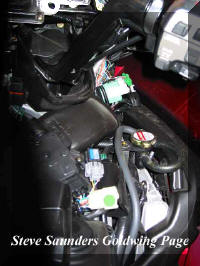
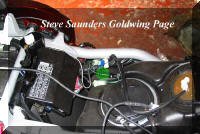 The Hondaline CB kit comes with three filters, the waterproof one plugs in
here. Plug the antenna connector into the antenna wire where it comes out of the
trunk. The long grey wire seen here is the main harness for the CB and will need
to be secured to the right side frame member after everything is connected up.
Route it under the frame where possible so that it doesn't get crushed by the
saddle.
The Hondaline CB kit comes with three filters, the waterproof one plugs in
here. Plug the antenna connector into the antenna wire where it comes out of the
trunk. The long grey wire seen here is the main harness for the CB and will need
to be secured to the right side frame member after everything is connected up.
Route it under the frame where possible so that it doesn't get crushed by the
saddle.
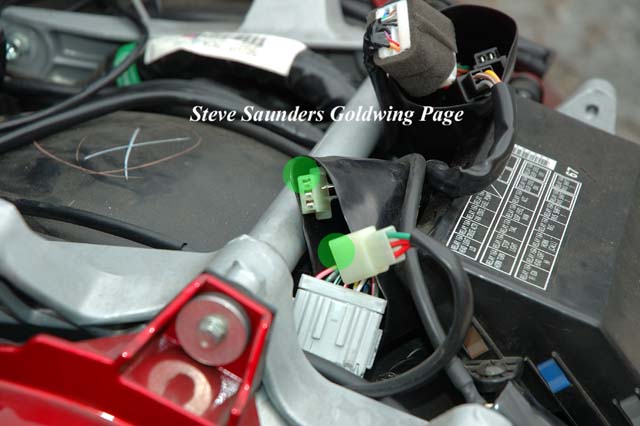
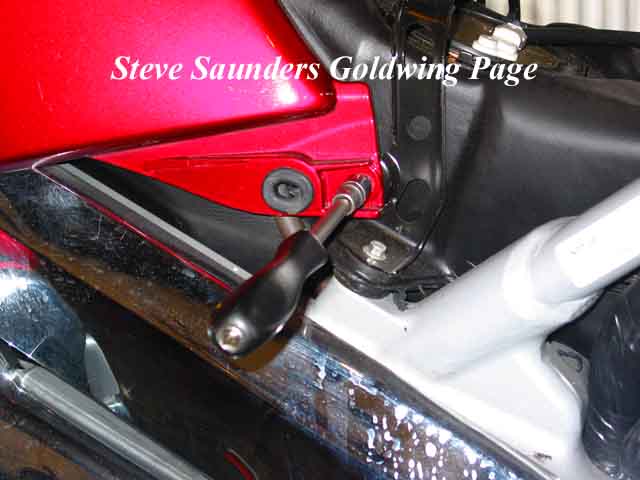
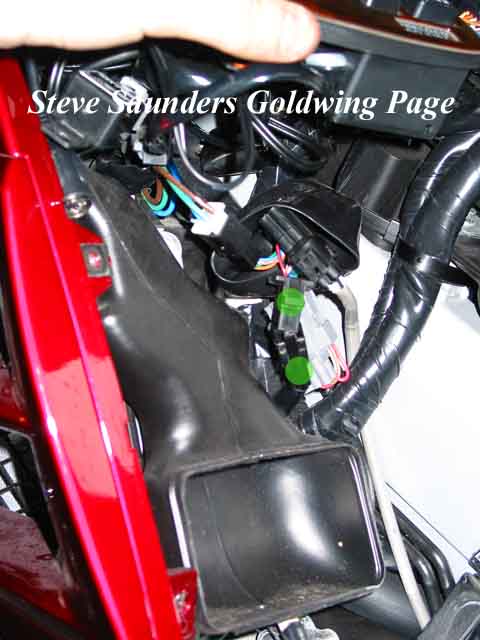
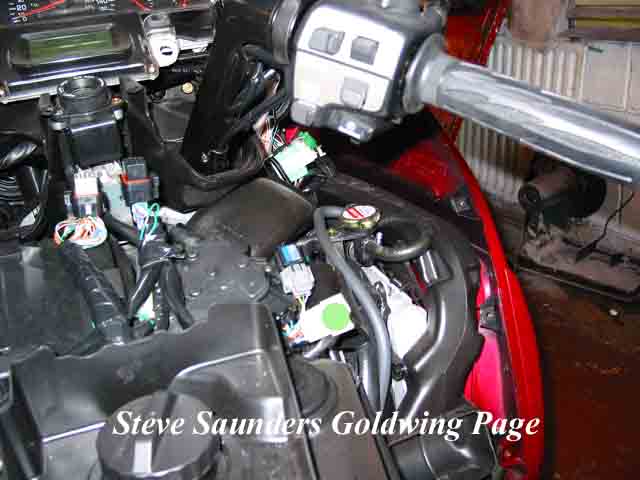
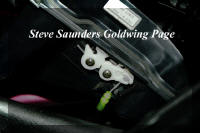
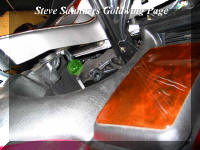
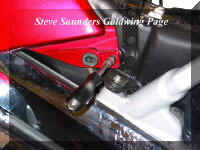
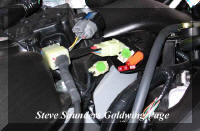
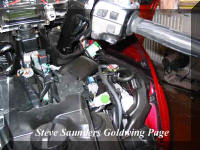
 This picture shows the 3-pin plug in the rubber boot that the plug from the
CB radio plugs into. This is the power plug for the CB. Have a good peep at it
and make sure that you select this plug from this rubber boot.
Tip; There is a similar plug that the CB will plug
into, but that is the WRONG plug which is used for the dealers to plug the
diagnostic kit into. Plugging the CB into this will cause error messages and
possibly the FI warning light will stay lit as well.
This picture shows the 3-pin plug in the rubber boot that the plug from the
CB radio plugs into. This is the power plug for the CB. Have a good peep at it
and make sure that you select this plug from this rubber boot.
Tip; There is a similar plug that the CB will plug
into, but that is the WRONG plug which is used for the dealers to plug the
diagnostic kit into. Plugging the CB into this will cause error messages and
possibly the FI warning light will stay lit as well.
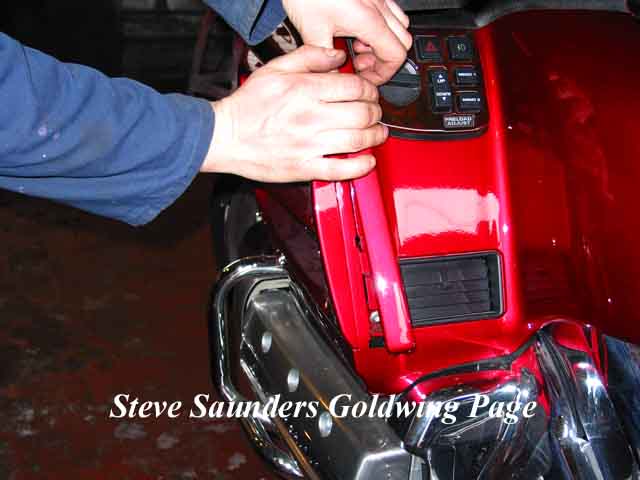
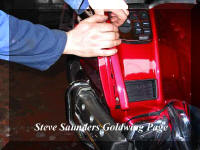
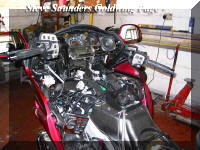
 The front shelter has to be removed next. Start by taking out the two fairing
pockets. The right one is held by two self tapper screws and two clips. Push the
centre of the clip in and then just lift the whole clip out. Unhook the lock
cable from the right pocket. Tip; When
reassembling, don't forget to put the cable back or you won't be able to open
the pocket. If you do lock it with the cable disconnected by mistake, you don't
need to remove the top shelter again. Just remove the trim piece and the
lockable panel and then work your paw up to the white lock clip shown in
the picture, then just pull down on the part that the cable sits into.
The front shelter has to be removed next. Start by taking out the two fairing
pockets. The right one is held by two self tapper screws and two clips. Push the
centre of the clip in and then just lift the whole clip out. Unhook the lock
cable from the right pocket. Tip; When
reassembling, don't forget to put the cable back or you won't be able to open
the pocket. If you do lock it with the cable disconnected by mistake, you don't
need to remove the top shelter again. Just remove the trim piece and the
lockable panel and then work your paw up to the white lock clip shown in
the picture, then just pull down on the part that the cable sits into.
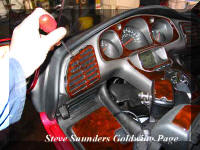
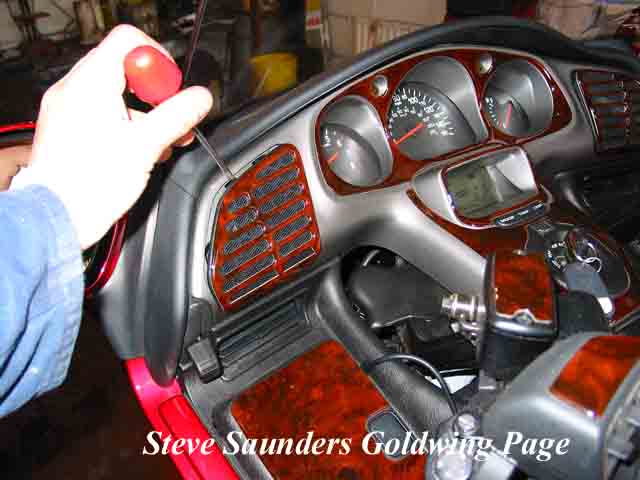
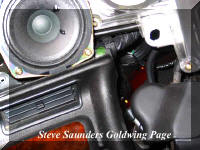
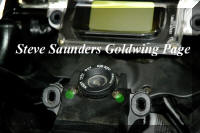
 Pop the speaker grilles out from the top. Tip;
When refitting the grilles later on, remember to give them a firm push downwards
after they are clipped in, otherwise you may lose them one day while out
riding. The middle picture shows the concealed Allen bolt being removed,
there is one under each speaker grille. From the ignition key area, pull the
meter panel backwards (towards the rear of the bike), NOT upwards or you will
break the tabs that sit in the four hidden rubber grommets (two in the clocks
and two below the ignition switch). Reach under the right side of the ignition
switch and free the connector shown in the third picture here. Then just pull
the panel clear.
Pop the speaker grilles out from the top. Tip;
When refitting the grilles later on, remember to give them a firm push downwards
after they are clipped in, otherwise you may lose them one day while out
riding. The middle picture shows the concealed Allen bolt being removed,
there is one under each speaker grille. From the ignition key area, pull the
meter panel backwards (towards the rear of the bike), NOT upwards or you will
break the tabs that sit in the four hidden rubber grommets (two in the clocks
and two below the ignition switch). Reach under the right side of the ignition
switch and free the connector shown in the third picture here. Then just pull
the panel clear.
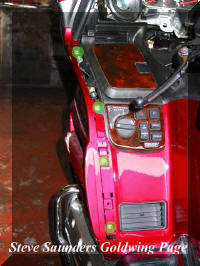
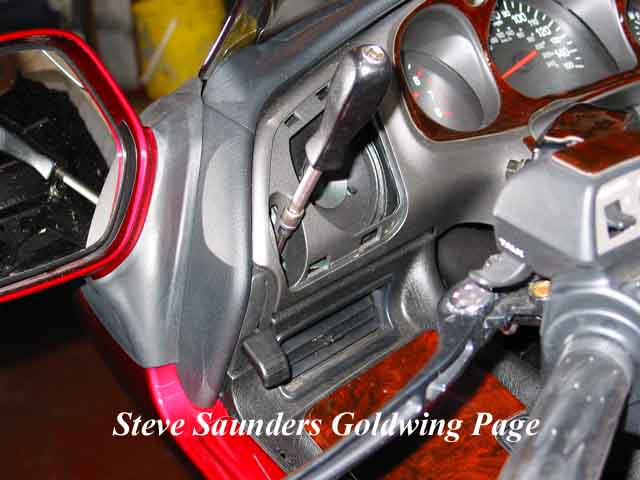
 The fairing trim is easily removed without tools. Just start at the bottom
inside part and pull outwards, then work your way up the whole trim as shown in
the first of these four pictures (when refitting the trim pieces, always start
at the top and work down). Then (as shown in the five pictures that
follow) remove the nut on each side of the shelter rear, the Allen bolts under
the trim pieces each side and also each side (just under) of the clocks. Don't
forget the two screws (last picture) just below the ignition switch.
Also in the last picture, you can see the rubber grommets that the meter panel
sits into. The grommets either side of the LCD display usually come away with
the meter panel, so make sure you put them back in place like in the third picture.
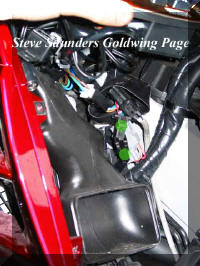
Also in the third picture you can see the thick wire harness passing under the
shelter. When you fit the long CB wire, cable tie it along this harness (and the
frame rail above the right side panel) and make
sure that the shelter doesn't pinch them when refitting! Tip; The Allen bolts under the trim are several
different sizes, make a note of where each one goes.
The fairing trim is easily removed without tools. Just start at the bottom
inside part and pull outwards, then work your way up the whole trim as shown in
the first of these four pictures (when refitting the trim pieces, always start
at the top and work down). Then (as shown in the five pictures that
follow) remove the nut on each side of the shelter rear, the Allen bolts under
the trim pieces each side and also each side (just under) of the clocks. Don't
forget the two screws (last picture) just below the ignition switch.
Also in the last picture, you can see the rubber grommets that the meter panel
sits into. The grommets either side of the LCD display usually come away with
the meter panel, so make sure you put them back in place like in the third picture.
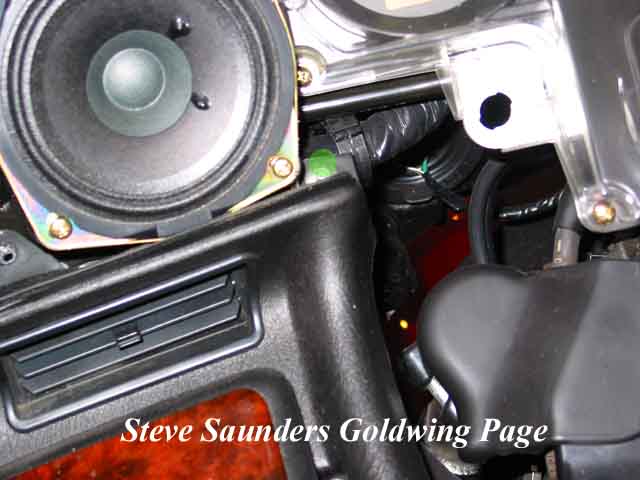
Also in the third picture you can see the thick wire harness passing under the
shelter. When you fit the long CB wire, cable tie it along this harness (and the
frame rail above the right side panel) and make
sure that the shelter doesn't pinch them when refitting! Tip; The Allen bolts under the trim are several
different sizes, make a note of where each one goes.
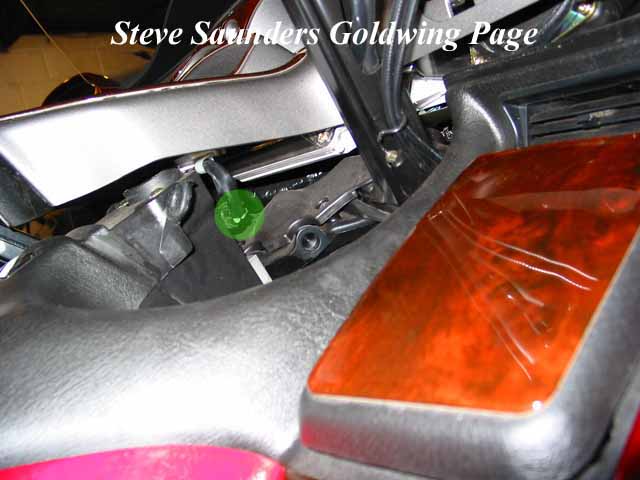
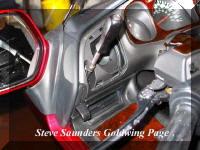
 Lift the rear of the shelter up, then release the antenna wire from the rear
left of the audio unit and also the two connectors from the front of it. These
are easy to see with the shelter up. Then just lift the whole shelter away. It's
fairly light so you won't need any assistance here, just be careful you don't
scratch your paintwork.
Lift the rear of the shelter up, then release the antenna wire from the rear
left of the audio unit and also the two connectors from the front of it. These
are easy to see with the shelter up. Then just lift the whole shelter away. It's
fairly light so you won't need any assistance here, just be careful you don't
scratch your paintwork.
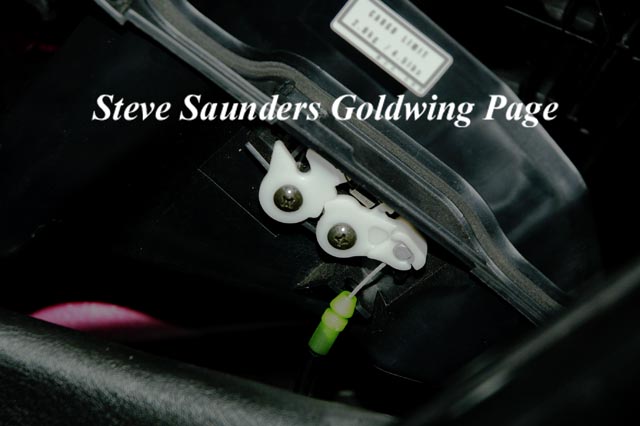
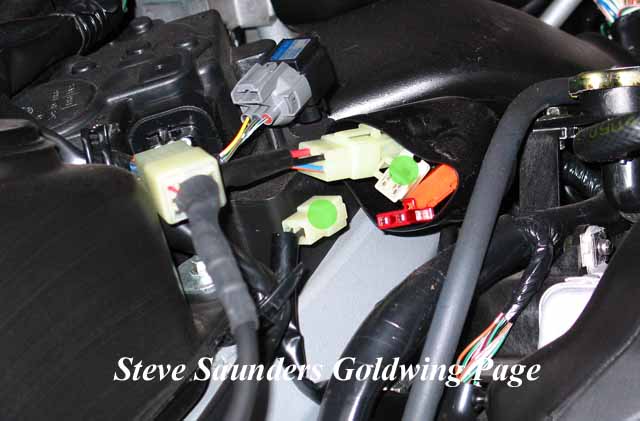
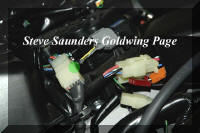
 Fit the remaining two filters between the connector blocks as shown. The left
block is black and the one on the right is white (both disconnected in these
pictures). They are both located in the rubber boots.
Fit the remaining two filters between the connector blocks as shown. The left
block is black and the one on the right is white (both disconnected in these
pictures). They are both located in the rubber boots.
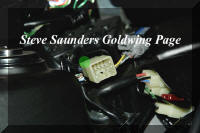
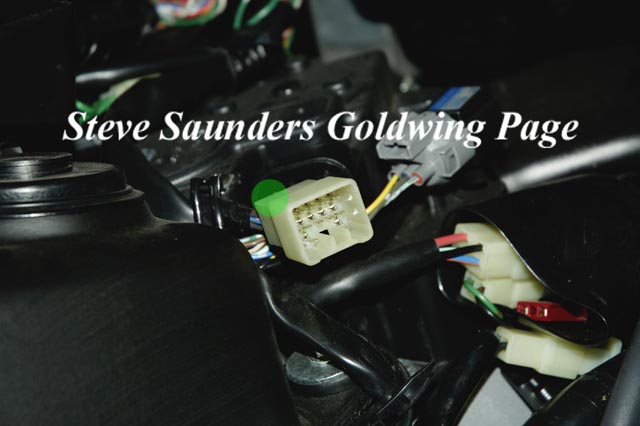
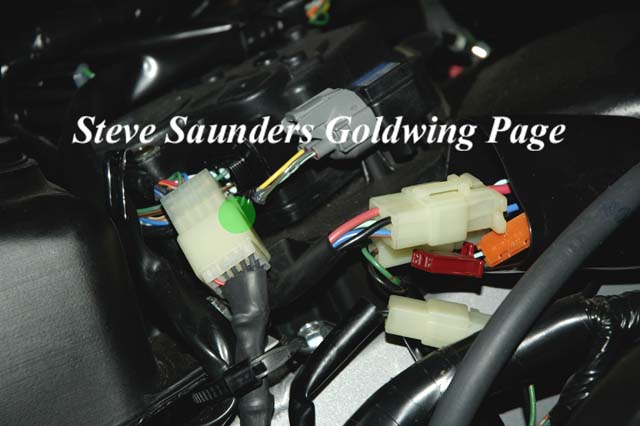
 These four pictures are just different views of the connector that the wire
from the CB unit in the trunk plugs into, the last two are close-ups and the
final one showing them connected. After you have tested everything and ideally
trimmed the antenna with the aid of an SWR meter, replace the panels and
saddle etc. Tip; When refitting the shelter,
make sure that the upper fairing vents sit into the air scoops before pushing
the shelter fully into place, otherwise the vents may pop out with the pressure
of the scoops and do a disappearing act down the road one day.
These four pictures are just different views of the connector that the wire
from the CB unit in the trunk plugs into, the last two are close-ups and the
final one showing them connected. After you have tested everything and ideally
trimmed the antenna with the aid of an SWR meter, replace the panels and
saddle etc. Tip; When refitting the shelter,
make sure that the upper fairing vents sit into the air scoops before pushing
the shelter fully into place, otherwise the vents may pop out with the pressure
of the scoops and do a disappearing act down the road one day.
Instructions for fitting the antenna to follow
later.
Bikers Workshop
Menu
Home
 First disconnect the battery. Then it's off with the side panels and saddle. When you remove the Allen bolts, firmly push the
riders backpad rearwards until the two white tabs at the front of the saddle
clear the shelter bracket, then look under the front part of the saddle and
ensure that the lug under the saddle is clear of the bracket. Then just lift the front up and away. Check that the
rubber spacers under the saddle (where the bolts go through) are still in place.
Tip; Use plenty of soft cloths to cover
any panels that are even remotely at risk from falling bolts, screwdrivers etc.
First disconnect the battery. Then it's off with the side panels and saddle. When you remove the Allen bolts, firmly push the
riders backpad rearwards until the two white tabs at the front of the saddle
clear the shelter bracket, then look under the front part of the saddle and
ensure that the lug under the saddle is clear of the bracket. Then just lift the front up and away. Check that the
rubber spacers under the saddle (where the bolts go through) are still in place.
Tip; Use plenty of soft cloths to cover
any panels that are even remotely at risk from falling bolts, screwdrivers etc.