Bikers Workshop Series
Part 6;
Fitting Hondaline CD Player To GL1800.
By Steve Saunders.
The Hondaline CD player was announced for the GL1800 late
in 2000, ready to ship around the same time as the new Goldwing itself. The
early player wasn't without problems however and in 2002 a separate (improved)
mounting kit was supplied. The main difference with the new kit was that you now
had to remove the trunk from the bike to fit the mounting brackets. The
procedure for fitting the later unit is outlined here.
Click the thumbnails for a bigger image.
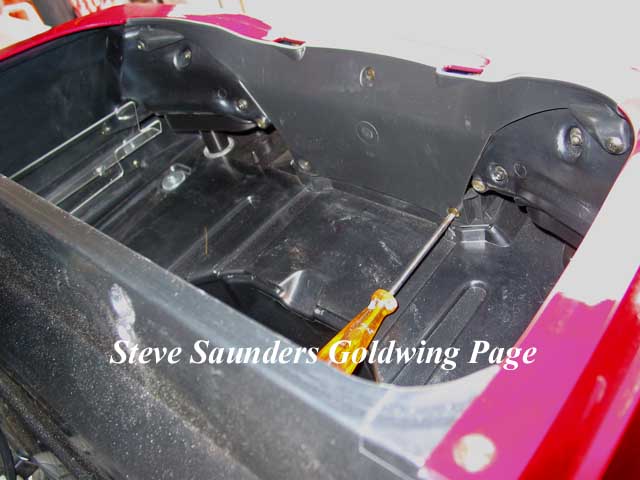
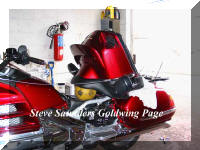
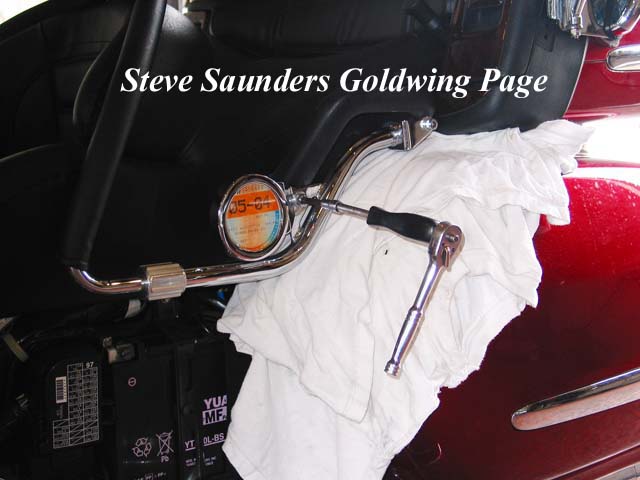
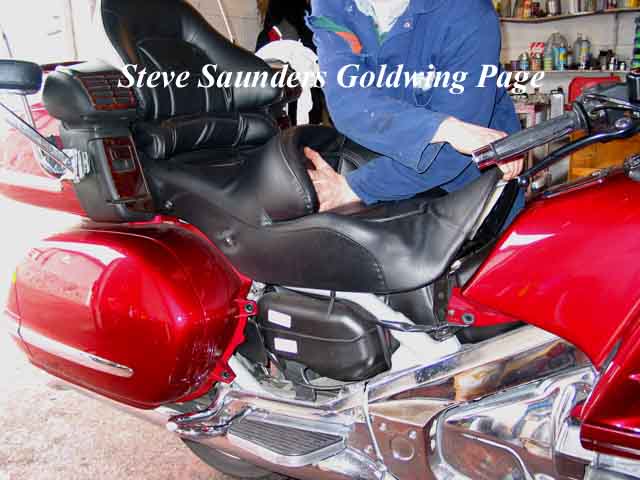
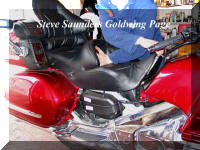 First disconnect the battery. Then it's off with the saddle. When you remove the Allen bolts, firmly push the
riders backpad rearwards until the two white tabs at the front of the saddle
clear the shelter bracket. Then just lift the front up and away. Check that the
rubber spacers under the saddle (where the bolts go through) are still in place.
Tip; Use plenty of soft cloths to cover
any panels that are even remotely at risk from falling bolts, screwdrivers etc.
First disconnect the battery. Then it's off with the saddle. When you remove the Allen bolts, firmly push the
riders backpad rearwards until the two white tabs at the front of the saddle
clear the shelter bracket. Then just lift the front up and away. Check that the
rubber spacers under the saddle (where the bolts go through) are still in place.
Tip; Use plenty of soft cloths to cover
any panels that are even remotely at risk from falling bolts, screwdrivers etc.
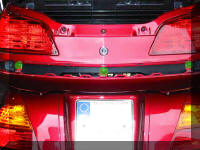
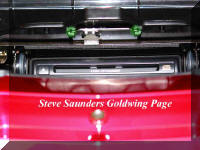
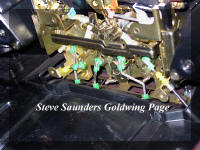 Inside the trunk, remove the five screws holding the lock mechanism cover in
place. Note that the bottom two are fine threads and shouldn't be mixed up with
the self tappers. Disconnect the two saddlebag cables from the mechanism.
Inside the trunk, remove the five screws holding the lock mechanism cover in
place. Note that the bottom two are fine threads and shouldn't be mixed up with
the self tappers. Disconnect the two saddlebag cables from the mechanism.
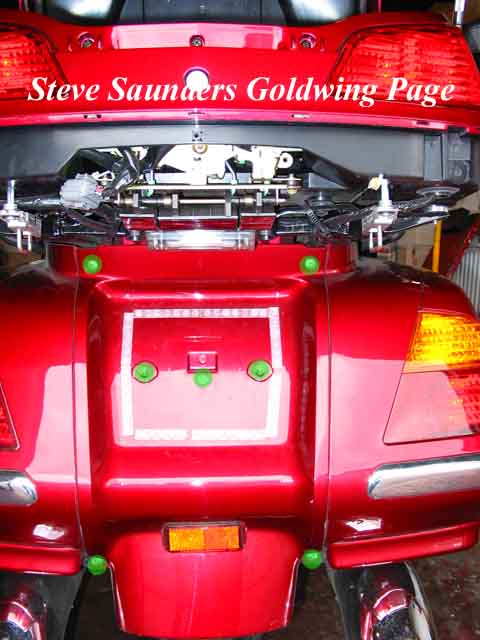
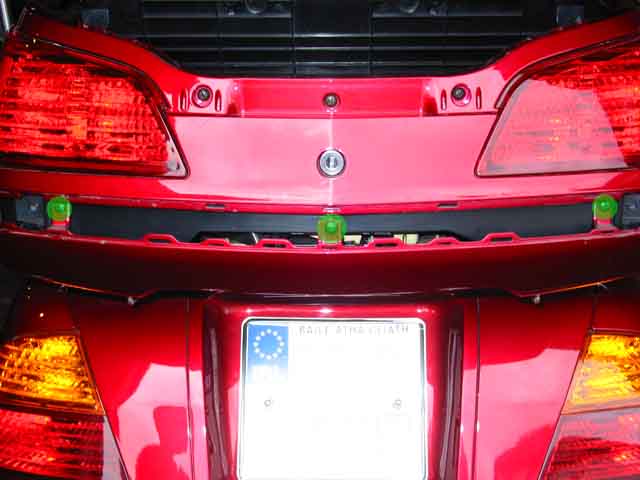
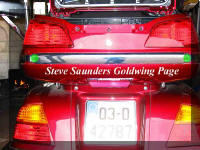
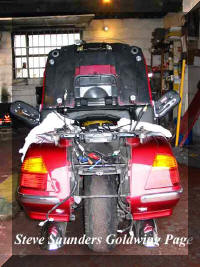
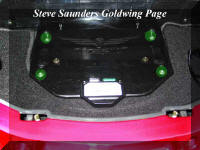
 Number plate and bracket off, then the five bolts holding the rear fender
(all highlighted in green). Unclip the fender.
Tip; The middle bolt is different to the other ones,
don't mix them up.
Number plate and bracket off, then the five bolts holding the rear fender
(all highlighted in green). Unclip the fender.
Tip; The middle bolt is different to the other ones,
don't mix them up.
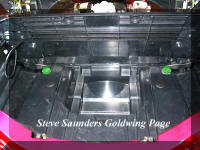
 The trunk mouldings and lower cover have to be removed as well. First picture
shows the side trim screws to be removed (highlighted), the two screws under
them are for the lower cover and should be removed as well. Repeat this on the
other side of the trunk. Pull the side trims off. Second picture shows the
screws to be removed for the long trim to be unclipped. Third picture shows the
remaining screws that hold the lower cover in place. Slide the cover (carefully)
towards the rear of the bike and free of the trunk & saddlebag levers.
The trunk mouldings and lower cover have to be removed as well. First picture
shows the side trim screws to be removed (highlighted), the two screws under
them are for the lower cover and should be removed as well. Repeat this on the
other side of the trunk. Pull the side trims off. Second picture shows the
screws to be removed for the long trim to be unclipped. Third picture shows the
remaining screws that hold the lower cover in place. Slide the cover (carefully)
towards the rear of the bike and free of the trunk & saddlebag levers.

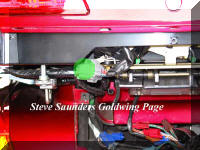
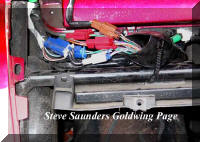
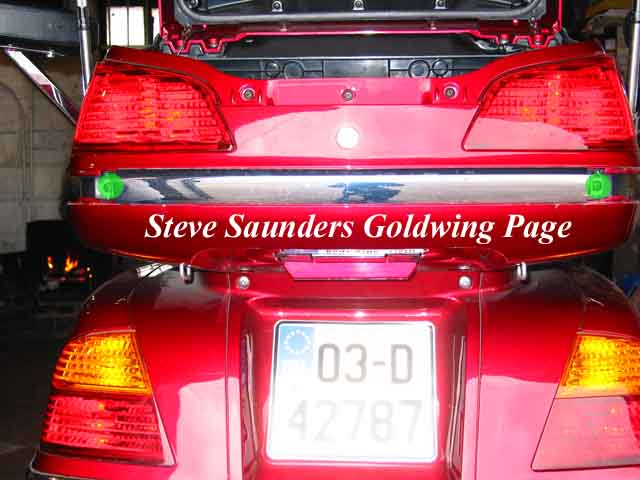
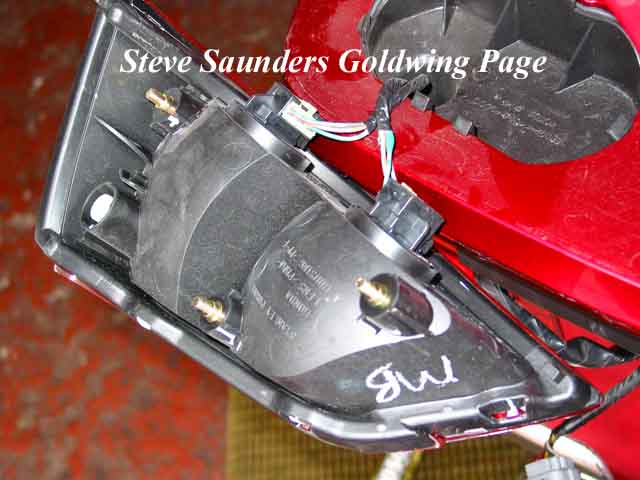
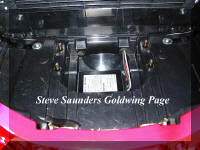
 Remove the three nuts holding the trunk lights in place and pull the lights
out. Disconnect the bulb holders and pull the wires down through the holes in the
trunk. Second picture shows the large connector block to disconnect and picture
three shows the other connectors to be unhooked. You can see where I have the
Electrical Connections accessory (fitted between the blue connector block) that
allows the trunk brake light to act as a running light as well. Unclip any cable
ties that you can see. At this point, if you have the Hondaline passenger audio
controller fitted, you should remove the trunk pockets by taking out the three
screws inside the trunk, right behind each pocket. Last picture shows two of the
trunk mounting bolts removed, the other two are just at the rear and out of view
in this picture. Don't forget to pull out the helmet holder knobs, they usually
pop out easily enough. Take a good look and note how the wires are routed so you
don't get it wrong at reassembly time.
Remove the three nuts holding the trunk lights in place and pull the lights
out. Disconnect the bulb holders and pull the wires down through the holes in the
trunk. Second picture shows the large connector block to disconnect and picture
three shows the other connectors to be unhooked. You can see where I have the
Electrical Connections accessory (fitted between the blue connector block) that
allows the trunk brake light to act as a running light as well. Unclip any cable
ties that you can see. At this point, if you have the Hondaline passenger audio
controller fitted, you should remove the trunk pockets by taking out the three
screws inside the trunk, right behind each pocket. Last picture shows two of the
trunk mounting bolts removed, the other two are just at the rear and out of view
in this picture. Don't forget to pull out the helmet holder knobs, they usually
pop out easily enough. Take a good look and note how the wires are routed so you
don't get it wrong at reassembly time.
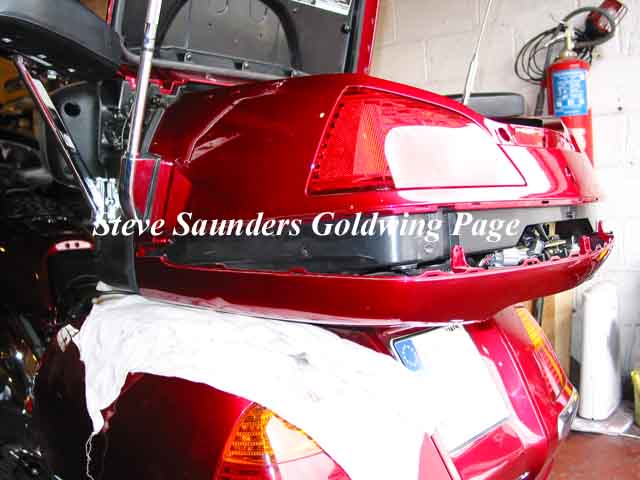
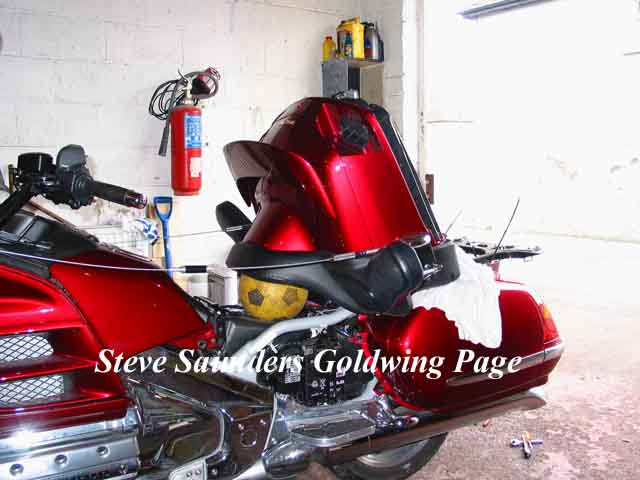
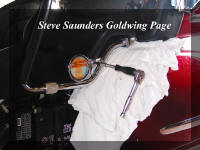
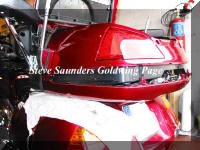
 These two pictures show the trunk tipped forward. I left some of the wires in
place as I was a bit lazy that morning and wanted to save time, so I opted to
tip the trunk forward rather than remove it fully. Our lunchtime football came
in handy and kept the trunk from going too far forward.
These two pictures show the trunk tipped forward. I left some of the wires in
place as I was a bit lazy that morning and wanted to save time, so I opted to
tip the trunk forward rather than remove it fully. Our lunchtime football came
in handy and kept the trunk from going too far forward.
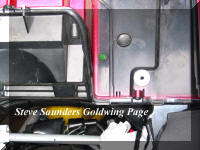
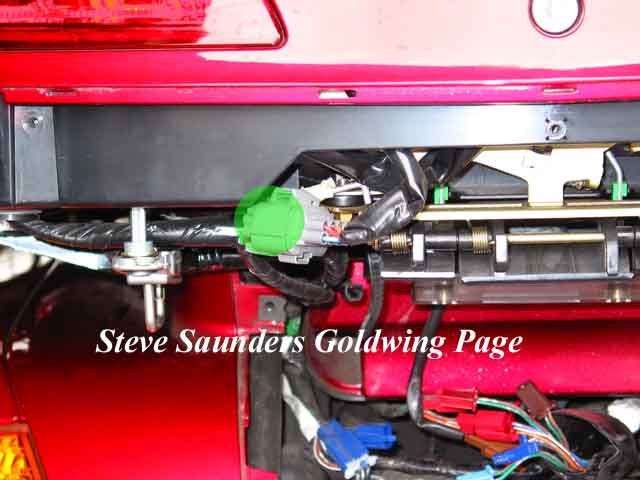
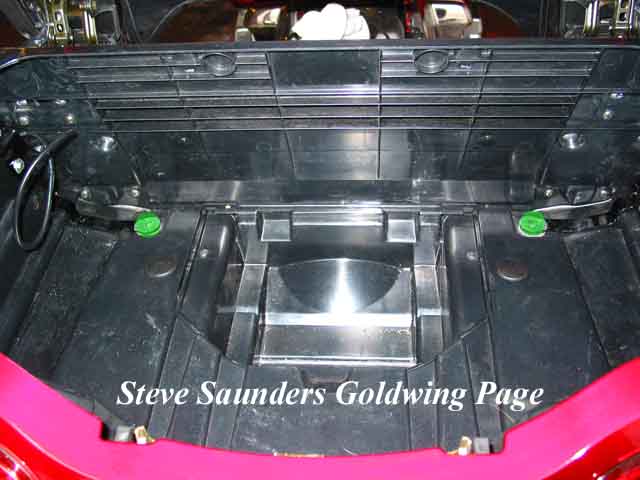
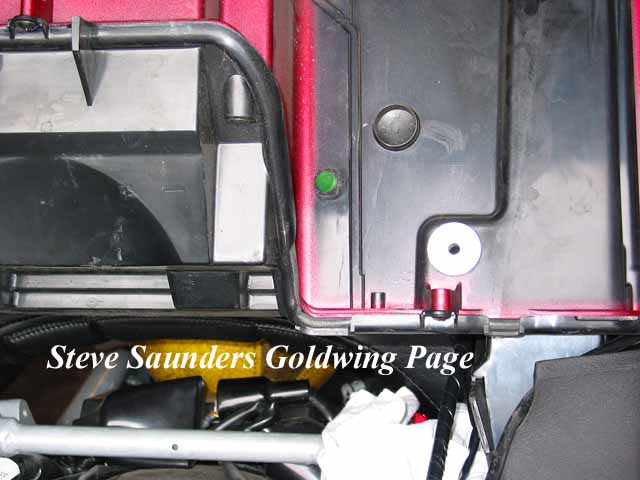
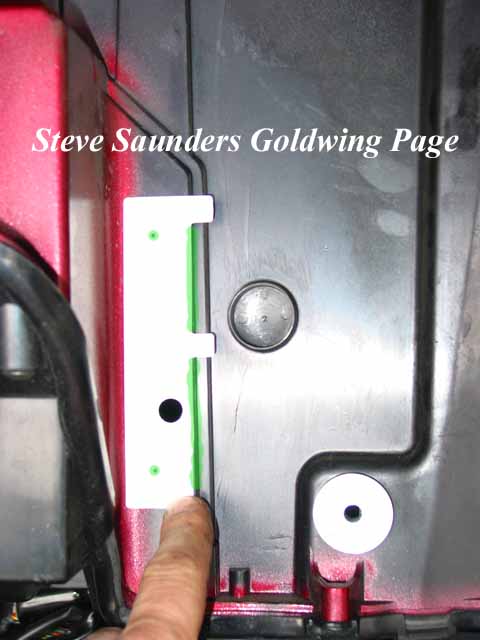
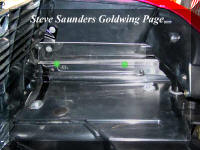
 Standing at the rear of the bike and looking at the trunk base, you can see
the rubber grommet (right side) to be removed in the first picture. Remove the
other grommet on the left side as well. Position the supplied cardboard template
over the grommet hole as shown in the second picture, making sure that the
highlighted side is flush with the edge of the lip as shown. Then use an awl or
punch to mark the spots where you will be drilling the 22mm holes. Repeat on the
left side. Then drill the holes. Don't forget to put the grommets back.
Standing at the rear of the bike and looking at the trunk base, you can see
the rubber grommet (right side) to be removed in the first picture. Remove the
other grommet on the left side as well. Position the supplied cardboard template
over the grommet hole as shown in the second picture, making sure that the
highlighted side is flush with the edge of the lip as shown. Then use an awl or
punch to mark the spots where you will be drilling the 22mm holes. Repeat on the
left side. Then drill the holes. Don't forget to put the grommets back.
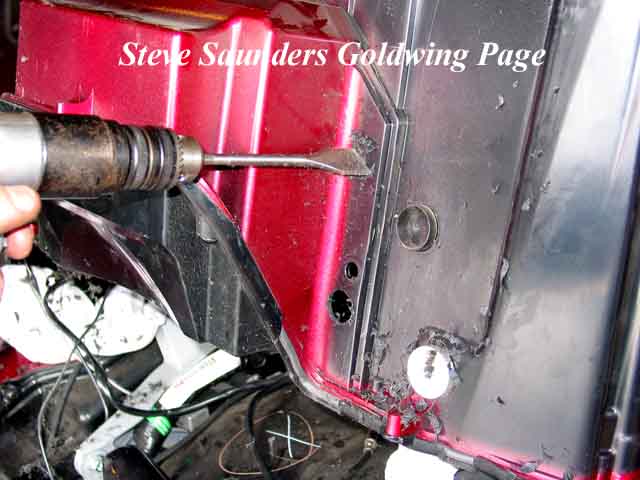
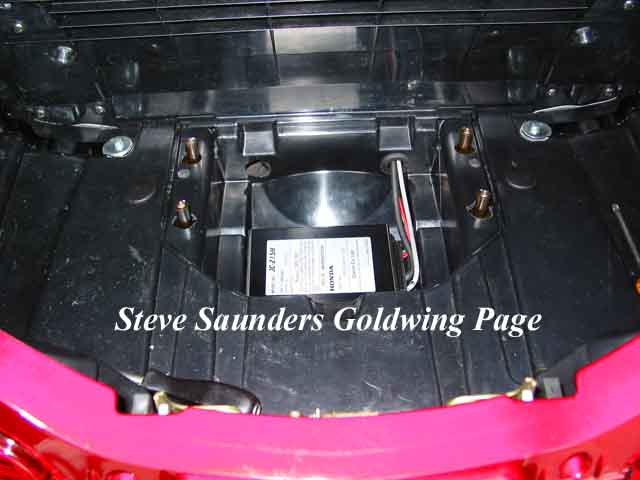
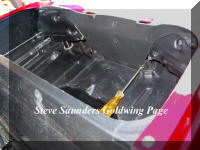
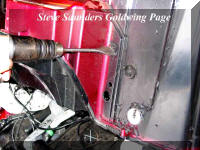
 Now it's time to drill the 28mm hole in the base of the trunk for the players
wire harness to pass through (left side hole). I've also drilled the hole on the
right side as I was fitting the Hondaline CB radio at the same time as the
Hondaline CD
player. Honda have the positions of the holes marked precisely.
Tip; If you are fitting the old type mounts, you
don't need to remove the trunk to drill the hole. With the saddle removed, you
can get a 28mm holesaw and heat it with a butane torch and just melt the hole in
the trunk.
Now it's time to drill the 28mm hole in the base of the trunk for the players
wire harness to pass through (left side hole). I've also drilled the hole on the
right side as I was fitting the Hondaline CB radio at the same time as the
Hondaline CD
player. Honda have the positions of the holes marked precisely.
Tip; If you are fitting the old type mounts, you
don't need to remove the trunk to drill the hole. With the saddle removed, you
can get a 28mm holesaw and heat it with a butane torch and just melt the hole in
the trunk.
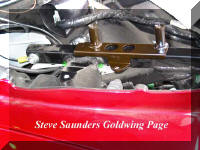
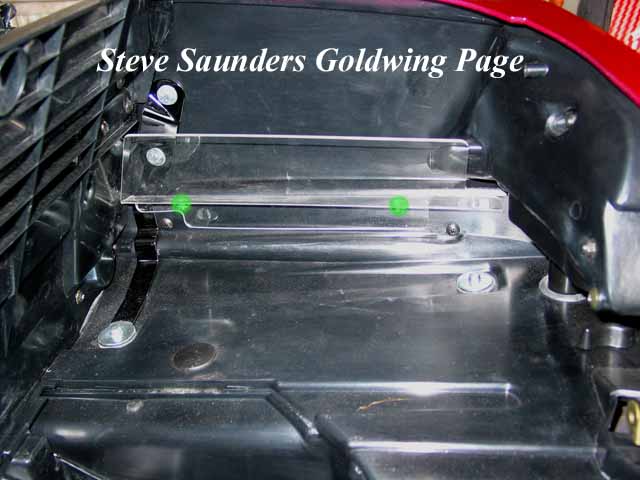
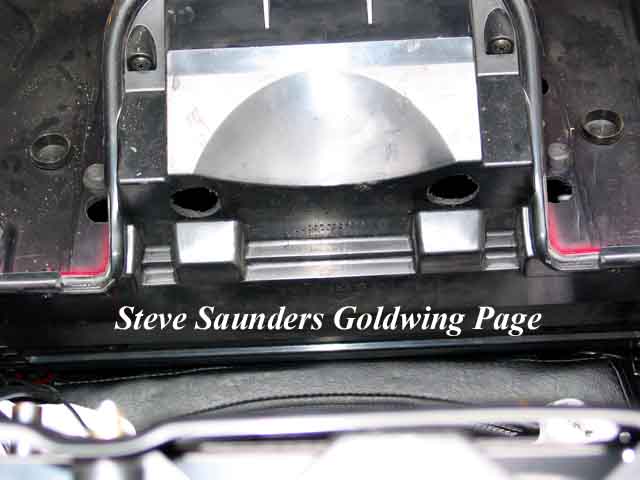
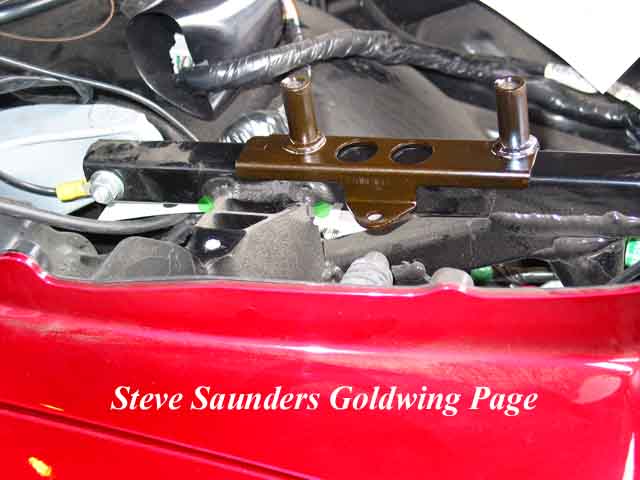
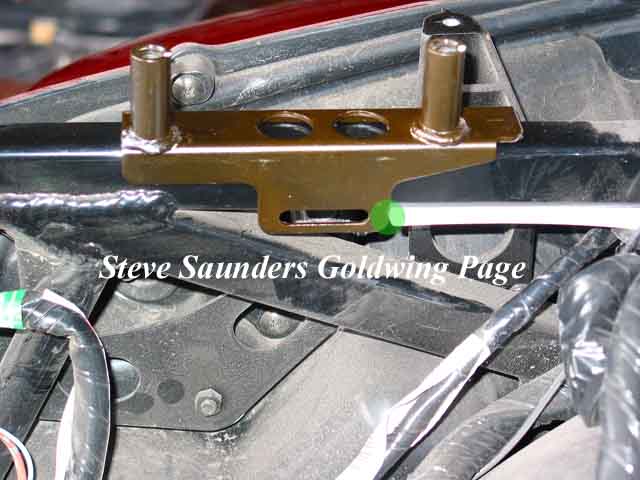
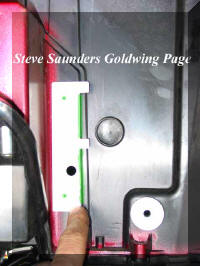
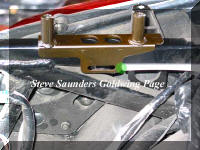 Time to fit the Hondaline player mounting brackets. First picture shows the
left side bracket sitting loosely and below that you can just see the cardboard
F template sitting astride the frame member. Second picture is the view from the
inside and you can see better where the bracket must touch the template. Make
sure the bracket is fitted the right way around as shown, otherwise it won't fit
through the 22mm holes you drilled earlier. Fit the clamp to the bottom of the
bracket and bolt it in position. Repeat for the bracket on the right side.
Time to fit the Hondaline player mounting brackets. First picture shows the
left side bracket sitting loosely and below that you can just see the cardboard
F template sitting astride the frame member. Second picture is the view from the
inside and you can see better where the bracket must touch the template. Make
sure the bracket is fitted the right way around as shown, otherwise it won't fit
through the 22mm holes you drilled earlier. Fit the clamp to the bottom of the
bracket and bolt it in position. Repeat for the bracket on the right side.
Refit the trunk and connect all the wires you removed before going any
further. Before you bolt the trunk down, check that all the rear lights and
saddlebag latches function properly and that all the wires are routed properly, you really don't want to have to take it all apart again over
something silly later on!
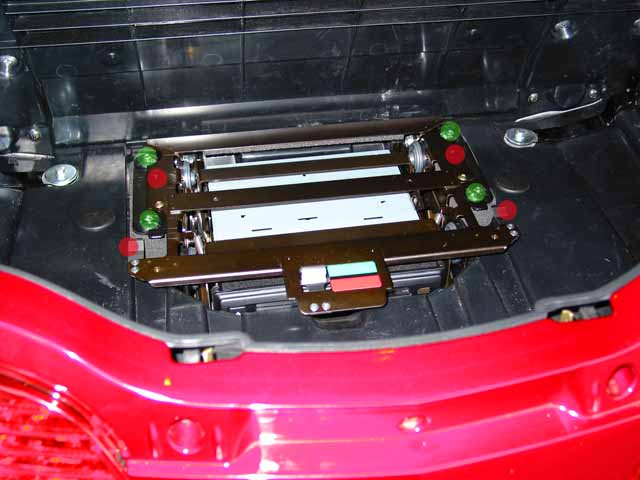
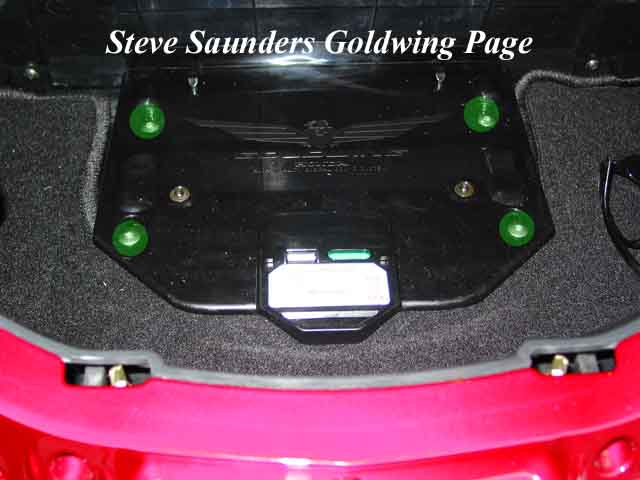
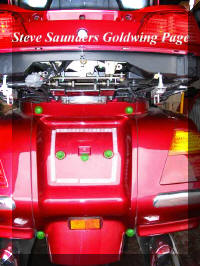
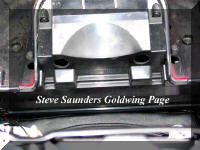
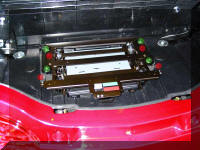 With the trunk refitted, pop the Hondaline CD player and cage into place. The CD
unit is easy to screw into the cage so no need for pictures of that. Use the big
chromed Allen bolts (highlighted in green) to screw the cage onto the visible
mounting brackets (now you know why you had to drill the four 22mm holes) that
you fitted earlier. The two small brass-coloured self tappers just behind the
front chrome bolts will need to be removed and binned for the unit to open. Put
a small dab of grease on the spring clip each side and on the two holes
(highlighted in red) for the cover to slide along. You can see the CB radio that
I was fitting as well. The Hondaline CB wire harness goes through the right side
hole as shown in the first picture and the CD player harness goes through the
left one.
With the trunk refitted, pop the Hondaline CD player and cage into place. The CD
unit is easy to screw into the cage so no need for pictures of that. Use the big
chromed Allen bolts (highlighted in green) to screw the cage onto the visible
mounting brackets (now you know why you had to drill the four 22mm holes) that
you fitted earlier. The two small brass-coloured self tappers just behind the
front chrome bolts will need to be removed and binned for the unit to open. Put
a small dab of grease on the spring clip each side and on the two holes
(highlighted in red) for the cover to slide along. You can see the CB radio that
I was fitting as well. The Hondaline CB wire harness goes through the right side
hole as shown in the first picture and the CD player harness goes through the
left one.
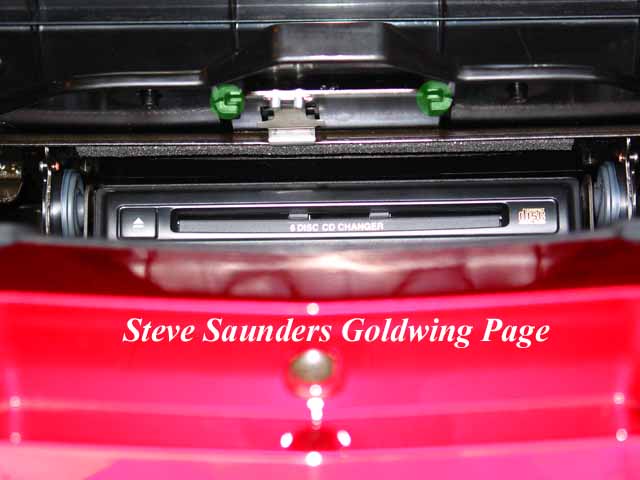
 The plastic cover for the unit has to slot in position as shown in the left
picture. Once it's in place you can close the unit and fit the large chrome
Allen bolts. Job done.
Tip; Before you bolt the cover down, make sure that
the hinged flap (where it meets the trunk) is turned upwards as shown in the
second picture, rather than down, or it will most certainly break off in record
time.
The plastic cover for the unit has to slot in position as shown in the left
picture. Once it's in place you can close the unit and fit the large chrome
Allen bolts. Job done.
Tip; Before you bolt the cover down, make sure that
the hinged flap (where it meets the trunk) is turned upwards as shown in the
second picture, rather than down, or it will most certainly break off in record
time.
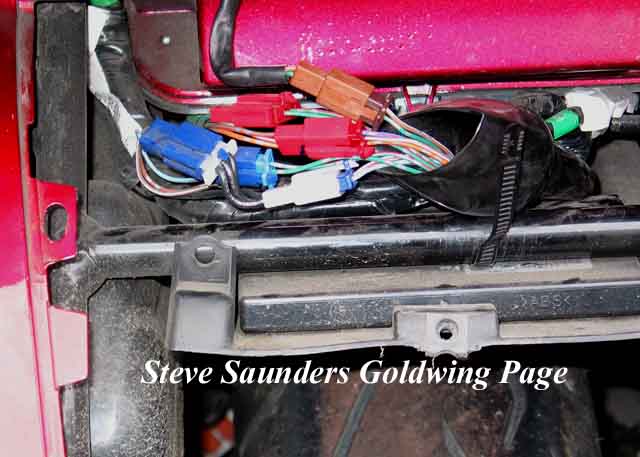
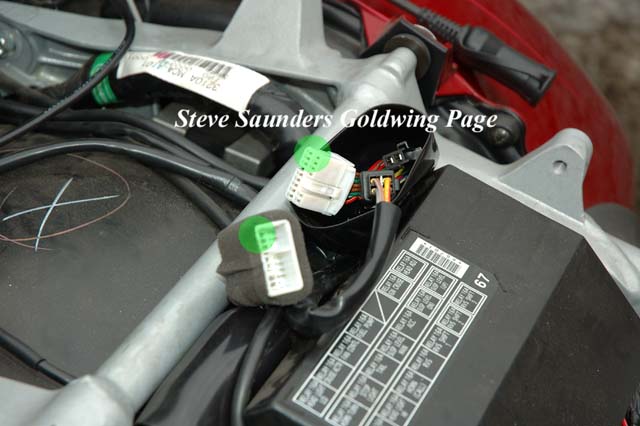
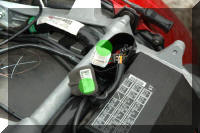 The highlighted connector in the rubber boot is where the Hondaline CD player
plugs into, the other highlighted foam covered plug is the one coming from the
CD player that plugs into it. When you've connected everything up, test the
operation of the CD player before refitting the saddle.
The highlighted connector in the rubber boot is where the Hondaline CD player
plugs into, the other highlighted foam covered plug is the one coming from the
CD player that plugs into it. When you've connected everything up, test the
operation of the CD player before refitting the saddle.
Bikers Workshop
Menu
Home
 First disconnect the battery. Then it's off with the saddle. When you remove the Allen bolts, firmly push the
riders backpad rearwards until the two white tabs at the front of the saddle
clear the shelter bracket. Then just lift the front up and away. Check that the
rubber spacers under the saddle (where the bolts go through) are still in place.
Tip; Use plenty of soft cloths to cover
any panels that are even remotely at risk from falling bolts, screwdrivers etc.
First disconnect the battery. Then it's off with the saddle. When you remove the Allen bolts, firmly push the
riders backpad rearwards until the two white tabs at the front of the saddle
clear the shelter bracket. Then just lift the front up and away. Check that the
rubber spacers under the saddle (where the bolts go through) are still in place.
Tip; Use plenty of soft cloths to cover
any panels that are even remotely at risk from falling bolts, screwdrivers etc.