Bikers Workshop Series
Part 13;
Fitting a Utopia Backrest to a GL1800.
By Steve Saunders.
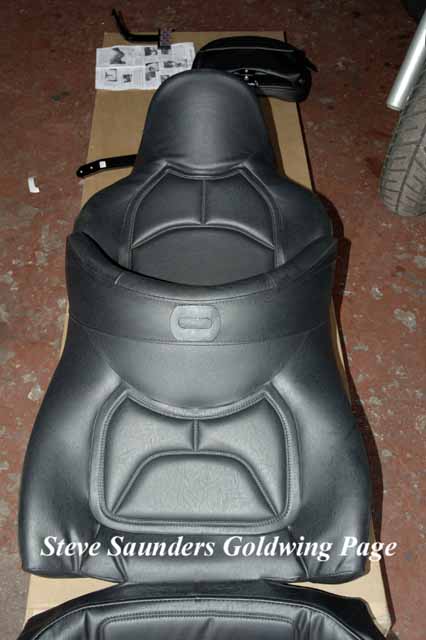
Like many other Goldwing owners, I've bought a riders
backrest for every Goldwing I have owned and there is one fitted to my current
(and sixth) Goldwing, a 2003 GL1800. I wouldn't be without one and it's usually
the first accessory I buy, no matter what model Goldwing I own at the time. I
usually buy the Markland type with the chrome hoop that bolts over the grab
rails on the bike. After a while I realized that the side rails on the hoop tend
to push the passengers legs outwards, making for some discomfort on long rides.
This was never a problem on any GL1500 I had, but the much wider saddle on the
GL1800 is made even wider by the rails on the backrest. I decided that I would
try a Utopia backrest for a change, if only to relieve the nagging coming
through my helmet headset!
The main thing
holding most Goldwing owners back from buying a Utopia is the fact that you have
to cut into the saddle to fit the backrest bar, but there comes a point
when you just go and take a chance. The installation really is simple and I've
prepared this tutorial complete with plenty of pictures that should help you out
as you go.
Click the thumbnails for a bigger image.
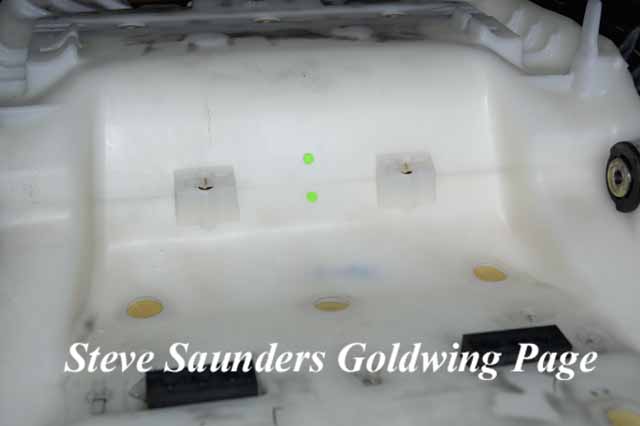
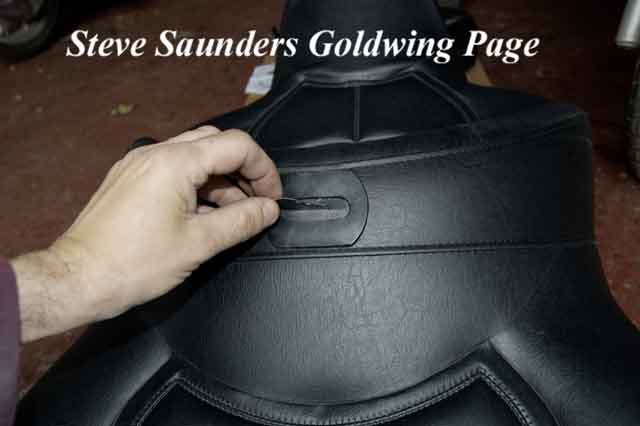
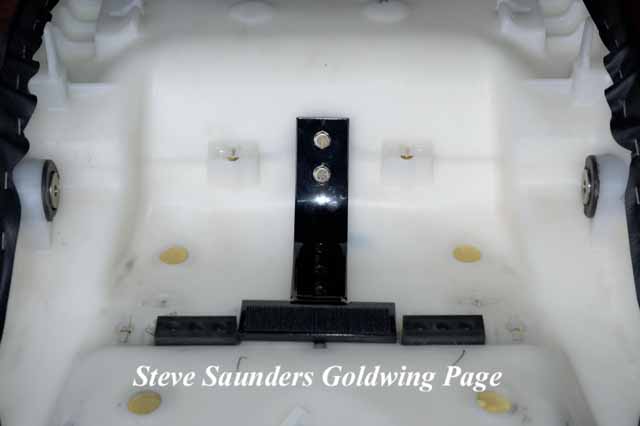
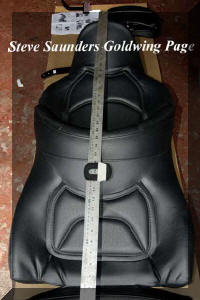
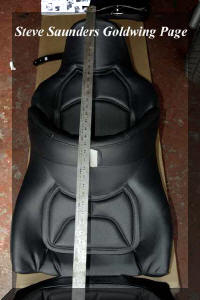
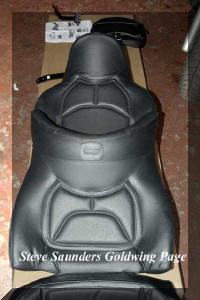
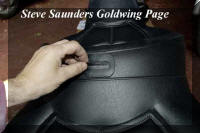
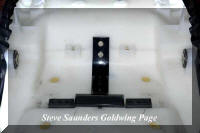
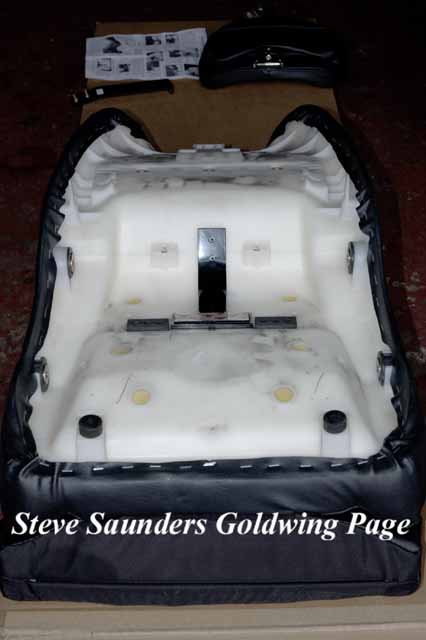
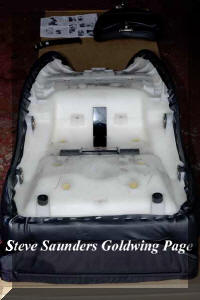 First thing is to remove the saddle, then turn it upside down and place the
Utopia T bracket as shown. It's easy to centre the bracket, then just mark the
saddle base through the two holes with a marker or better still a press the
marks with a pointed awl or thin screwdriver (the drill bit won't slide off the
mark this way).
First thing is to remove the saddle, then turn it upside down and place the
Utopia T bracket as shown. It's easy to centre the bracket, then just mark the
saddle base through the two holes with a marker or better still a press the
marks with a pointed awl or thin screwdriver (the drill bit won't slide off the
mark this way).
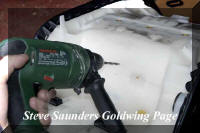
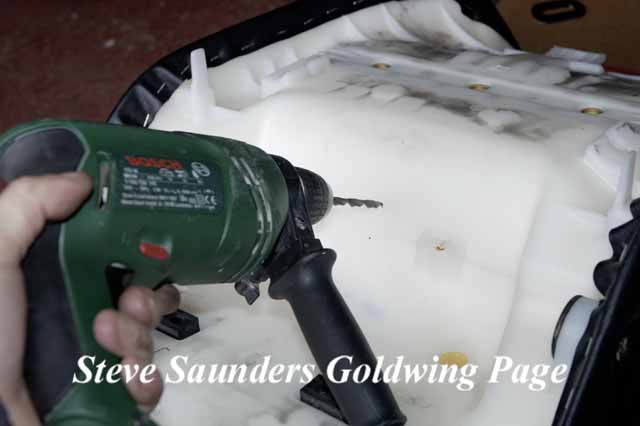
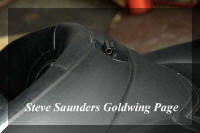
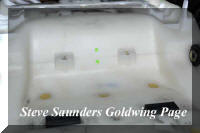 Now drill the two holes with a 7mm drill bit. Be careful not to go right
through the foam and out through the saddle cover as well! I've highlighted the
two holes in the second picture as they are hard to make out against the white
foam inside the saddle.
Now drill the two holes with a 7mm drill bit. Be careful not to go right
through the foam and out through the saddle cover as well! I've highlighted the
two holes in the second picture as they are hard to make out against the white
foam inside the saddle.
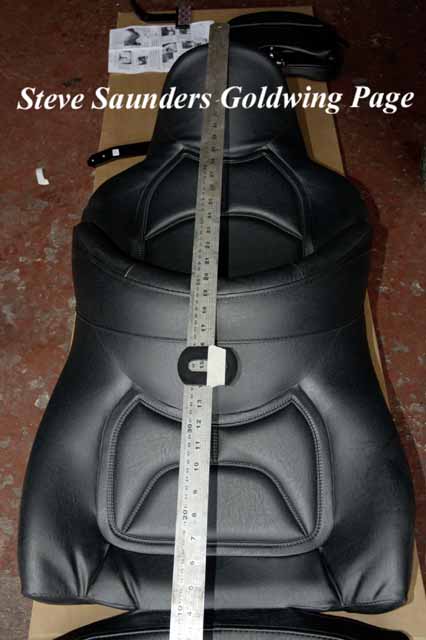
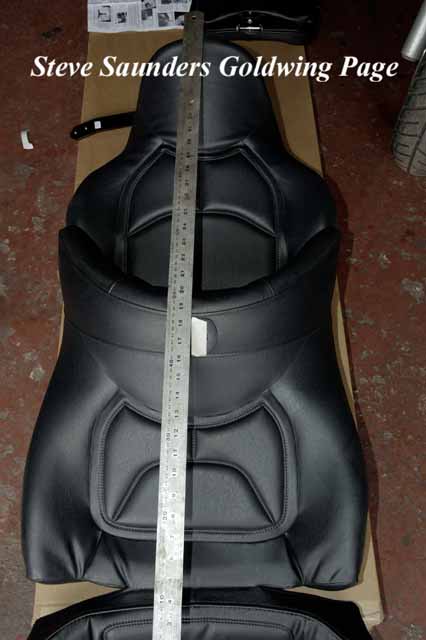
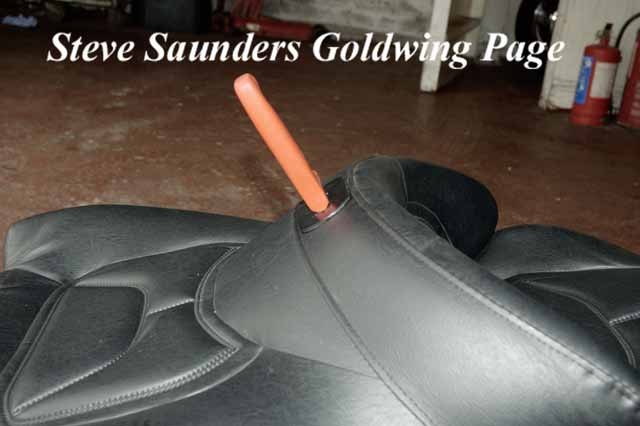
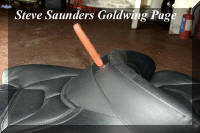
 Next thing is to stick the supplied plastic pad into it's correct position on
the saddle. You have to centre it as well as placing it 25mm from the face of
the riders back pad. To centre it really well, run a straight edge (thin piece
of wood or a rule as shown) along the centre lines on the front and back flat
(sitting) parts of the saddle cover. I ran a piece of tape across the middle of
the plastic pad before sticking it in place under the steel rule. As you can
see, this results in a properly positioned pad.
Next thing is to stick the supplied plastic pad into it's correct position on
the saddle. You have to centre it as well as placing it 25mm from the face of
the riders back pad. To centre it really well, run a straight edge (thin piece
of wood or a rule as shown) along the centre lines on the front and back flat
(sitting) parts of the saddle cover. I ran a piece of tape across the middle of
the plastic pad before sticking it in place under the steel rule. As you can
see, this results in a properly positioned pad.
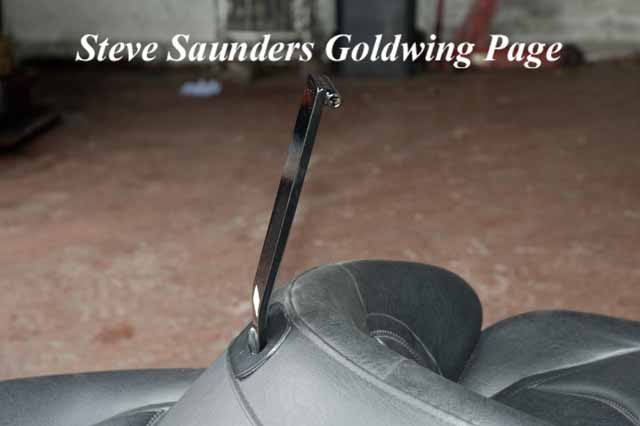
 Before taking your mothers best steak knife to the saddle, I think it's a
good idea to slit the saddle cover with a sharp craft blade first, so that you
get a very clean cut with no saw marks. Then get mothers best and cut into the
foam at an angle similar to that shown in the second picture here. You have to
go at this angle to get past the shallow pillion part of the base and down past
the holes you drilled earlier. Cut up and down several times, removing some of
the loose foam and making room for the backrest bar.
Before taking your mothers best steak knife to the saddle, I think it's a
good idea to slit the saddle cover with a sharp craft blade first, so that you
get a very clean cut with no saw marks. Then get mothers best and cut into the
foam at an angle similar to that shown in the second picture here. You have to
go at this angle to get past the shallow pillion part of the base and down past
the holes you drilled earlier. Cut up and down several times, removing some of
the loose foam and making room for the backrest bar.
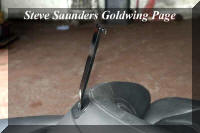
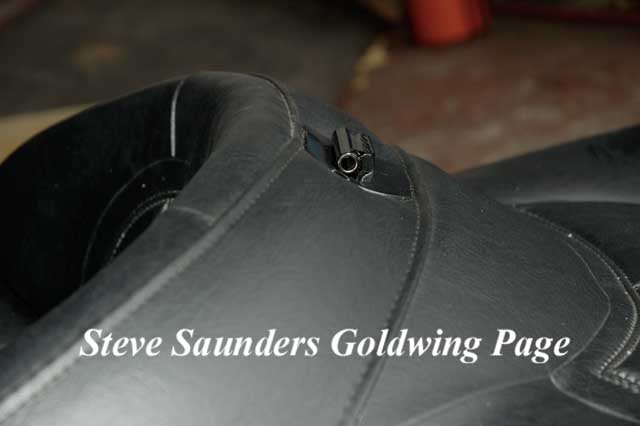
 Insert the backrest bar as shown (ie the welded tube for the bolt at the
front) and wiggle it downwards until the holes in the bar line up with the T
bracket. In the second picture here you can see me using a screwdriver to line
up one of the holes while threading the other bolt in loosely. Remove the
screwdriver and put in the second bolt and tighten the two of them. The third
picture shows the T bracket just before I tightened the bolts. Note the Velcro
pad in the second picture, you need to pull off one half and put it aside for
later.
Insert the backrest bar as shown (ie the welded tube for the bolt at the
front) and wiggle it downwards until the holes in the bar line up with the T
bracket. In the second picture here you can see me using a screwdriver to line
up one of the holes while threading the other bolt in loosely. Remove the
screwdriver and put in the second bolt and tighten the two of them. The third
picture shows the T bracket just before I tightened the bolts. Note the Velcro
pad in the second picture, you need to pull off one half and put it aside for
later.
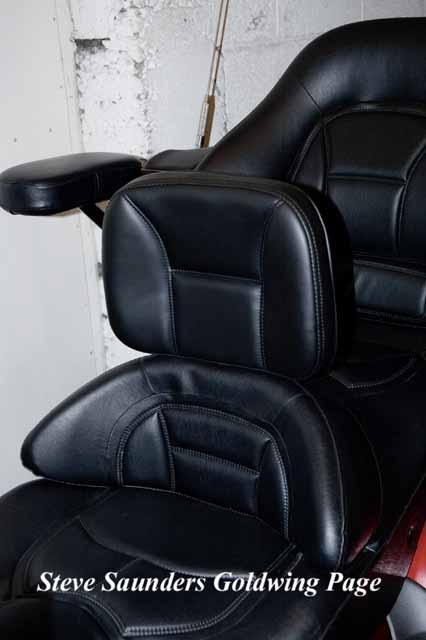
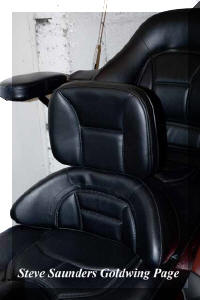
 Here is a couple of shots of the backrest bar fitted. You can take this
opportunity to lift the plastic pad a bit and settling the saddle cover so that
you don't have unsightly creases.
Here is a couple of shots of the backrest bar fitted. You can take this
opportunity to lift the plastic pad a bit and settling the saddle cover so that
you don't have unsightly creases.
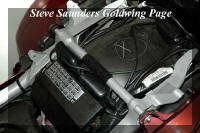
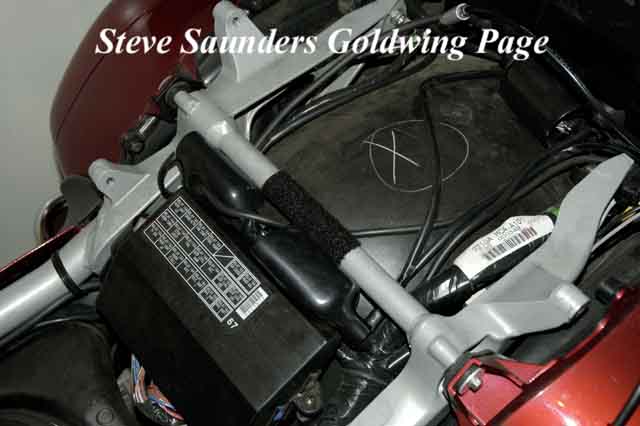
 The first picture here shows the Velcro pad you saved earlier stuck onto the
frame crossmember behind the relay box. This apparently adds to the stability of
the backrest. Ensure that no wires are draped across the top of the crossmember
or they will be damaged by the T bar when you fit the seat, with possibly very
interesting results!
The first picture here shows the Velcro pad you saved earlier stuck onto the
frame crossmember behind the relay box. This apparently adds to the stability of
the backrest. Ensure that no wires are draped across the top of the crossmember
or they will be damaged by the T bar when you fit the seat, with possibly very
interesting results!
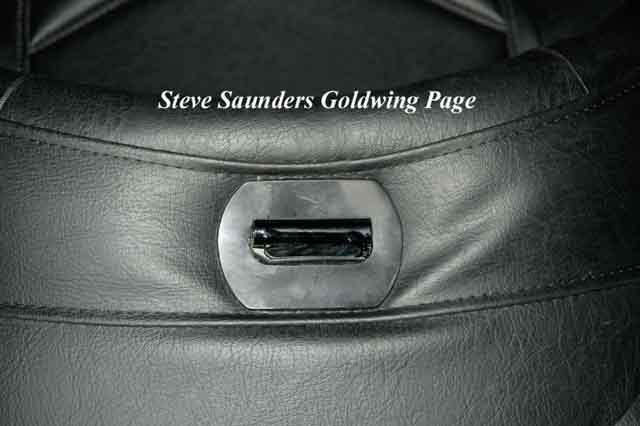
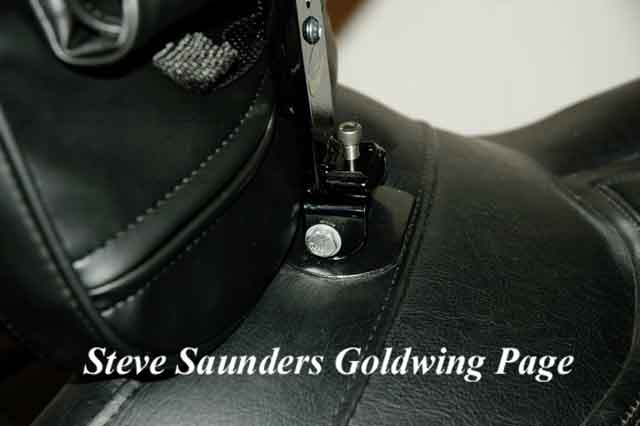
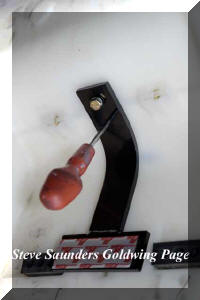
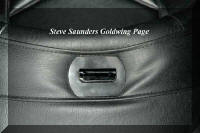
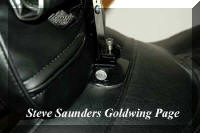
 You can see the actual backrest fitted to the bar in the first picture. I put
a plastic washer under the bolt head and one under the nut as well to prevent
them damaging the powder coated finish (no washers were supplied for this with
my backrest). I also replaced the nut with a self locking one to prevent the
backrest pad from flapping about after five minutes of use. The last picture
shows the completed job.
You can see the actual backrest fitted to the bar in the first picture. I put
a plastic washer under the bolt head and one under the nut as well to prevent
them damaging the powder coated finish (no washers were supplied for this with
my backrest). I also replaced the nut with a self locking one to prevent the
backrest pad from flapping about after five minutes of use. The last picture
shows the completed job.
Bikers Workshop
Menu
Home
 First thing is to remove the saddle, then turn it upside down and place the
Utopia T bracket as shown. It's easy to centre the bracket, then just mark the
saddle base through the two holes with a marker or better still a press the
marks with a pointed awl or thin screwdriver (the drill bit won't slide off the
mark this way).
First thing is to remove the saddle, then turn it upside down and place the
Utopia T bracket as shown. It's easy to centre the bracket, then just mark the
saddle base through the two holes with a marker or better still a press the
marks with a pointed awl or thin screwdriver (the drill bit won't slide off the
mark this way).