Bikers Workshop Series
Part 3;
Fitting A GL1800 Windshield Garnish.
By Steve Saunders.
Removal of the windshield garnish on a GL1800 Goldwing is
usually undertaken because the bikes owner wants to replace the original painted
item with a chrome one, or because the screen itself has to be removed. Honda
tell us that to remove the garnish, we need to remove both mirrors, speaker
grilles, dash edge trim and the whole meter panel. In fact, you don't have to
remove any of this stuff and the garnish can be removed leaving all those other
items in place. You do need to be a bit dextrous though, and I've showed the
Honda method as well as describing the shortcuts that I usually use. You can
make you own minds up.
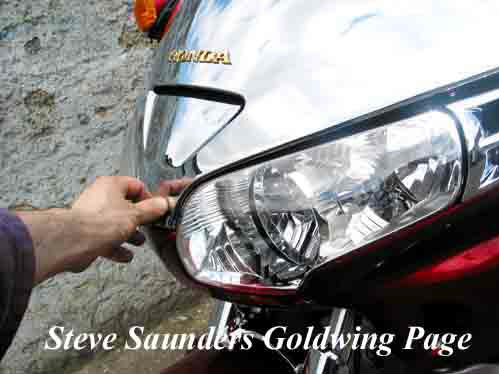
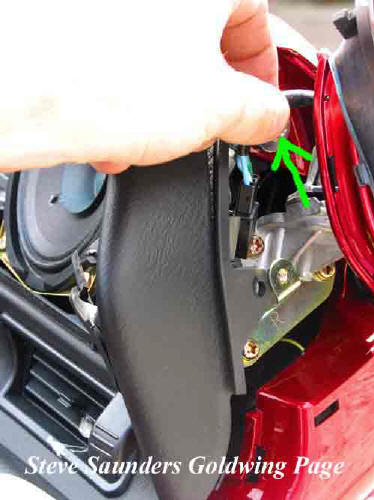 To get to the shortcut, look at the picture here. The green arrow is pointing
at the 10mm head bolt that holds the screen garnish to the bike. There is one on
the left side of the bike as well. To get at the bolts, just peel back the
mirror rubbers and wangle a spanner in. Don't lose the mounting rubber under
each bolt.
To get to the shortcut, look at the picture here. The green arrow is pointing
at the 10mm head bolt that holds the screen garnish to the bike. There is one on
the left side of the bike as well. To get at the bolts, just peel back the
mirror rubbers and wangle a spanner in. Don't lose the mounting rubber under
each bolt.
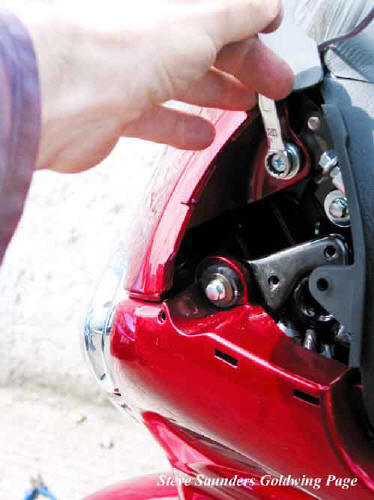 This is the bolt on the left side, mirror removed so you can see it better.
See the trouble I go to for you ungrateful sods!
This is the bolt on the left side, mirror removed so you can see it better.
See the trouble I go to for you ungrateful sods!
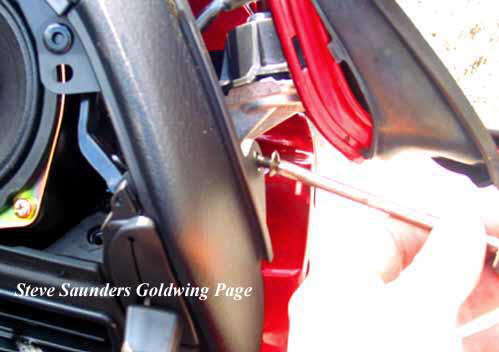
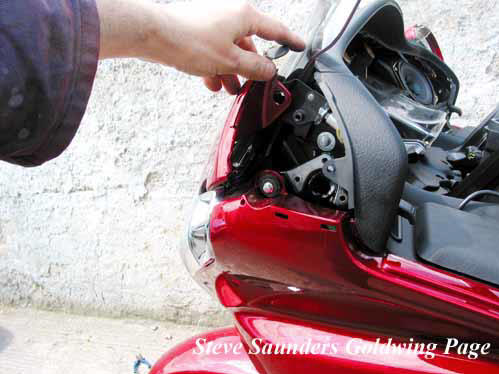 Having removed the bolts, pull the garnish out to the side of the bike for the
mounting hole to clear the black mounting stud and then upwards to dislodge the
garnish from the upper grommet just below my grubby index finger.
Then go to the front of the Goldwing and pull the lower centre part of the
garnish towards you, ie in the direction of the front wheel. That's the garnish
removed, refitting is just the reverse of what I've explained.
Having removed the bolts, pull the garnish out to the side of the bike for the
mounting hole to clear the black mounting stud and then upwards to dislodge the
garnish from the upper grommet just below my grubby index finger.
Then go to the front of the Goldwing and pull the lower centre part of the
garnish towards you, ie in the direction of the front wheel. That's the garnish
removed, refitting is just the reverse of what I've explained.
For those who enjoy doing things the hard way, read on;
 A strip of tape prevents damage to the dash while you pry the speaker grille
off.
A strip of tape prevents damage to the dash while you pry the speaker grille
off.
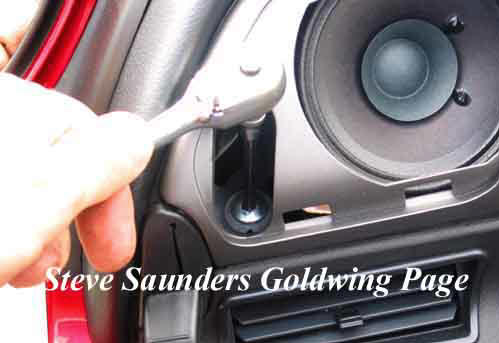 The meter panel bolt is shown here, there is a plastic push-clip just above the
speaker as well which I forgot to include in the photo. Same on both sides of
the meter panel. Pull the whole panel backwards towards the saddle and
disconnect the wiring connection for the meter display, located just under the
right side and in front of the ignition.
The meter panel bolt is shown here, there is a plastic push-clip just above the
speaker as well which I forgot to include in the photo. Same on both sides of
the meter panel. Pull the whole panel backwards towards the saddle and
disconnect the wiring connection for the meter display, located just under the
right side and in front of the ignition.
 If you go to the very first picture on this page, you will see the three brass
coloured mirror screws and plate. You can also see the mirror wire connector
block which you will disconnect. Where the plastic dash side piece screws to the
plate in the picture here, you need to remove the screw shown as dash side piece
has to be unscrewed and pulled back a bit for the plate to clear it.
If you go to the very first picture on this page, you will see the three brass
coloured mirror screws and plate. You can also see the mirror wire connector
block which you will disconnect. Where the plastic dash side piece screws to the
plate in the picture here, you need to remove the screw shown as dash side piece
has to be unscrewed and pulled back a bit for the plate to clear it.
 Push the new garnish onto the two grommets at the very lower front of it. Then
push the two top side parts down into the grommets, effectively doing the
reverse of what you seen when removing the existing garnish. Make sure that the
two top mounting holes are lined up properly before replacing the mounting bolts
and rubbers.
Push the new garnish onto the two grommets at the very lower front of it. Then
push the two top side parts down into the grommets, effectively doing the
reverse of what you seen when removing the existing garnish. Make sure that the
two top mounting holes are lined up properly before replacing the mounting bolts
and rubbers.
 Job
done. A quick clean-up to remove my grubby paw prints and another Goldwing was
on it's way.
Job
done. A quick clean-up to remove my grubby paw prints and another Goldwing was
on it's way.
Bikers Workshop
Menu
Home