Bikers Workshop Series
Part 3;
Fitting Hondaline GL1800 Rotor Covers.
By Steve Saunders.
Having gone to the expense of buying Hondaline rotor
(brake disc) covers for your GL1800 Goldwing, you will no doubt have noticed
that they are made of steel. Plastic aftermarket covers are available too and I
wonder why Honda chose steel for their items. The GL1800 design team did a great
job of keeping weight down on the Goldwing and surely plastic covers similar to
the GL1500 would have been more appropriate.
Having said all that, Honda chrome is generally considered
to be of better quality than most aftermarket stuff. It doesn't rub through at
the first sign of a polishing cloth and doesn't lose it's shine during the
winter months either, so I think the extra expense of Honda chrome is well worth
it.
The only downside to the Honda rotor covers is that the
unpolished inner surfaces will be more prone to damage from stone chips etc. and
will eventually rust. Cleaning them is impossible
without removal. My own way of overcoming this is described below.
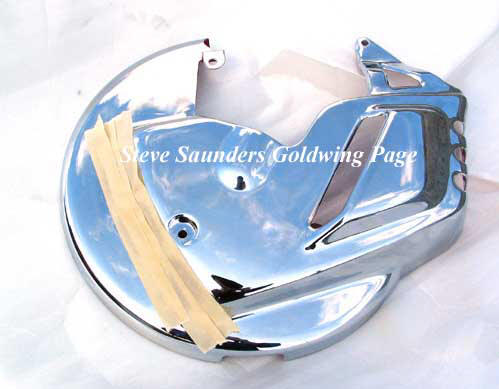 If I am asked to fit Hondaline covers to a GL1800, I usually encourage the owner
of the Goldwing to paint the inner surfaces so as to give much needed protection
against the dreaded tinworm. In the picture here, I've started to mask all the
holes from the outside to keep the primer and paint off the chrome. Note that
the mounting hole at top right is for the long 8mm head bolt when fitting later
on.
If I am asked to fit Hondaline covers to a GL1800, I usually encourage the owner
of the Goldwing to paint the inner surfaces so as to give much needed protection
against the dreaded tinworm. In the picture here, I've started to mask all the
holes from the outside to keep the primer and paint off the chrome. Note that
the mounting hole at top right is for the long 8mm head bolt when fitting later
on.
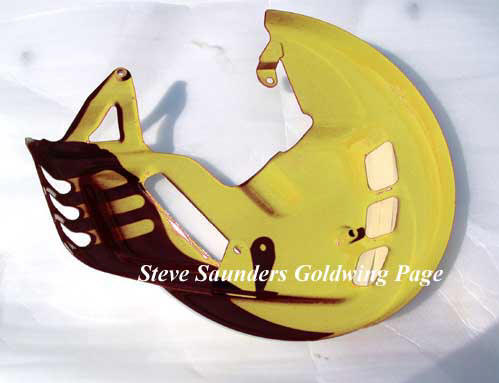 This is the etch primer coat after spraying. Etch primer is used on bare
steel or unpolished chrome as it gets a better grip on the surface and will not
fall off like standard primer. I sprayed one coat of etch and followed it with a
coat of grey primer.
This is the etch primer coat after spraying. Etch primer is used on bare
steel or unpolished chrome as it gets a better grip on the surface and will not
fall off like standard primer. I sprayed one coat of etch and followed it with a
coat of grey primer.
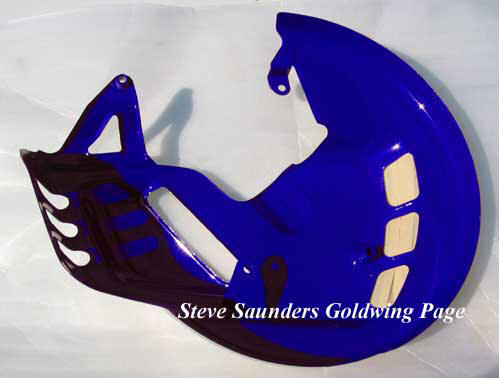 The colour of the final coat isn't important, but this owner asked me to
spray them blue, as his GL1800 is Illusion Blue. I just used a standard solid
blue colour as it's very difficult to see the inner surfaces when the covers are
on the bike.
The colour of the final coat isn't important, but this owner asked me to
spray them blue, as his GL1800 is Illusion Blue. I just used a standard solid
blue colour as it's very difficult to see the inner surfaces when the covers are
on the bike.
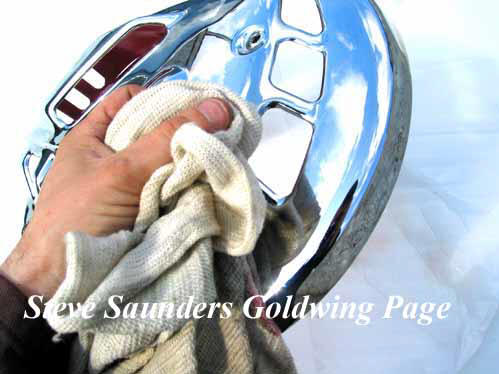 After the paint is dry, use some 2k or cellulose thinners to clean off any
paint that is on the chromed side. Taking your time will ensure that the paint
and chrome lines meet precisely at the edges without overlapping. You should do
this after the paint dries but before it gets too hard, otherwise it won't come
off too easily. If you used 2k for the final coats, then 24 hours after spraying
will be fine.
After the paint is dry, use some 2k or cellulose thinners to clean off any
paint that is on the chromed side. Taking your time will ensure that the paint
and chrome lines meet precisely at the edges without overlapping. You should do
this after the paint dries but before it gets too hard, otherwise it won't come
off too easily. If you used 2k for the final coats, then 24 hours after spraying
will be fine.
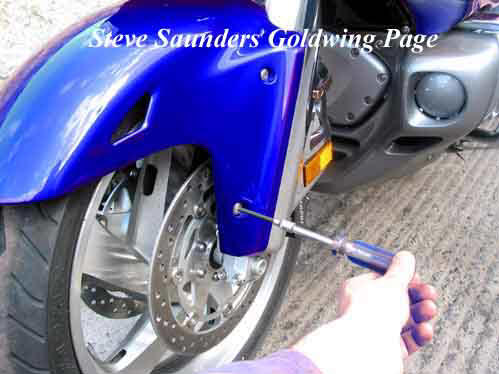 Taking off the front section of the mudguard is easy, just use a 6mm Allen
key to remove the four bolts. Note that the bolts with the rubber washers are
fitted to the bottom mounting holes in each side.
Taking off the front section of the mudguard is easy, just use a 6mm Allen
key to remove the four bolts. Note that the bolts with the rubber washers are
fitted to the bottom mounting holes in each side.
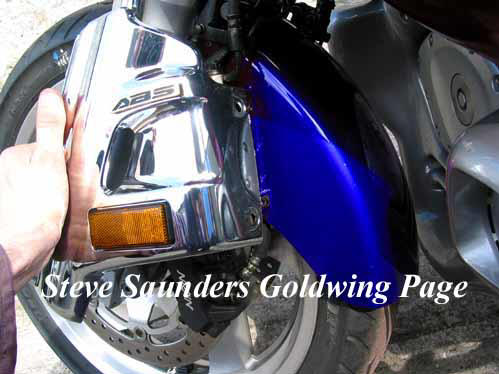 The rear
covers come off by removing the two Allen bolts (these are shorter than the
bolts in the front mudguard section), you can see the two holes at the rear
where the cover meets the rear section of the mudguard. The new rotor covers are
a straight bolt on job (no need for pictures of that) and you only need to note
that the two long 8mm head bolts supplied should be fitted to the mounting hole
as I described in the very first picture above. On non-ABS models, there is a
smaller bolt fitted to the right mounting hole instead. As usual, I apply a dab
of copper grease to the bolts.
The rear
covers come off by removing the two Allen bolts (these are shorter than the
bolts in the front mudguard section), you can see the two holes at the rear
where the cover meets the rear section of the mudguard. The new rotor covers are
a straight bolt on job (no need for pictures of that) and you only need to note
that the two long 8mm head bolts supplied should be fitted to the mounting hole
as I described in the very first picture above. On non-ABS models, there is a
smaller bolt fitted to the right mounting hole instead. As usual, I apply a dab
of copper grease to the bolts.
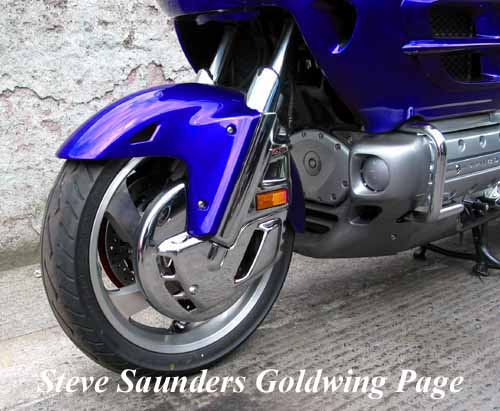 Job done. Actual fitting time is only about ten minutes. If you don't have
access to spraying equipment, why not ask your local spray painter to do it for
you? It shouldn't cost very much. Alternatively, you can just get a tin of
Hammerite and brush it on, the finish won't be as good but as it will be hard to
see then who cares? The method I described in this article is one I used on my
2001 GL1800 and the bikes new owner assures me that the rotor covers on that one
are still perfect. I've since used it on my 2003 GL1800.
Job done. Actual fitting time is only about ten minutes. If you don't have
access to spraying equipment, why not ask your local spray painter to do it for
you? It shouldn't cost very much. Alternatively, you can just get a tin of
Hammerite and brush it on, the finish won't be as good but as it will be hard to
see then who cares? The method I described in this article is one I used on my
2001 GL1800 and the bikes new owner assures me that the rotor covers on that one
are still perfect. I've since used it on my 2003 GL1800.
Bikers Workshop
Menu
Home