by Sean Bergin
Original File Size - 3.1mb
Image Size - 3456 x 2304
IMG_1202.jpg
The above details are for a photograph taken with my 8 megapixel SLR Camera (EOS 350D). The steps below will turn a section of the photograph into a smal JPEG file suitable for sending over the internet. This procedure only involves using Preview, an application supplied with your Mac. The quality of the file you start with is obviously an important factor in determining the quality of the end result. If you need further control over the level of squeeze to put on the picture try out GraphicConverter which is a shareware product provided free on most Macs and available for download from MacUpdate.com.
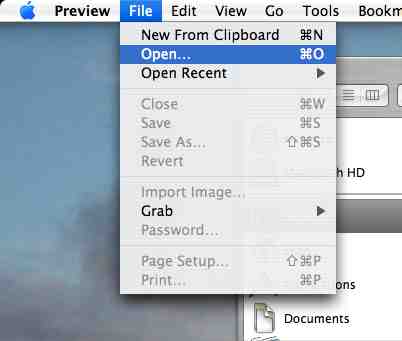
Step 1
Open the file in Preview
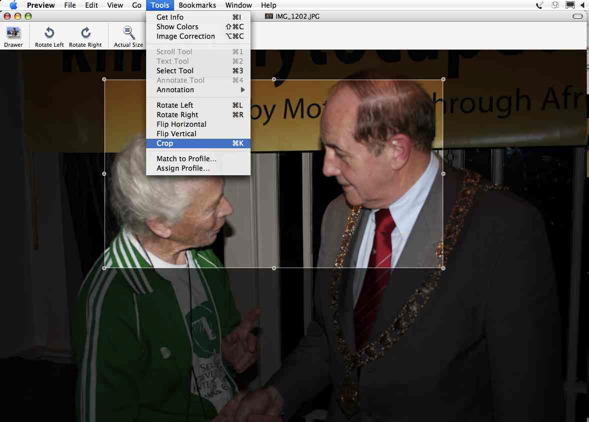
Step 2
If you do not need the entire photograph, just cllick and drag a rectangle over the area you would like to use. Fine tune your selection by dragging the small handles at the corners and mid-points of your selection.
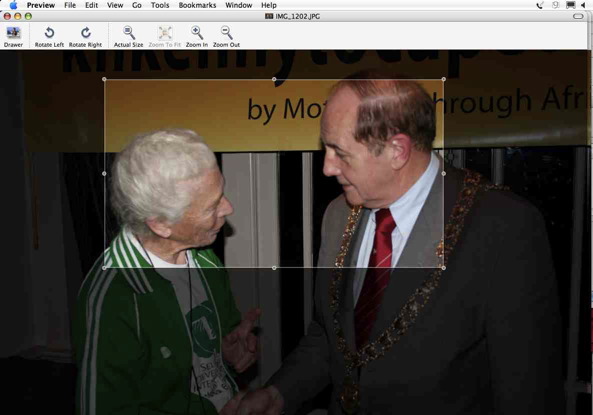
Then select Crop from the Tools Menu. If you are not happy, select Undo from the Edit Menu and try again.
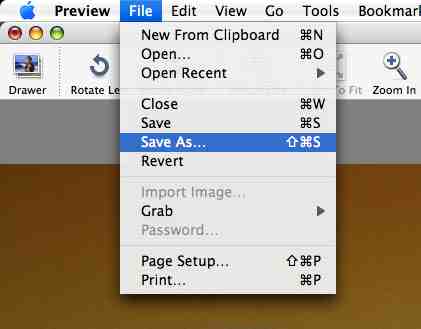
Step 3
Select Save As... from the File Menu
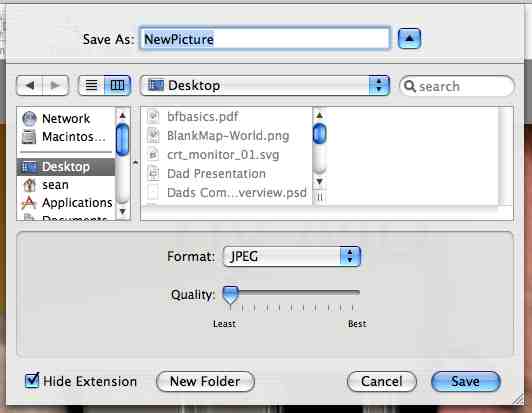
Type a suitable name and select where to save. At this stage you also need to select JPEG from the Popup 'Format' Menu and set the 'Quality' to 'Least'. When you reopen the picture you might find that this loses too much quality and will need to repeat the process, if so, you will need to reopen the original file as the window you now have open contains the Squeezed File.
Step 4
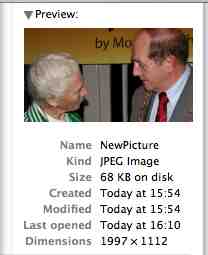
All that remains now is to go to the Finder and select the file. If you are in List View you will see the details below, in our case we have reduced our file size to a respectable 68k. If you are not in List View then you will need to select Get Info from the File Menu to check the size of your new file.