CHESMAYNE
dream guitar-02

Pawn
|
Moving
and capturing
|
|
|
|
|
PAs move only forward and they cannot retreat. At the beginning
of a game, each and every PA has the
option to advance one or two cells as shown - FMO. Afterwards, they can only move one cell
at a time – AOM (All Other Moves).
|
|
The PAs may capture
in a diagonally
way only as shown above. A-PA5 on cell E04 cannot move forward because it
is blocked by B-PA4 on cell E05 (red mark) - since it is an illegal
move.
|
|
|
|
|
|
In the above diagram, B-PA5 just moved two cells to D05. This enables
A-PA5 to perform the optional en
passant move by capturing
it and placing himself onto the cell D06 (blue
arrow).
|
|
When a PA reaches the 8th rank,
it can be enrobed/promoted to any desired MP
other than KI or PA. A QU
is chosen as a natural and logic elevation for she is the most powerful
chess piece on the board.
Underpromotion is also possible ie, RO,
BS or KT
on Level-01.
|
|


The two letters used to indicate
the PA - personal assistant.
All PAs are of equal value but
some PAs are more equal than others. In
Chesmayne each PA is given a name. Jacopo da Cessole (14th century) was the first to give the mps a name. The monogram ‘PA’. PA5 (mp5) is known as
‘the eye of the army’. A PA is not able
to reverse its move. ‘P’ is sometimes
also used.
French:
Pawn - le pion
Backward pawn - pion arriéré
Isolated pawn - pion isolé
Passed pawn - pion passé
To create a passed pawn - se faire un pion passé
Pawn chain - chaîne de pions
Pawn ending - finale de pions
Pawn promotion - promotion
To promote a pawn - promouvoir un pion
|
#
|
Language
|
Piece
|
Game Name
|
|
01
|
English
|
Pawn
|
Chess
– Chesmayne
|
|
02
|
French
|
Pion
|
Les
echecs
|
|
03
|
German
|
Bauer
|
Schachspiel
|
|
04
|
Italian
|
Perdone
|
Gli
scacchi
|
|
05
|
Spanish
|
Peón
|
Ajedrez
|
|
06
|
Portuguese
|
Peão
|
Xadrez
|
|
07
|
Russian
|
Peshka
|
IIIaxmatbl
|
|
08
|
Arabic
|
Baidaq
|
Ash-shatranj
|
|
09
|
Latin
|
Pedes
|
Scaci
|
Shakespeare (KI Lear): “As flies to wanton boys, are we to the gods; they kill us for their sport” (it is considered good to kill a mp from
time to time, to encourage the others)!
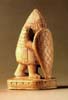
Pawn.
From the ‘Charlemagne’ pieces.
Ivory. Italy - end of
the 11th Century. Paris Cabinet des
médailles.
The FMO (First Move Option) of this mp was introduced in Spain in 1280. Upto the 16th century a game
could be started by making two mp moves before your opponent moved. This was the norm in Holland
and Germany
until the late 19th century.
In Asia mps started on the 3rd
rank instead of the 2nd.
Until 1903 a PA reaching rank-8 could remain a PA! And promotion could
only be to a MP already captured. If no MP had been captured the
mp remained a PA until a capture occurred.
Steinitz was a leading proponent of the dummy PA law.


The PA may move 1 or
2 cells on the first move but, only 1 cell thereafter.
The PAs get
their name from an old French word meaning ‘foot-soldier’ and like the infantry they must advance against the foe. The monogram ‘PA’ is used to identify these mps.
On an 8 x 8 board the PAs are numbered PA1 to
PA8.
On a 10 x 10 board the PAs are numbered PA1 to
PA10.
On a 12 x 12 board the PAs would be numbered PA1 to
PA12.
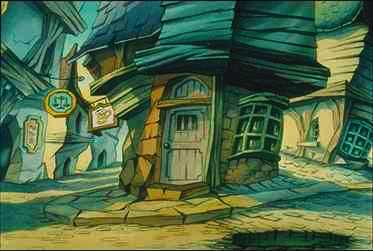
Street scene-inn and pawn-brokers
The PAs have special rules for
their capturing manoeuvre.
The PA is, in fact, exceptional in many ways, which is now
explained. The normal move of the PA is
simple - they plod just one cell forward at a time. They may never move backwards. On their first move, however, a PA may, if
desired, be moved two cells forward instead of just one. This privilege is accorded to each of the eight
PAs on either side (Level-1), but a PA may only advance two cells if both cells
are unoccupied and the PA has not previously been moved. As distinct from their forward mode of
travel, the PA captures diagonally, but again only one cell. A PA must move in the file in which it placed (ISP), until it captures another MP/mp diagonally. On Level-1 it is the only MP/mp that
captures in a different manner to the normal mode of movement. On reaching rank-8 (Level-1) a PA is
invested with the title and assumes the power of any of the MPs to which the PA is promoted/enrobed (which a player chooses at his/her discretion). A PA is not permitted to capture any MP/mp
which impedes its path ie,
01A PA4 D02/D04
01B PA5-D07/D05
…….neither PA can do more than remain an obstruction
to the forward march of the other. Upon
capturing a diagonally placed MP/mp, a PA changes file ie,
PA5-E04*D05.
PA5 moves from file-E to file-D.
The movements
of these homely mps are amongst the most refined and arduous elements of the game. When placed in B$A they prevent the advance of your opponents’s PAs. However, you should not place two PAs
abreast in Block-A until you are able to support them from behind. If you have two PAs placed abreast in
Block-A and one of them is attacked by an opposing PA, you will find it better
to advance the PA that is attacked, rather than resort to capture. After %K it is better
not to advance PA7 until obliged to do so.
It is better to protect a PA with a PA than with a MP. Do not advance PAs on either wing until you see on what side of the board your opponent castles. In the endgame two PAs can protect themselves against the enemy KI.
The Arabs called them Baidaq (BQ), ‘foot soldiers’, which was translated into the
Anglo-French word p’oun. In the old
game (Shatranj), a BQ could not be promoted to QU2, but to a Minister (MR) only. The game-tree (:gt) of chess was, therefore, different from today, for there was
little point in promotion. A PA can
move forward only. A PA cannot
jump. A PA is promoted on reaching the
last rank as part of the same move. The
cell on which a PA is promoted is normally called the queening cell, even if the PA is exchanged for a MP which is not a QU. Promotion is also called ‘enrobing’ in Chesmayne.
Theoretically it is possible to have nine QUs (Level-1, QU1, QU2, QU3, QU4 etc). The
PA is nearly always promoted to QU2, but underpromotion is possible. If a PA reaches the top-rank of the board
and is promoted to a QU, then this QU is referred to as QU2 to distinguish her from
QU1. Sometimes it is best to
underpromote to a KT, KM, BS, RO etc. The en passant (:ep) capture can only be made by a PA on rank-5 (for :A). The en passant move is
optional, not obligatory. Beginners
often find this difficult, so practice on rank-5 (for :A) and on the rank-4 for
:B. The PA can
only capture one diagonal cell forward to their right or left. Monogram: PA1, PA2, PA3 etc. The PA is
known by different names in differing countries…….
01 English: Pawn. 02 French: Pion. 03 German: Bauer. 04 Italian: Pedone. 05 Spanish: Peon.
06 Russian: Peshka. 07 Arabic: Baidaq.
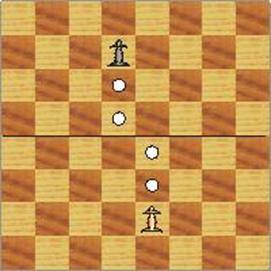
The diagrams
below show you how to move the PAs. It’s
not really that complicated – but you do have to pay attention. On the first move, a PA may move either one cell/square forward or two
cells/squares (FMO) in a file. After making their first move they are only
allowed to move one cell/square forward at a time (all subsequent moves). In diagram-03 (below) both PAs are blocked –
neither of them can move. Unlike the
other MPs, the PAs (mps) do not capture in the same way
that they move. They capture one
cell/square diagonally forward. In diagram-04 (below) A-PA5 has three
possible ways to move. Forward in a
file one cell/square or, it may capture B-PA3 or B-PA5 by moving one
cell/square diagonally forward – you see!
You might not think that a PA is not much use but there is one really
special thing it is allowed to do in chess.
If a PA gets to Rank-08 for :A
or Rank-01 for :B you must
exchange it for another MP, a QU, RO, BS or a KT on Level-01. Another special rule to do with PAs is
called the ‘En Passant’ rule. If you have A-PA5 on Rank-05, as :A does
here in diagram-06 (below) and your adversary moves B-PA5 on the adjacent file
two cells/squares forward, you can, on your next move, capture B-PA5 as if it
had moved only one cell/square forward.
Watch the movie (below) to see the En Passant capture in action!
Below:
diagram-01
Below: diagram-02
PA may move 1 o 2 cells (FMO) PA moves 1 cell (AOM)
Below:
diagram-03
Below: diagram-04
These two PAs block each other path
A-PA5 may capture B-PA3, PA5
Below:
diagram-05
Below: diagram-06
A-PA5 moves to Rank-08 – QU2! B-PA5 captured by En Passant rule
Below: diagram-07
En Passant rule in action!
:L01 Note: the (quickest) number of moves of a PA from the ISP to the promoting cell is five moves ie,
1st move PA4-D02/D04 (PA4 moves two cells forward, FMO).
2nd move PA4-DO4/D05
3rd move PA4-D05/D06
4th move PA4-D06/D07
5th move PA4-DO7/D08-#QU2 (PA4 is promoted to QU2).
A PA has a
maximum of six moves on Level-1 (from the ISP to the promoting cell).
Level-01. PAs
in the opening and middle
game. In an open game or position, the PAs are
fluid, are able to advance, and many may have already been exchanged or disposed. Both :A
and :B are ready to castle (%K, %Q) and there will be open lines for RO1, RO2,
BS1 and BS2.
Level-01. PAs in a closed game. In a closed position the central PAs (PA4
and PA5) are interlocked in such a way that they cannot be exchanged. There are no open files for RO1, RO2, BS1
and BS2. In such positions KT1 and KT2
can become more important because of their ability to manoeuvre.
Level-01. During the opening, development may be slowed down by making too many mp moves or moving a mp to a
wrong cell.
Level-01. Mp formation. Most openings and defences try to keep the PAs united, so that they protect one another. This is important for the middle game and even
more important in the endgame.
Level-01. Typical mp structures: doubled PAs (:do-PAs). Doubled mps usually
imply that open files are available and in such cases you may be able to gain
useful play on such a file with RO1 or RO2.
A doubled PA (:do-PA) is not necessarily a disadvantage, particularly if
it is united with another PA. A :do-PA
on file-E is the best because it strengthens the middle PAs and makes available
a file for RO2. A :do-PA on file-A or
file-H is the least valuable.
Above: PAs in the ISP
Level-01. Isolated
PAs
(:is-PA). A PA is considered isolated
because there are no mps of the same colour on adjoining files. If the mp is attacked the mp may have to be
defended by MPs which are then left out of action on other areas of the
board.
Level-01. Backward PA (:ba-PA). Place A-PA8 on H04
and A-PA7 on G03. Now place B-PA1 on
H05. The :A
mp on G03 is
backward as A-PA7 is unable to advance without being captured by B-PA1 on
H05. This means that, in certain
circumstances, a single :B
mp can almost
be as valuable as two :A mps.
Level-01. Passed
PA (:pa-PA). Place A-PA8 on H04 and a-PA7 on G05. Now place B-PA1 on H05. A-PA7 on G05 is passed (:pa-PA7), as there
are no opposing mps, either on the same file or adjacent files, between PA7s
current position and the enrobing cell (on G08).
:pa-PAs can become especially strong in the endgame. When a mp
has no enemy PA that could hinder promotion - that is, no enemy PA in front or,
on the same file or, either of the next-door files - then the mp is called a
passed-pawn (:pa-PA). A :pa-PA in the
endgame can be a great asset, particularly if well advanced, as the enemy has
to use MPs to stop the PA becoming QU2, thus reducing your adversaries MPs efficiency.
In the early
stages of the game, the mps have various functions. Those in the center (PA4 and PA5), are the
most valuable mps and are used for protecting central
cells. PAs in front of a castled KI are used as a shelter. To wreck this center, the enemy often
advances PAs upon yours, to force them to advance or exchange. This
operation is called a ‘PA-storm’. Here
the mps play the part of tanks rather than infantry. Mps sometimes resemble neither tanks nor infantry. Their lack of mobility makes them more like natural obstructions ie,
rivers, hills or marshes, that interfere with mobile warfare. When one of your own PAs becomes an
obstruction to your attack, it often pays to sacrifice the mp. A
PAs value increases as MPs/mps are exchanged off, for when both armies are so
reduced that checkmate becomes next to impossible, the major objective
becomes the promotion of a mp. To be a
PA ahead with otherwise as good a position as your opponent’s, is usually a
winning advantage - theoretically!
Level-1, A-PA6
can be the source of major problems. At
the start of Level-1, PA6 is positioned on the very weak F02 for :A and PA3 on F07 for :B, where they are only defended by their respective KIs. Because of
the way they move, neither BS2 nor KT2 can protect A-PA6.
Advancing A-PA6 too soon can create a permanent and crippling weakness in the cells near the A-KI.
The Chesmayne chess MPs/mps are triangular shaped.
Large triangles are used for the MPs and small triangles are used for the mps. Each
triangle has the monogram of the MP/mp printed on it ie,
PA1, PA2, PA3,
PA4, PA5, PA6, PA7 and PA8 for the mps.
The monograms
RO1, RO2, BS1, BS2, KT1, KT2, QU1 and KI for the MPs on Level-1 (traditional
chess).
Although PAs are usually promoted into a QU2 on
reaching rank-8, they can be also promoted to any other MP you choose. In the opening phase the PAs defend the center of the board and
play a static role. In the endgame phase, when there are few MPs/mps on the board, PAs
help the KI to capture MPs/mps or to checkmate your opponent. In the middle game PAs become very active. Their function is to drive away attacks from
enemy MPs/mps and move forwards or sacrifice themselves to open attack lines for QU1, RO1, RO2,
BS1 and BS2. PAs that are in a group
can support one another (PA islands). PAs
connected in a chain are quite
strong. To attack this chain your
opponent would need to attack the ‘base PA’.
Passed PAs (:pa-PAs) are very strong as they can reach rank-8
without coming into contact with enemy PAs on their own or adjacent ranks. PAs in
enemy territory should ideally be supported by MPs. Two PAs placed on the same rank control more
cells in front but will need to be supported from behind. A PA on rank-7 can even deliver checkmate. A trailing
PA should not be left unsupported (backward PA - :ba-PA) and if advanced is usually captured quite
easily. PAs are ‘fixed’ if they are
blocked from moving forward. Isolated
PAs (:is-PA) cannot be
defended by neighbourly PAs and are easily captured by your opponent. Doubled PAs (:do-PA) are weak as the back PA cannot advance
until the front PA moves forward. Tripled
PAs are even weaker
(:tr-PAs) and the back PA has to wait for the front two PAs to advance before
it can do so. Hanging
PAs (:ha-PA) must rely on
MPs for protection and without support are easily eliminated/erased.
En Passant
There is another special rule to do with PAs which you may find takes a little
getting used to. It is called the En
Passant option. If you have a PA on your 5th rank, as White does in figure-1
below, and your opponent moves a PA on the
next file two cells forward, you can, on your next move, capture it as if it had moved one cell only as shown in
figure-2.
Caught in the ‘Square’
Suppose you ‘threaten’ a piece, say a KT or a BS. What
happens? Your opponent will do
something about it. He will move it, defend it or
block the attack. But sometimes he can
not get out of it. And that is what we are looking at in this lesson. PAs are often good at hunting down mps - BSs and KTs - in the opening.
Examples
Games…….
Set up your own chessboard and play
through the moves as given below? Look
at this - using the ‘Chesmayne algebraic notation’…….
01A-PA5-E02/E04 01B-PA6-C07/C05 - The
Sicilian Defence
02A-KT2-G01/F03 02B-KT2-B08/C06
03A-BS2-F01/B05 03B-PA8-A07/A06
04A-BS2-B05/A04 04B-PA7-B07/B05 (see diagram 01 below)
In the
‘traditional algebraic notation’ the moves above are indicated by…….
01. e2-e4 c7-c5 -
02. Ng1-f3 Nb8-c6
03. Bf1-b5 a7-a6
04. Bb5-a4? b7-b5 (see diagram below)
It is not the same as the Ruy Lopez,
where ‘black’
has a PA on E05, not C05. He should
take the KT
here.
05A-BS2-A04/B03
see diagram
01 below…….
White 05. Ba4-b3
 Diagram 01
Can you find a good move for ‘beta/black’ here? Yes, black can trap the BS by playing 05B-PA6-C05/C04 – Black c4. Look for yourself, A-BS2 has
nowhere
to go.
Let us start again…….
01A-PA5-E02/E04 01B-PA5-E07/E05
02A-PA4-DO2/D04 02B-KT2-B08/C06
03A-PA4-DO4/D05 03B-KT2-C06/D04?
See diagram 02 below…..
01.
e2-e4 e7-e5
02.
d2-d4 Nb8-c6
03.
d4-d5 Nc6-d4? - see diagram 02 below…….
 Diagram 02
This time ‘white’ gets the chance to win a MP. How can he
do it? Remember that to ‘threaten’ a defended MP you have to ‘attack’ it with something weaker. The answer in this case [diagram 02 above] is A-PA3-C02/C03, and, surprisingly B-KT2 is lost. He has
eight cells/squares to go to, but whichever one he tries he gets taken/captured – nice!
ROs are usually fairly safe in the corner at the start
of the game, but if you move RO1 or RO2 out, they might fall victim to an
attack along the diagonal.
01A-PA4-D02/D04 01B-PA5-D07/D05
02A-PA3-C02/C04
See diagram 03
below…….
01. d2-d4 d7-d5
02. c2-c4
Moving PA4 is just as good as moving the PA5, but usually leads to more closed positions where play develops more
slowly. This move is the QUs Gambit.
02B-PA5-D05*C04-PA3 (PA3 is captured)
03A-PA5-E02/E03 03B-PA7-B07/B05?
See diagram 03
below…….
02. ........ d5xc4
03. e2-e3 b7-b5?
It is much better to play [Ng8-f6] B-KT1-G08/F06 and let white have the PA back.
04A-PA1-A02/A04 01B-PA6-C07/C06?
04. a2-a4 c7-c6?
Alpha [white] is trying to
keep his/her extra PA. If 04B-A07/A06 and 05A-PA1-A04*A05-PA2 [4... a7-a6 and
05. a4xb5] then beta
[black] finds that
B-PA1 is ‘pinned’
against B-RO2 as shown below in diagram 03…….
05. a4xb5 c6xb5
 Diagram 03
And what does alpha [white] do next?
You have had a clue so you should find
the right answer: A-QU1-D01/F03 [Qd1-f3], trapping B-RO2 in the corner cell at A08. If beta/black
prefers s/he can lose B-KT2 [by playing Nb8-c6], B-KT2-B08/C06, or B-BS2 [by
playing Bc8-b7], B-BS2-C08/B07. Whatever beta/black moves s/he is going to
lose one of the big guys. In that position it is a good idea to bring A-QU out
early.
If you are not careful you are likely to get A-QU1 trapped.
Like this – see diagram 04 below…….
01A-PA5-E02/E04
01.
e2-e3
“If you move A-PA5 [e-pawn] two squares/cells
forward your opponent might get the idea of Scholar’s
Mate into his/her head, so you move PA5 one square/cell instead –
who’ a clever boy/girl then!”.
01B-PA4-E07/E05
01A-QU1-D01/F03?
01. ........ e7-e5
02. Qd1-f3?
“Now I will try for Scholar’s Mate myself. Perhaps s/he will not notice”.
01B-PA5-D07/D05
02A-KT2-B01/C03
02. ........ d7-d5
03. Nb1-c3
“Now A-BS2 goes to C04 [c4] – vernacular expletive! If I go there s/he will take BS2. Better bring out a KT instead”.
03B-PA4-E05/E04 - an invasion!
03. ........ e5-e4
“S/he’s attacking A-QU1 with B-PA4. Better keep A-QU1 attacking B-PA3 on cell
F07 [f7]”, so your next great move in this game is…….
04A-QU1-F03/F04? - smart move
04.
Qf3-f4?
 Diagram 04
Alpha [white] has broken several rules of good opening
play. How does s/he pay the penalty? Beta/black plays 04B-BS2-F08/D06 [Bf8-d6,] attacking A-QU1 on
cell F04. Where can A-QU1 move to
now? There are twelve possible
squares/cells (count them) but whichever one is chosen for A-QU1 she will be
captured/taken on the next move.
Do you know anyone who thinks and plays chess like alpha/white did in the game
above? It better not be you – I
hope!
I repeat…….
Start by moving A-PA5 [e-pawn] two squares/cells.
Make sure you keep a PA [PA4 or PA5] in
the centre.
Don’t go for ‘Scholar’s Mate’.
Don’t bring QU1 out too soon.
Use your ‘centre PAs’ to drive the enemy MPs/mps
to unfavourable squares/cells.
Here is another guy/gal who ran into
trouble by bringing QU1 out too soon…….
01A-PA5-E02/E04 01B-PA5-D07/D05
01. e2-e4 d7-d5
This is the ‘Centre Counter’ or
‘Scandinavian Defence’. It is not recommend that you play this one just at the moment. QU1 is too likely to run into a serious
mishap.
02A-PA5-E04*D05-PA5
(B-PA5 is captured)
02B-QU1-D08*D05-PA5
(A-PA5 is captured)
03A-KT2-B01/C03
02. e4xd5 Qd8xd5
03. Nb1-c3
In this opening white/alpha gains time by
attacking B-QU1. Those new to chess are
often tempted by a check
on the E-file,
but this is not a good idea. :A or,
white will block the check and later gain
more time by attacking QU1 again.
:B or, blacks best move here is QU1-D05/A05 [Qd5-a5]. What s/he must not do is to play the
following move.……
03B-QU1-D05/C06
03. ........ Qd5-c6
 Diagram 05
Can you see
why?
White plays BS2-F01/B05 [Bc1-b5]. What is happening here you may
ask? “My QU has lots of squares/cells to go to”, says
beta/black, H06, G06, F06 [h6, g6, f6]...”, “No you wont”, says alpha/white. “B-QU1 is pinned. If you go over there it leaves you in +CH. The only square/cell B-QU1 can go to is D07,
where I will capture you with A-BS2, and cell B05. If you capture A-BS2 on B05 with your QU,
then A-KT1 will capture you instead”.
So, whichever way you move your QU is kaput!
You will meet a lot of pins in the course of these lessons. If, as here, you pin a stronger piece you ‘win’ it. If you pin a
weaker piece, or a piece of equal value, ‘you might’ be able to win it by
attacking it again. Remember, if you
have pinned a piece what do you do?
Attack it again with everything you have got - usually starting with
your weakest piece.
Some pins are pretty scary - you need to get out of
them as soon as you can: either by moving the piece at the back of the line, by
putting something else in the way, or by driving off the pinning piece. Other pins are just slightly annoying, while others are completely
harmless. There are even pins which can
backfire, as you will see when you learn about ‘Legall’s Mate’.
The next ‘opening’ shows you a situation that happens all the
time. Most players do not manage to find the way out…….
01A-PA5-E02/E04
01B-PA5-E07/E05
02A-KT2-G01/F03
02B-KT2-B08/C06
03A-BS2-F01/B05
01.
e2-e4 e7-e5
02.
Ng1-f3 Nb8-c6
03.
Bf1-b5
The Ruy Lopez, the world’s
strongest opening.
03B-PA5-D07/D06
04A-PA4-D02/D04 04B-KT2-G08/F06
03. ........ d7-d6
04. d2-d4 Ng8-f6
This is a mistake, but not for the
reason you might think. Alpha/white
should probably play PA4-D04*E05-PA4 (B-PA4 is
captured) [d4xe5], which
eventually wins a PA, rather
than.……
05A-PA4-DO4/D05
05.
d4-d5
 Diagram 06
:A attacks the
pinned B-KT2 with A-PA4. It looks like
:A is winning a piece but :B has got a
way out. Can you help him/her find it? :B can save B-KT2
by playing B-PA7-A07/A06 [a7-a6] Now if :A
captures B-KT2, :B captures A-BS2 as compensation. And if :A plays A-BS2-B05/A04 [Bb5-a4], :B drives off
the pinning piece by playing B-PA7-B07/B05 [b7-b5].
Helpful
Hints…….
1. Look out for chances to trap enemy KTs and BSs using
your PAs.
2. Look out for chances to trap the enemy
QU using your PAs and MPs (KTs and BSs).
3. Look out for diagonal attacks on
unmoved ROs.
4. Do not bring your QU out too soon without
a very good reason: she might get trapped or pinned.
5. Look out for chances to pin your
opponent’s pieces. If you have pinned a
piece, attack the pinned piece with
everything you have got.
6. Learn to tell the difference between
different types of pin. They are not
always so scary so don’t panic if you find one of your pieces is pinned.
The Double Freddie
Do you know Freddie, Gerry and Harry?
If you know them, and know how to make the most of them, they will help you win lots of games. But you will only know who they are if you
have got the board the right way round.
So first of all check that you have set up the white pieces on the ranks numbered 1 and 2 on your board, and the black pieces
on the ranks numbered 7 and 8 on your board.
In most of your games it will be best for you to castle on the KI-side, moving your KI to the G-file (G01 or G08) and your RO to the F-file (F01 or F08). You will remember that we can call the PAs after the files they stand on in the ISP ie, A-Pawns, B-Pawns and so on.
Freddie, Gerry and Harry are your F-Pawn, your G-Pawn and your H-Pawn. Imagine that you are playing football. The KI is the goal.
If you are :A and you have castled KI-side [%K] your defenders are your RO on F01, your KT on F03
and ...Freddie, Gerry and Harry (PA6, PA7 and PA8).
Try, if at all possible, not to move Freddie, Gerry
and Harry early on in the game. Every
time one of them moves up the board it weakens cells and opens lines for the
enemy strikers to attack and put the ball in the net.
In this lesson we look at an attacking plan designed to force your opponent’s Gerry to change
his name to Freddie. When this happens
your QU comes in, and, with the help of a BS or a KT, scores the winning
goal.
Here’s
an example that was played by :A and :B…….
01A-PA5-E02/E04 01B-PA4-E07/E05
01. e2-e4 e7-e5
Both
players move the PA in front of their
KI two cells forward.
01A-KT2-G01/F03 O2B-KT2-B08/C06
02.
Ng1-f3 Nb8-c6
A-KT2
threatens B-PA4 and B-KT2 defends.
03A-BS2-F01/C04 03B-BS2-F08/C05
03.
Bf1-c4 Bf8-c5
Both
players move their BSs onto strong diagonals, attacking the weak PAs on file-F (A-PA6 and B-PA3).
04A-PA4-D02/D03 04B-KT2-G08/F06
04.
d2-d3 Ng8-f6
:A
prepares to develop BS1, while :B develops KT1.
05A-KT1-B01/C03 05B-PA5-D07/D06
05.
Nb1-c3 d7-d6
 Diagram 07
:A develops KT1 while :B prepares to
develop BS1.
You will see that we have a symmetrical position. Both sides have developed their pieces in
the same way. This makes the opening easier to learn because the plans for both players
are the same. Stop here and decide what move you would play next
for :A.
I wonder how many of you played
A-KT2-F03/G05 [Nf3-g5] here? It is very tempting, isn’t it, to
threaten a lovely A-KT2 fork on cell F07
within two moves? But the move is not
very good, as you will find out later in the course. :B can defend simply by castling (%K, %Q)
and later gain time by driving A-KT2
back.
Reasonable moves for :A include 0-0 [%K], although, as you will see, :A
will have to be careful after this move, A-BS1-C01/E03 and A-KT1-C03/D05 [Bc1-e3 and Nc3-d5], but the move we would really recommend you play here is
as follows.……
06A-BS1-C01/G05
06.
Bc1-g5
What is the big idea of this move you
may be asking? :A develops BS1 on the
same diagonal as B-QU1 – that’s why?
If B-KT1 on F06 moves at any
time, for instance to G04, what will :A do?
Of course, he will zap QU1 on cell D08! We say that A-BS1 on G05 pins B-KT1 on cell
F06.
Good moves for :B here are B-KT2-C06/A05, KT2-H07/H06 and BS2-C08/E06 [Nc6-a5, h7-h6] and [Bc8-e6. Bc8-g4], continuing to
copy :A, is also possible. But let’s
see what happens if :B castles [%K] here.
06B %K (kingside
– KI and RO2 castle)
06. ........ 0-0
 Diagram 08
What should white play in this position?
Don’t forget that B-KT1 is pinned. Imagine you are wrestling someone and you have got them pinned to the
ground so that they can not move. You
can then hit them with everything you have got and eventually they will have to
give up. How can you attack the pinned
KT here? There is only one way to do it.……
07A-KT1-C03/D05
07. Nc3-d5
Now it is very easy for black to make
a mistake. If s/he takes A-KT1 on cell
D05 with B-KT1 what will you then
do? Will you recapture B-KT1? Of course not: you will take QU1 instead. Sometimes :B sees
this and decides to move QU1 to get out of the pin! What would you do
if :B played QU1 to cell E08 here? The
answer is you would play A-BS1-G05*F06-KT1 [Bg5xf6], the result being that B-KT1 is
captured. If :B decides to play
B-PA2*F06-BS1 [g7xf6], A-BS1 is
captured - what will you do now? You
would of course play A-KT1-D05*F06+CH [Nd5xf6+], resulting in check to B-KI
and threatening B-QU1 on cell E08 at the same time – a fork presents
itself! Instead of these moves we will
give :B a fairly useless move on the other side of the board…….
B-PA1-A07/A06
07. .......
a7-a6
In this sort of position :A has two
plans: capture on cell F06 with A-KT1 and ++CM (mate) on G07 with BS1
and QU1 or capture on F06 with the BS1 and mate on H07 with KT1 and QU1. We will start
with Plan-A…….
08A-KT1-D05*F06-KT1+CH
(B-KT1
captured, B-KI is now also in check)
08B-PA7-G07*F06-KT1
(A-KT1
captured)
08.
Nd5xf6+ g7xf6
:B’s best defender, B-KT1 on cell F06,
has been shown the red card. Gerry, the
centre back PA7 on cell G07, has changed rank and moved to rank-06. There is an open goal just waiting for :A to
place the ball in the net.
09A-BS1-G05/H06 09B-RO1-F08/E08
09.
Bg5-h6 Rf8-e8
 Diagram 09
If you could put your QU anywhere on the board, where would it be? That’s right: G07 which is checkmatge –
‘The kiss of death’, with the BS on H06 holding the QUs hand. So how can we get her there?
10. Nf3-h4
The KT moves out of the way to let the QU come
out. At the moment the black BS
controls G04 so the KT heads for F05 to cut the BS off.
10.
...... b7-b5?
11. Nh4-f5!
Don’t get too excited and play Qd1-g4+ too soon!
11.
...... Bc8xf
12. e4xf5 b5xc4 - see diagram below…….
 Diagram 10
And you know what happens next.
White’s QU does her impersonation of Michael Owen and scores the winning
goal:
13. Qd1-g4+ Kg8-h8
14. Qg4-g7++
Let’s go back to the start and see if you remember the
moves of the opening.
01. e2-e4 e7-e5
02. Ng1-f3 Nb8-c6
03. Bf1-c4 Bf8-c5
04. d2-d3 Ng8-f6
05. Nb1-c3 d7-d6
06. Bc1-g5 (PIN!)
It’s easy to remember how to play this opening: PA,
KT, BS, PA, KT, BS (twice)! In that
order!
06. ......
0-0
07. Nc3-d5
Attacking the pinned piece!
07. ......
a7-a6
This
time we’ll look at plan B. Now the BS
captures on F06:
8. Bg5xf6 g7xf6 - see diagram below…….
 Diagram 11
Again, the black KT has been sent off, and Gerry has turned into Freddie. Where do you want the white QU this time? Now the answer is H06, when black will not
be able to defend F06. How do we get
her there? Via D02.
9. Qd1-d2 b7-b5?
Black’s best move was Bc8-e6, to get rid of
the KT.
10. Qd2-h6 b5xc4 - see diagram below…….
 Diagram 12
And again you know what to do, don’t
you?
11. Nd5xf6+ Kg8-h8
The only other move was Qd8xf6, losing the QU.
12. Qh6xh7++
How the PA
moves, captures and promotes/enrobes
Every PA may move
1 or 2 cells/squares forward on the 1st
move - FMO.
From the 2nd
move the PA may move only 1 cell/square forward – AOM.
The PA captures by moving 1
cell/square diagonally forward.
A PA captures by moving diagonally to the opposing
cell/square.
The PA captures any MP/ mp on the arrival
cell/square.
Enrobing/Promoting a
PA. The PA may be exchanged for a MP – except a PA or KI on Level-01. PA1 to PA8 may all be promoted on reaching rank-08. They can be promoted to QU, RO, BS or KT on Level-01. Also see ‘Level’. Theoretically, you could have eight QUs -
imagine QU1 to QU9 on the board at the same time? Games with five QUs – QU1, QU2, QU3, QU4 and
QU5 have actually occurred in over-the-board play, :otb.
Below: you could
exchange a PA for RO3, BS3, KT3 or QU2.
In play you could have RO1, RO2 and RO3. You could also have BS1, BS2 and BS3. Or, KT1, KT2 and KT3. Or, QU1 and QU2 could be on the board at
the same time!

Enrobing/promoting
a PA to QU2 is not always the best procedure as indicated in the animated
example below…..
“The most important feature of the chess position is
the activity of the pieces. This is absolutely fundamental
in all phases of the game (opening, middlegame and especially endgame). The primary constraint on a
piece’s activity is the PA structure.”
Michael Stean, in ‘Simple Chess’.
“In
general, a PA centre is a good thing not in itself but in its usefulness for
concrete ends”. Mark Dvoretsky & Artur Yusupov, ‘Opening
Preparation’.
·
indicates most
common or important types.
I will give
several illlustrative games here - fairly straightforward games from Capablanca, Alekhine, Korchnoi and Karpov showing PAs
mobile and dangerous, and the others (e.g. Nimzovitch’s) showing them
stuck and vulnerable.
1. Pawn
majorities
1. marshall-capablanca,
1909
2. [white
"alekhine, alexander"][black "marshall, frank"][result
"1-0"]
2. Pawn
mobility
1. [white
"korchnoi"][black "szabo"][result "Ø"]
2. [White
"dodd, n."][Black "regis.d"][Result "Ù"]
3. [karpov-miles]
3. Immobile
pawns
1. [White
"mattison"][Black "nimzovich"][Site
"carlsbad"][Date "1929.??.??"][Result "Ù"]
2. [White
"bronstein, David"][Black "najdorf, M."][Result
"Ø"]
3. [White
"spassky, b."][Black "fischer, rj"][Result "Ù"]
4. [white
"spassky"][black "tal, mikhail n."][result "Ù"]
5. [Event
"march vs st.neots 'b',1978"][White "pope, m. "][Black
"regis, d"]
6. [johner-nimzovich]
Three
opening themes that are all about pawns
4.6.3.4
The minority attack (Tough stuff-level 3/4 players only).
If you have a PA
majority - say, three PAs to your opponent’s two on one side of the board - you
should be able to create a passed
PA. By advancing the PA, you should
be able to create enough pressure to win. Steinitz was the first great exploiter of
PA majorities, particularly on the QUs
side where they can often advance without fear of exposing the KI. Some people regard the QUs side majority as
an advantage in itself, but
realistically it depends on where and what the other pieces are.
“Doubled, isolated and blockaded PAs are weak:
avoid them!”
Fine, Basic
Chess Endings
Stalemate: The
Game’s Over but Nobody Won, What’s Going on Here?
Stalemate is one of the more confusing concepts to
beginners. Stalemate is a case in which
neither side wins the game but it is declared a draw. By the laws
of chess, you must
play a move when it is your turn.
Unlike other games, you are not allowed to pass your move. But what happens if you don’t have any legal
moves? That’s where the stalemate rule comes into
play. You have no legal moves, but by
the laws of chess, you have to play a move.
The position is declared as stalemate and the game is drawn. There are also many more ways than stalemate
to draw a game. Draws are explained in
much more detail later on in this section.
Zugzwang:
Zug-What?
Why couldn’t they just use English?
This one is a German word and it’s a little more complicated than a lot
of things that you’ve done so far. The
word means compulsion to move and it doesn’t happen very often. A zugzwang position is one in which it your turn to move but
any move that you make will make your position worse. Pretty cool stuff eh? Well, that’s your sneak peek at zugzwang,
more will await you as you progress, and there’s much cooler stuff than just
that!
Pawn Promotion
The PA: not even good enough to be called a piece. They’re not
very interesting, look kinda boring and they can only move forward. Something had to be done to spice this piece
up. A PA, as you know, can only move
one cell/square forward at a time. Only
forward, no sideways stuff. So, an
interesting case came up where when the PA reached the 8th rank, it
wouldn’t be able to move anymore for the rest of the game. How could this be fixed? The promotion of a PA!
Those who struggle hard and work their way to the eighth rank get to
promote to any piece they like – QU, RO, BS or KT on Level-01! What a
prize! When the game originally began,
the PA could only promote to a “mantri” (the predecessor of the QU), which at the time was
the lowest of the officer pieces. It
wasn’t until they introduced the “new QU” that the PA could promote to anything
it liked. Now, the threat of Queening
is quite a threat indeed: introducing a QU to the game could be deadly.
By the way, a small tidbit of information for you: the promotion of a pawn
to anything other than a queen is what is known as underpromotion. Why would anyone want to underpromote? Well, it depends on the position. If there is a tactic in the
position which the player can take advantage of only if he underpromotes, then
he may choose to do so.
Numero Uno Pawn
Move
Well, someone decided that PA promotion was not enough. The game was still too slow and needed to be
sped up to provide excitement. Along
with the introduction of the “new QU” as I’ve been calling it, they introduced
a rule, where on the PAs first move it is allowed to move up two cells/squares. This picked up the speed of the game and
made it more interesting. This rule
applies to each PA, on their first move, not the first move of the game and can
be invoked any time you please, but only on the PAs first
move. You can’t take this option after
the PA has already moved one cell/square.
Pawn Capturing
Still not
enough! This rule, however, has stayed
true for the existence of the game (since the 15th century). When the PA captures, it captures different than the other pieces. Instead of capturing the way it moves,
forward, the PA captures diagonally forward and it can’t capture
straight/directly forward. This makes
it a little more interesting and less predictable.
Subj: Two PAs move…….
From:
Viewer (USA)
To: service@chess-poster.com
A friend just told me that at the beginning of a game, it
is OK to move two PAs forward on the first move (or two KTs) on one’s
turn.
Is my friend right or is it only a joke?
Hi, Viewer…….
It has been a long time since we heard
that story. There is nothing in the Fide Chess Rules nor in any
chess book that even
mentions it, so we assume that it is an illegal
move.
Thank you for visiting our site.
http://www.chess-poster.com
From: Chess
Kids Home Page

Below: A-PA4 on
cell D04 can capture B-PA4 on E05.
A-KT2 on F03 can
also capture B-PA4 on cell E05.
B-PA4 is in fact
attacked twice.
Result: B-PA4 is
lost!
Below: B-KT1 on
cell F06 could capture A-PA5 on E04.
You should move
A-QU1 from cell D01 to F03 to offer protection.


![This time ‘white’ gets the chance to win a MP. How can he do it? Remember that to ‘threaten’ a defended MP you have to ‘attack’ it with something weaker. The answer in this case [diagram 02 above] is A-PA3-C02/C03, and, surprisingly B-KT2 is lost. He has eight cells/squares to go to, but whichever one he tries he gets taken/captured – nice! ROs are usually fairly safe in the corner at the start of the game, but if you move RO1 or RO2 out, they might fall victim to an attack along the diagonal. 01A-PA4-D02/D04 01B-PA5-D07/D05](Chesmayne-Feb-2006/The%20Pawn_files/pawn_2.gif)
![And what does alpha [white] do next?](Chesmayne-Feb-2006/The%20Pawn_files/pawn_3.gif)
![Alpha [white] has broken several rules of good opening play. How does s/he pay the penalty? Beta/black plays 04B-BS2-F08/D06 [Bf8-d6,] attacking A-QU1 on cell F04. Where can A-QU1 move to now? There are twelve possible squares/cells (count them) but whichever one is chosen for A-QU1 she will be captured/taken on the next move. Do you know anyone who thinks and plays chess like alpha/white did in the game above? It better not be you – I hope! I repeat……. Start by moving A-PA5 [e-pawn] two squares/cells. Make sure you keep a PA [PA4 or PA5] in the centre. Don’t go for ‘Scholar’s Mate’. Don’t bring QU1 out too soon. Use your ‘centre PAs’ to drive the enemy MPs/mps to unfavourable squares/cells.](Chesmayne-Feb-2006/The%20Pawn_files/pawn_4.gif)
![:A attacks the pinned B-KT2 with A-PA4. It looks like :A is winning a piece but :B has got a way out. Can you help him/her find it? :B can save B-KT2 by playing B-PA7-A07/A06 [a7-a6] Now if :A captures B-KT2, :B captures A-BS2 as compensation. And if :A plays A-BS2-B05/A04 [Bb5-a4], :B drives off the pinning piece by playing B-PA7-B07/B05 [b7-b5].](Chesmayne-Feb-2006/The%20Pawn_files/pawn_6.gif)


