Trev's VWRX Project
Engine-Transmission
Engine-Transmission
|
After
ages and ages of pie in the sky "what if..."
type of dreaming I took the plunge and bought myself a stomper of an engine:
a 2.0 Turbo from a '99 Subaru Impreza. As far as I can gather, these are
rated as having about the 210BHP mark when in the Impreza, but that's
while running a power steering pump and air-con, and all the exhaust gasses
having to pass through a catalytic converter. That figure should work
out a few BHP higher by the time I've fitted it in a beetle as power steering
and air-con won't be much use to me and I won't be required to run a catalytic
converter. Plus I'll be pushing it all through just 2 wheels as opposed
to the Impreza's 4WD. That means there will be slightly less frictional
losses without the extra differential and shafts. The engine is known
as an EJ20T to those in the know (wink!). I had to ask to find this out!
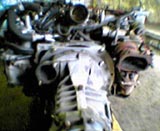
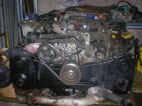
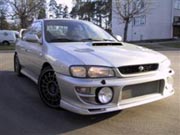
(Thanks Rich!) I bought the engine in Co. Cork, and was able to see and hear the car running before the engine was removed. The car was written off at 26,000 miles by its insurance company as it was subject to salt water flooding over its back half (it was parked on a boat ramp and the tide came in!) It wasn't crashed and had the proverbial single lady owner to boot! |
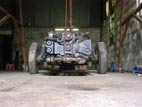
Subaru 2.0 Turbo
|
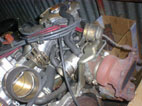
The gold coloured bit on the left is the inlet from
the intercooler, the red bit on the right is the exhaust outlet from
the turbo
|
Transmission:
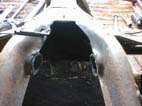
The engine will be fitted to a stock Porsche 915 transmission via an engine
adapter kit. The transmission will have to be raised and moved forward in
the chassis. The raising will allow extra ground clearance for the extra low
sump and exhaust pipework that the engine is fitted with. The moving forward
is necessary because I want it to fit under a stock engine lid. It will also
move some weight forward in the car, making for less tail-happy handling!
Moving the gearbox forward may necessitate chopping the centre out of the
torsion tube. Since this is the anchor point for the torsion bars, the bars
and inner anchor points will have to be refitted further outboard in the chassis.
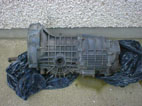
The transmission came from a 1974 2.4 litre 911.
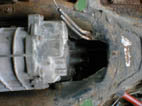
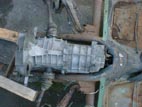
Porsche 915 transmission
|
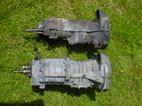
Comparison between VW transmission (top) and Porsche
|
Cooling:
Cooling will have to be addressed soon. Whatever happens, the radiator will
be mounted in the front of the car, in the spare wheel well, and air will
be ducted up from a scoop in the floor of the well. Copper pipes will run
the length of the car, probably along the central tunnel and join up with
the engine. The engine has an intercooler, and I will have to figure out the
best place to locate this to get a good flow of air through it.
Output shafts for the 915 transmission.
|
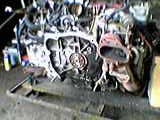
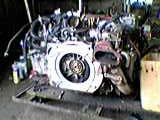
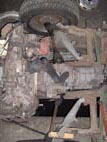
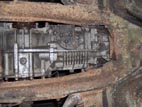
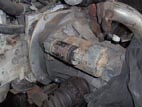
I got the adapter home on Saturday 9-8-03 and proceeded to fit it up to the engine. It needed a small amount of clearancing to it's outer edge to fit it around the turbo bracket, but nothing a short zap with the grinder didn't sort out. The two long lower studs on the Subaru engine had to be removed and replaced with the shorter ones supplied in the kit. The other two studs supplied were fitted to the top of the engine. The adapter plate slipped on easily then, being located by the 4 studs and 2 dowels protruding from the case. The oil drip tray had to be removed from the bottom of the engine to facilitate fitting of the adapter. The flywheel was then bolted onto the end of the crank via the original 8 bolts and then the gearbox was fitted to the 4 studs that protrude from the adapter. One stud is longer as I said, this is because it secures the starter along with another stud on the gearbox. I haven't got a clutch, ring gear or starter yet so obviously they weren't fitted. Incidentally, I trial fitted an old beetle starter motor I had lying around and it fits the gearbox alright, but I'm not sure if it would be compatible with the Porsche ring gear. Also, the Porsche transmission doesn't have a starter support bush so the beetle starter probably won't be suitable.
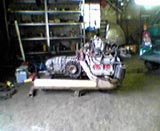
Here are some photos of the fitment of the adapter and then joining the engine to the gearbox. They're of really bad quality because the only camera I had at the time was a mobile camera phone. I'll get better pics soon... (better pic below! 18-7-04)
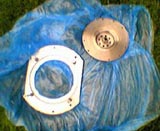
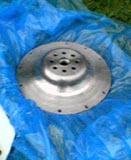
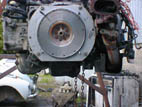
The adapter ring and flywheel
|
raised boss on flywheel
|
Subaru engine with stock flywheel removed
|
with adapter ring fitted
|
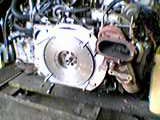
with modified Porsche flywheel fitted
|
engine and gearbox meet for the first time!!
|
plate can be seen between gearbox and engine
|
12-1-04:
Engine & transmission:
I got a single 944 Automatic drive shaft with the rear brake and suspension
parts. It's the wrong length to be of any use to me but at least it will
yield a pair of CV joints to use while setting up the location of the gearbox
in the chassis. It remains to be seen if the bolt pattern of the cv joint
is the same as that of the output flange. Fingers crossed!
Cooling:
The Subaru engine will probably need more air to cool itself than the stock
VW engine, so I will place the radiator up front in the spare wheel well
as originally planned to get the coolest air. I will weld in the slotted
front apron from an air-conditioned 1303 to keep it all looking factory.
The apron is holed from rust so was going to be replaced anyway.
27-1-04:
Transmission:
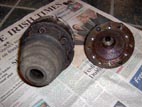
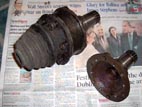
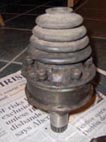
As rotten luck would have it, the bolt pattern of the output flanges I have
didn't match the 944 CV joints! The CV joint had a bolt pcd of 6x86mm and
an outside diameter of 100mm, the 915 flange had a bolt pcd of 6x94 and
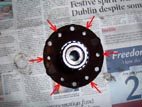
an outside diameter of approx. 110mm. While there were 6 holes on the flange
pitch circle, only 4 were fully drilled and tapped, the remaining two being
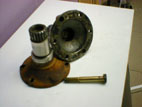
intended for a pair of dowels to help locate the CV on the flange. See the
pic below for more detail.
I managed to locate a pair of earlier 901 gearbox output flanges on Ebay.com
thanks to a tip off on the Germanlook.com forums, and I won the auction
for them. They look smaller in diameter than the ones I have, and have 6
fully drilled holes. Hopefully they will be more suitable for the job at
hand. I don't know what to do with the first pair of output flanges now.
Anyone need a pair? Contact me ;-)
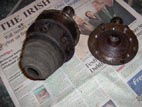
The first set of output shafts that I subsequently
discovered are the WRONG ones!!
|
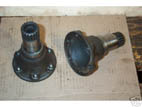
Another pair that I hope are the RIGHT ones!! Note
6 holes drilled and tapped.
|
21-4-04:
Transmission:
Oh nuts. This is becoming a bit of a habit...
I got the 901 output flanges in the post today from Canada. The pcd
is 6x77mm and the outside diameter is 88mm. Wrong again. Maybe they'll
fit beetle CV joints, but even that will be a stopgap measure, the beetle
CV's won't be strong enough for the power output of the Subaru motor.
More research will have to be done...
Well, at the very least, now I should be able to start fitting the gearbox
to the chassis. Waiting on these components was stopping me from doing
any real work on the project. Time to break out the angle grinder!
Turns out these ones are probably wrong too.
D'oh!!
|
4-7-04:
Transmission:
Well, the first meaningful work has begun. I've fired up the trusty
grinder and started fitting the 915 gearbox to the 1303 chassis.
While I could have fitted the gearbox in the stock location with
minimal fuss, I decided it would be best to jack it up and install
it higher in the chassis. The main reason for this is the depth
of the Subaru sump. If you measure how much of the VW engine hangs
below the axis of the crank and how much of the Subaru motor hangs
below, you'll find the Subaru is approximately 130mm lower than
the VW motor. So, if I was to fit the Porsche 'box where the VW
one was, and bolt the engine to it, the sump would be 80-90mm lower
than the VW one. Not good. So, the transmission had to be mounted
higher. The initial idea was to mount is so high that the selector
rod into the Porsche box would be in the same location as the VW
one. Only problem is, the selector rod on the Porsche box is lower
down on the gearbox than the VW one, so the gearbox would have been
too high for my purposes. The CV joints will limit how high I can
mount the gearbox as they only have a certain range of angular movement.
Lift the box too high and you risk locking out the CV joints.
In cutting the centre out of the torsion tube, I cut off the centre
mount for the torsion bars. The back suspension collapsed onto the
bumpstops. The initial plan was to do this and then cut the centre
mount in half and reweld the halves further outboard in the chassis
and use shorter torsion bars from a swingaxle beetle with the IRS
springplates. You can see below how much shorter the swingaxle torsion
bars are compared to the IRS ones. From there you can see where
the mounts would need to be welded back in. To be honest, it looks
like a LOT of work to get them back in securely and lined up properly,
and coilover shock absorbers are available to dispense with the
torsion bars altogether. I will probably end up opting for the coilovers.
I will also build up a tubular framework to strengthen the back
end of the chassis enough to carry the heavier engine and provide
solid location for the gearbox, engine and back suspension.
After talking to Mike Ghia, and about the amount of work involved
in strengthening the back end of the chassis, using coilovers etc,
he suggested chopping off the chassis horns altogether as they would
be pretty much defunct. It makes sense that a well thought out and
well engineered rear suspension system using a custom built frame
and coilovers would give better adjustability and handling than
a system based around torsion bars and constrained by obstructions
like chassis horns and a torsion tube.
However, if you're going to go to all that trouble to effectively
design and build the rear of the chassis, then you might as well
dispense with the VW floorpan as it forces the use of a rear engined
layout. If the chassis was designed to mount the engine in a mid-mount
setup, then handling could be dramatically improved with less of
the weight bearing on the rear axle. And if you're going to dispense
with the VW chassis, and mid mount the engine, then why stick a
big 1303 body on top? Why not go for a sleek Karmann Ghia body or
for the oddball factor, maybe a type 3 body. NOBODY would expect
a car with looks like a Notchback to go at performance car speeds!
But that's getting a bit excited about the whole thing. I'll probably
stick with the rear engined layout because it'll mean I can retain
the stock back seat, and keep the car looking stock from outside.
Besides, not many people are going to expect a street sleeper 1303
to outperform many big buck luxury cars either, are they?
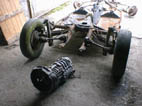
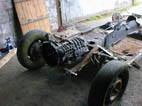
Gearbox, welcome to your new home!
|
Sitting the gearbox above the torsion bar:
too high for me
|
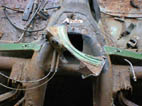
Starting the cut the centre out
|
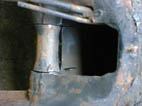
Centre of the tube cut free
|
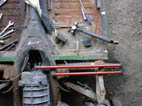
Swingaxle torsion bars (bottom) are shorter
than IRS ones
|
cut, fit, cut, fit, cut, fit
|
Throttle and clutch cable guides temporarily
bent out of the way
|
Gearbox moved forward a bit, note angle
of drive shafts. Needs to go further.
|
18-7-04:
Transmission:
While I still have to make up my mind about spaceframing the back
end of the chassis, I decided I'd better get on with getting everything
lined up and a trial assembly of the engine and gearbox in the chassis.
I've decided to retain the rear engined layout, it's still a VW,
even if it has had a heart transplant. I also want the car to retain
some level of practicality and with that in mind, it'll be more
practical to service the engine from outside the car than climbing
inside to change the oil. I also want to be able to lift the engine
lid and see an engine that sits in place nicely.
More metalwork had to be removed from the back end of the central
tunnel to make room for the gearbox to be moved forward some more.
That hole is just getting bigger, and the clutch and throttle cable
guides have had to be moved further out of the way. Now there's
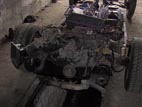
room to move the gearbox forward considerably, so much so that I'm
worried about the rather extreme angle the drive shafts are in at
the moment. I think I might start chewing up the CV joints with
them so far out of line. I know the Porsche 944/Type2 CV joints
offer a wider arc of movement, so for the same location they should
be under less pressure, being a bit further from their limit.
Gearbox now futher forward again, the driveshafts
are getting a bit out of line...
|
Engine:
With the gearbox bolted up to the CV joints, I was able to figure
out roughly how far forward and upward I could go before straining
them too much. The time had come to introduce the engine to the
gearbox and chassis and see how things were going to fit. Using
a hoist, I was able to swing the engine into place easily. Having
the hoist available to me made the job of fitting the motor much
easier, I generally work alone, and trying to manouver the engine
balanced on a jack and into the chassis would have been a real pain
in the ass. So with the engine bolted to the gearbox via the adapter
plate and hanging from the hoist, it became apparent that the stock
Subaru engine mounts lined up pretty well with the stock VW rear
gearbox mounts.
Making an adapter plate to bolt one directly to the other would
have ended up in the engine being too high (!) and there would be
a lot of movement in the engine as it would have a doubly thick
engine mount, so I decided to cut the top off the VW mounts leaving
the steel base bolted to the chassis and then extend the base to
pick up the Subaru mounts. As you can see from the pictures below,
the location was approximately right, but the angle was wrong. I
toyed with making a "wedge" to join the two, but a simpler
solution was at hand. After removing the stock brace from between
the frame horns the VW mounts could be rotated individually to bring
them into line with the Subaru mounts. They would still need to
be extended by some flat plate.
The plate was cut to size and welded to what was left of the VW
mounts and a hole drilled in each where I thought was right. It
turned out I was wrong and I had to drill another hole further down,
you'll see that in the pics. I don't mind as I'm not trying to get
it right first time with these, they'll serve as a template later
on when I reinforce the back end. When that happens, these mounts
will be incorporated into the framework.
While it is very convenient that the mounts lined up nicely, and
the engine is quite balanced on the mounts without much pressure
on the gearbox nosecone, I'm still very much aware of the severe
angle of the driveshafts. I need to find some gearbox output flanges
from a 911SC (thanks for that piece of info from Mike Ghia!) and
the correct length drive shafts from an early 944 Turbo to see EXACTLY
what range of movement the 944/Type2 CVs give. If I need to move
the engine and gearbox back to save the CV joints, it will simply
mean extending the VW mounts further back to meet the Subaru ones.
I can afford to move the assembly back a bit as the location of
the rearmost point of the engine (the crank pulley) at the moment
is actually aboput 40mm FORWARD of where the VW pulley would be.
A better shot than those above of the adapter
and flywheel on the engine.
|
The hoist was like having a second set of
(very strong) hands!
|
Subaru mount (top) doesn't quite line up
with the base of the VW mount.
|
Same, but the left side...
|
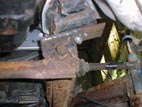
After extending the VW mount, note the bottom
bolt hole doesn't line up as the mount has been rotated around
the big bolt.
|
Same on the other side.
|
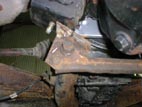
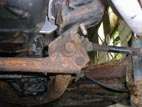
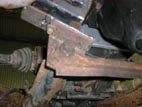
Where it's sitting at the moment, the dreaded
low Subaru sump is no lower than the brace between the frame
horns.
|
21-3-05:
Transmission:
Since I discovered the flanges bought from Ebay were actually designed
for type1 size CV joints, and the bigger ones I bought locally in
Ireland were designed for the much bigger 930 style CV joints, the
only thing to do in the absence of type2/944 size flanges was to
have the 930 flanges drilled out to suit the type2/944 bolt pattern.
After dropping them into my friendly neighbourhood precision engineer
along with one of the type2/944 CV joints to work from, I collected
them a few days later all freshly resized. You can see below the
difference in the diameter of the flange and the 944 CV joint, the
flange overhangs it by about 5mm each side.
I have also sourced a pair of early 944 turbo drive shafts complete
with CV joints from Ebay UK and I now have enough parts to get back
into assembling the rear axle. Once I have the redrilled flanges
plugged into the gearbox and the 944 axles and trailing arms installed
I can FINALLY determine how far out of line I can safely run the
CV joints without causing them to wear out prematurely.
944 CV and 930 flange
|
Note redrilled flange
|
930 flange much wider than 944 CV
|
The redrilled holes. M8 to match CV bolts
|
Gotta love all the shiny new parts... |
7-5-05:
Transmission:
After having the output flanges machined to suit the 944 CV joints,
the next thing to do was to plug them into the gearbox to see if
the drive shafts worked any better than the stock VW ones. I have
installed the 944 trailing arm on the right side now and everything
is in place for a trial assembly. Once the output shafts were plugged
in and bolted tight, the drive shaft slipped into place perfectly!
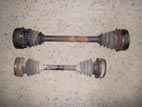
The shafts are the correct length for the type of trailing arms
being used, you can see the difference in length between the 944
Turbo shafts and stock VW shaft below. Because of the extra length
of the shaft, the difference in the angle of the shafts from the
stock angle is less then with the VW shafts. Truth be told, the
VW CVs were "popping" when moving the car around the garage,
that's how extreme their angle was. Luckily the 944 shafts and CVs
are well within their safe range of movement with no strain whatsoever.
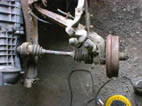
944 Turbo shaft (top) compared to beetle
shaft (bottom)
|
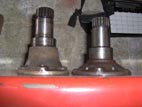
901 output flange (left), 915/930 output
flange (right)
|
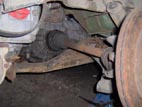
944T shaft installed, angle is within safe
range
|
4-7-05:
Transmission:
With the body off, it's easy to see the longer Porsche drive shafts
are at a more acceptable angle than the VW ones were. The shift
rods can be compared too, since I'll be using the Porsche shifter,
the matching shift rod will have to be lengthened to meet up with
the transmission.
Since the nose of the transmission is currently sitting inside the
central tunnel, it makes sense to use a single front gearbox mount
on the nosecone inside the tunnel. I've ordered a Ford Fiesta engine
mount to do the job, it has a single stud on either side. I'll make
up a mount to adapt it to the transmission.
The starter from a VW automatic transmission was supplied by Britt
from California (thanks!) and fits nicely in the transmission. A
self supporting starter like this is required because the Porsche
gearbox has no bush in the bellhousing to support the starter pinion
shaft like the VW transmission has. I still haven't checked whether
it meshes with the Porsch ering gear, so fingers crossed it does!
The stock Subaru intercooler and air filter have been offered up
in their stock locations just to see how they'll fit with the space
available. The intercooler will need a decent feed of cool air so
I'll have to figure that bit out yet. I reckon the filter will have
to be relocated, but I'll check that when the body is put back down.
The Subaru wiring loom has been taken out of storage to see what
bots are required and what bits need to be cut away. I'll fit it
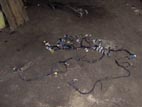
up to all the parts I have like the ECU and gauge cluster to see
which plugs are used and then compare it to a wiring diagram and
see what's not necessary.
911 shift rod (top compared to beetle shift
rod (bottom)
|
Old pic of the angle of the VW shafts.
|
Drive shaft angle now more reasonable
|
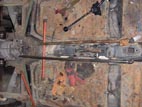
915 gearbox just resting inside tunnel at
the moment
|
Self-supporting starter fitted
|
Stock Subaru instercooler and air filter
fitted to engine
|
THE WIRING LOOM!
|