Bikers Workshop Series
Part 9;
Fitting Hondaline Heated Grips To GL1800.
By Steve Saunders.
Having ordered a set of Hondaline heated grips for my
GL1800 Goldwing in February 2004, they finally arrived in May, just in time for the
summer! I decided to fit them the next month, even though I wouldn't be needing
them until the next Winter. A case of fit them now or lose them later! You will
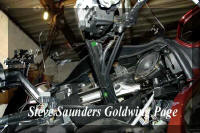
notice that the top shelter is removed from the Goldwing in some of the pictures below.
You don't need to do this, I was doing other work on the Goldwing at the time
and decided to kill two birds with one stone.
Click the thumbnails for a bigger image.
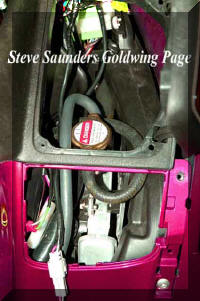
 First thing is to disconnect the battery and
remove the meter panel. Instructions for meter panel removal are already given
in the article on
GL1800 CB Radio Fitting. Remove the right side glove box. Don't forget to unhook the cable that goes from
the lock to the glove box.
First thing is to disconnect the battery and
remove the meter panel. Instructions for meter panel removal are already given
in the article on
GL1800 CB Radio Fitting. Remove the right side glove box. Don't forget to unhook the cable that goes from
the lock to the glove box.
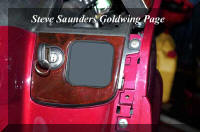 Then
remove the right side fairing trim piece, starting at the bottom inner and
working your way upwards. Unscrew the single Allen head bolt holding the lock
panel in place and remove the panel.
Then
remove the right side fairing trim piece, starting at the bottom inner and
working your way upwards. Unscrew the single Allen head bolt holding the lock
panel in place and remove the panel.
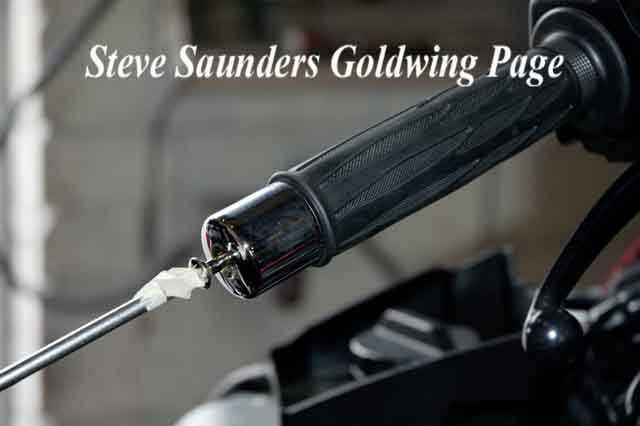
 Now to remove the old grips. Tip;
If you have chrome cap ends fitted, protect the chrome on the screw by
putting some tape on the end of the screwdriver.
Now to remove the old grips. Tip;
If you have chrome cap ends fitted, protect the chrome on the screw by
putting some tape on the end of the screwdriver.
 If you're a cheapskate, and want to save the old grips, run a thin
screwdriver or a hacksaw blade around the inside of the grip to loosen the old
glue and it will come away easily. Repeat on the right side grip. The
instructions tell you to remove the whole throttle grip & boss but you don't
need to go to all that hassle of unscrewing the switch assembly to get at it.
Just remove the rubber grip same as described for the left side.
If you're a cheapskate, and want to save the old grips, run a thin
screwdriver or a hacksaw blade around the inside of the grip to loosen the old
glue and it will come away easily. Repeat on the right side grip. The
instructions tell you to remove the whole throttle grip & boss but you don't
need to go to all that hassle of unscrewing the switch assembly to get at it.
Just remove the rubber grip same as described for the left side.
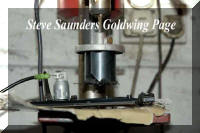
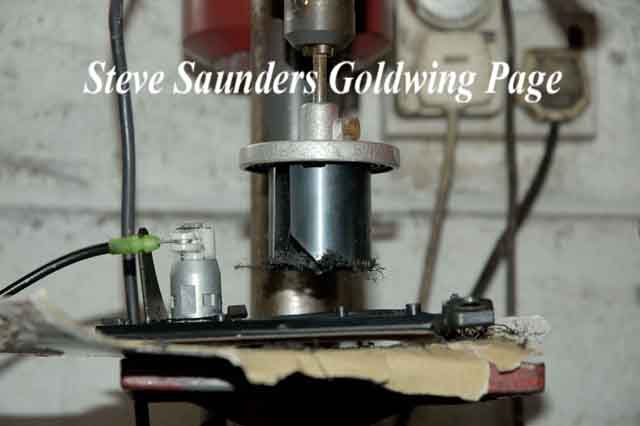
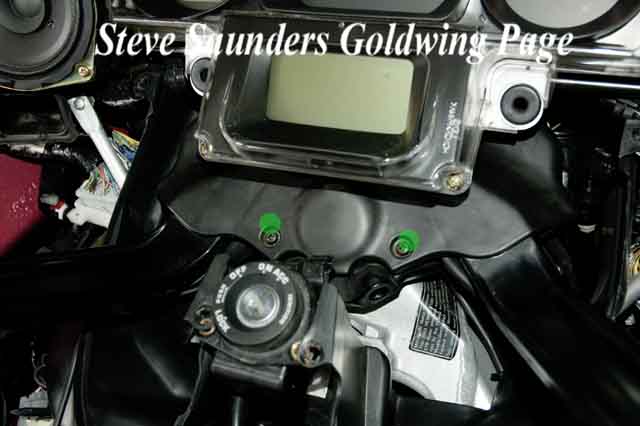
 After removing the switch panel, drill a 45mm hole with a holesaw. The spot
to drill is marked on the inside of the panel. Then just screw the controller
knob assembly into position with the three screws provided (second picture).
After removing the switch panel, drill a 45mm hole with a holesaw. The spot
to drill is marked on the inside of the panel. Then just screw the controller
knob assembly into position with the three screws provided (second picture).
 Spread some glue (the Honda stuff if you can get it, or just plain old rubber
cement as I've used on my last four Goldwings without problems). Spread it more
towards the ends and middle of the bar as it will get pushed inward as you push
the grips on anyway.
Spread some glue (the Honda stuff if you can get it, or just plain old rubber
cement as I've used on my last four Goldwings without problems). Spread it more
towards the ends and middle of the bar as it will get pushed inward as you push
the grips on anyway.
 Before the glue sets, put the black plastic spacer in position and screw the
end cap back on. Then quickly slide the grip back out a bit until the spacer is
touching the end cap without any rattling or free play. This is a much more
accurate way of fitting the grip than measuring a 3.8mm gap at the switch
housing that the supplied instructions suggest. Place the left grip so
that the electrical wire is in a similar position to the picture.
Before the glue sets, put the black plastic spacer in position and screw the
end cap back on. Then quickly slide the grip back out a bit until the spacer is
touching the end cap without any rattling or free play. This is a much more
accurate way of fitting the grip than measuring a 3.8mm gap at the switch
housing that the supplied instructions suggest. Place the left grip so
that the electrical wire is in a similar position to the picture.
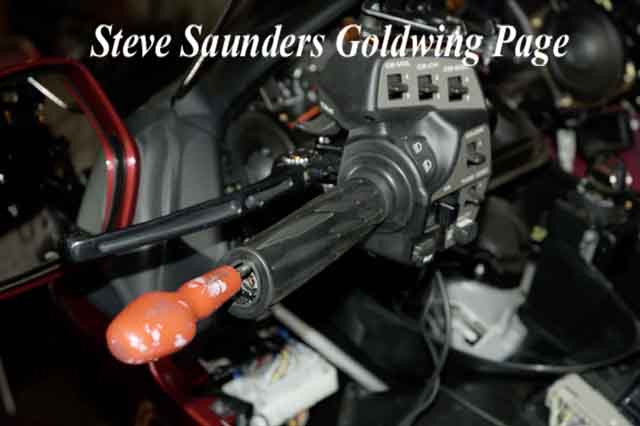
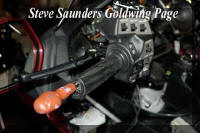
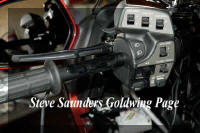
 Fit the right grip as you did the left, then rotate the grip so that the wire
is as shown. This is much better than the way the instructions tell you and will
ensure that your thumb won't snag the wire. The throttle only rotates about 45
degrees so the wire won't interfere with anything else either.
Fit the right grip as you did the left, then rotate the grip so that the wire
is as shown. This is much better than the way the instructions tell you and will
ensure that your thumb won't snag the wire. The throttle only rotates about 45
degrees so the wire won't interfere with anything else either.
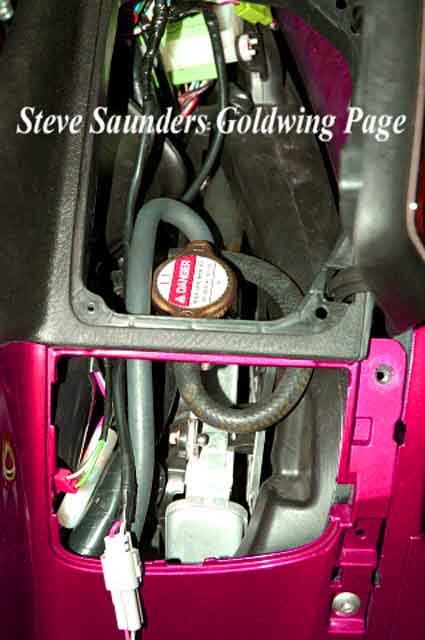
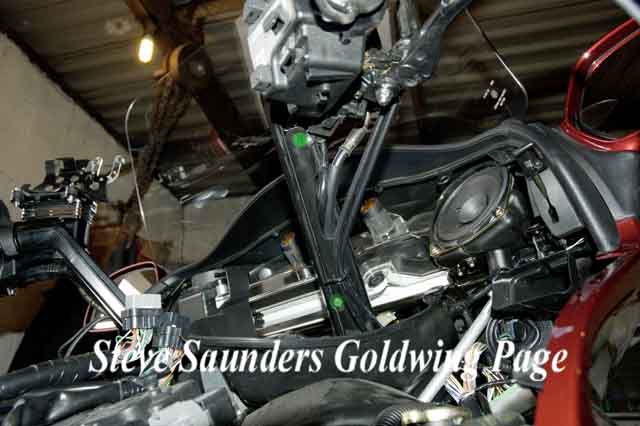
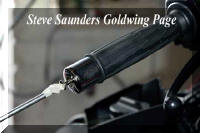
 See the breather hose coming out from just under the front of the radiator
cap in the first picture? Remove the hose, chop 30mm off and route it so that it comes around from
the left side instead, this is to prevent it rubbing against the heater control
for the grips. Then put the supplied corrugated plastic tubing around the same
hose to
give it some more protection. The second picture shows the correct route for the
hose.
See the breather hose coming out from just under the front of the radiator
cap in the first picture? Remove the hose, chop 30mm off and route it so that it comes around from
the left side instead, this is to prevent it rubbing against the heater control
for the grips. Then put the supplied corrugated plastic tubing around the same
hose to
give it some more protection. The second picture shows the correct route for the
hose.
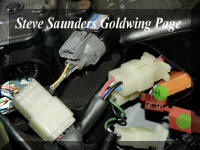
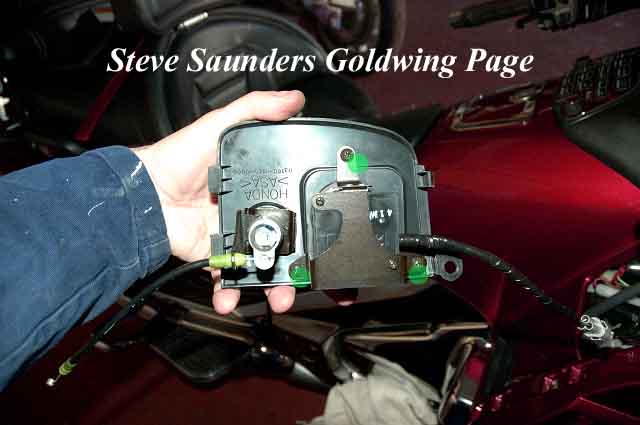
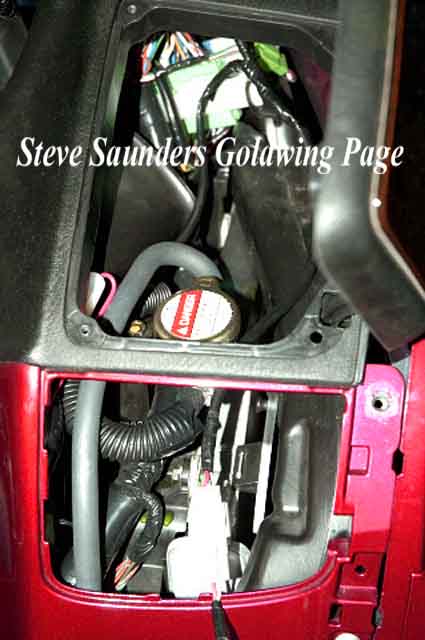
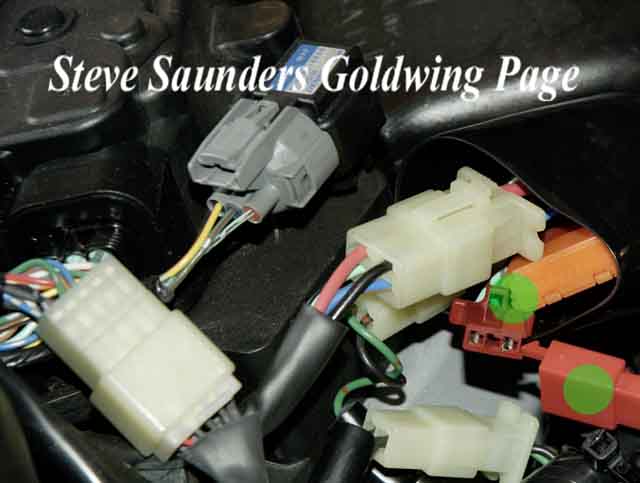
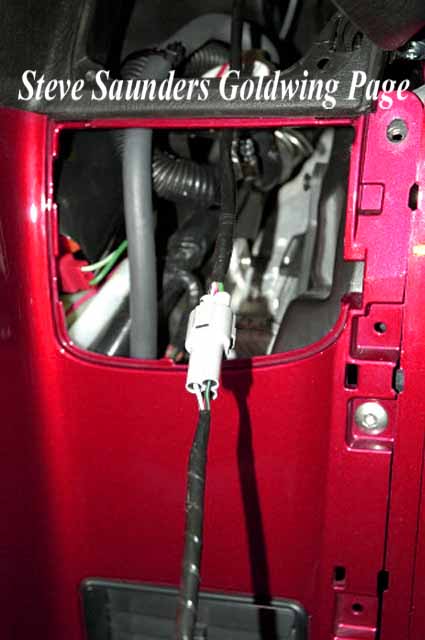
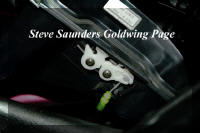
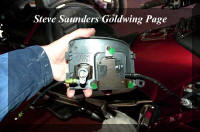
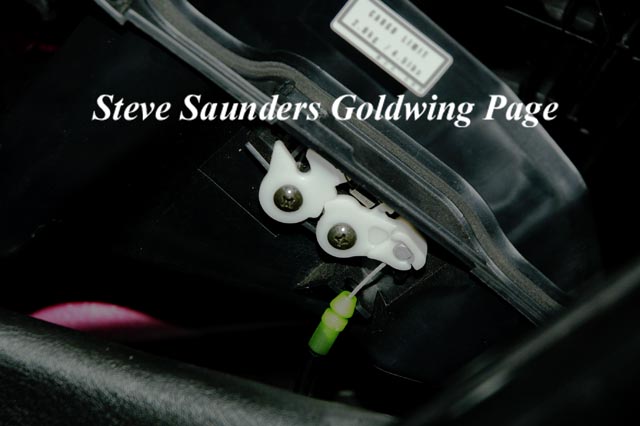
 Remove the two screws and the fork cover. Then route the supplied wires around
the steering head with the other wires and down to the power connector shown in
the second picture. The red connector is just behind where the heater control
panel fits. On 2001 & 2002 models this connector (clear coloured) is just
under the right side air vent (below the speaker). The white connector (third
picture) plugs into the
heater controller. You can now fit the controller panel in place, but make sure
that the back of the controller and the lock mechanism do not foul the wires or
radiator hoses before bolting up.
Remove the two screws and the fork cover. Then route the supplied wires around
the steering head with the other wires and down to the power connector shown in
the second picture. The red connector is just behind where the heater control
panel fits. On 2001 & 2002 models this connector (clear coloured) is just
under the right side air vent (below the speaker). The white connector (third
picture) plugs into the
heater controller. You can now fit the controller panel in place, but make sure
that the back of the controller and the lock mechanism do not foul the wires or
radiator hoses before bolting up.
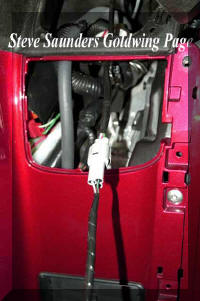
 Unscrew the fork lower plates on each side and route the wire from the grips
down through them. Make sure that the connection plugs for the grips are
concealed under the cover (and covered by insulating tape) after the job is done. Check out the operation of the
grips before putting everything back together and cable tie all the wires in
sensible places, ensuring just enough (but not too much) free play in the wires
on the throttle side. Be warned that the Honda heated grips get very hot when
turned on full blast! Leave them on hot for a few minutes to help the glue dry
faster.
Unscrew the fork lower plates on each side and route the wire from the grips
down through them. Make sure that the connection plugs for the grips are
concealed under the cover (and covered by insulating tape) after the job is done. Check out the operation of the
grips before putting everything back together and cable tie all the wires in
sensible places, ensuring just enough (but not too much) free play in the wires
on the throttle side. Be warned that the Honda heated grips get very hot when
turned on full blast! Leave them on hot for a few minutes to help the glue dry
faster.
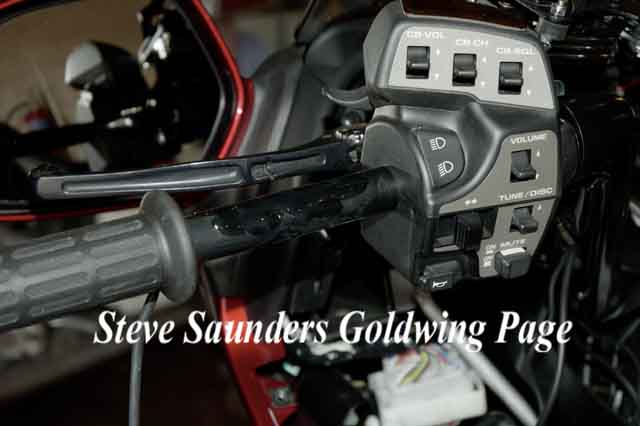
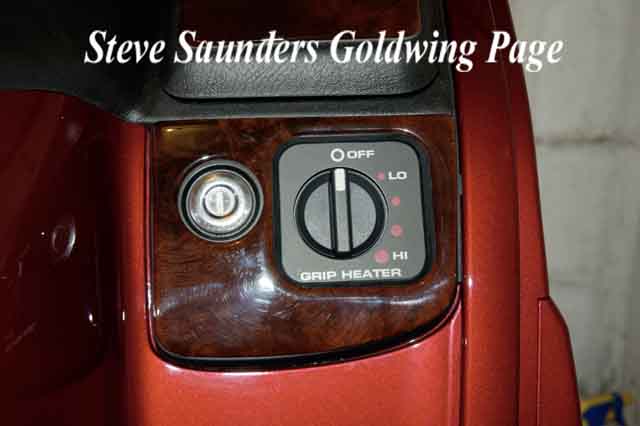
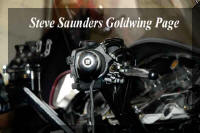
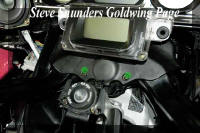
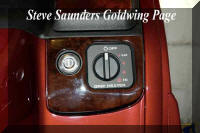 Finally stick the dial face onto the front of the grip controller as shown. This
is the heated grip controller after installation.
Finally stick the dial face onto the front of the grip controller as shown. This
is the heated grip controller after installation.
Bikers Workshop
Menu
Home
 First thing is to disconnect the battery and
remove the meter panel. Instructions for meter panel removal are already given
in the article on
GL1800 CB Radio Fitting. Remove the right side glove box. Don't forget to unhook the cable that goes from
the lock to the glove box.
First thing is to disconnect the battery and
remove the meter panel. Instructions for meter panel removal are already given
in the article on
GL1800 CB Radio Fitting. Remove the right side glove box. Don't forget to unhook the cable that goes from
the lock to the glove box.