How to get PaintShop Pro to print one or more photos to a A4 Sheet. |
|||||
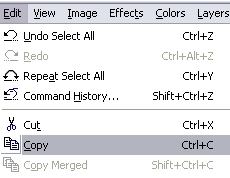
5. Select one of the photos and go to Selections and Select All, you should now see a dotted line around the photo. Now go to Edit and Copy.
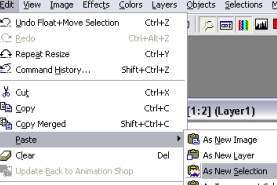
6. Select the A4 image that you
created and go to Edit and Paste
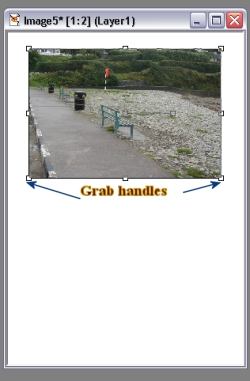
as New Layer. 7. Now if the photo is too big or
small click on the Deformation tool,
|
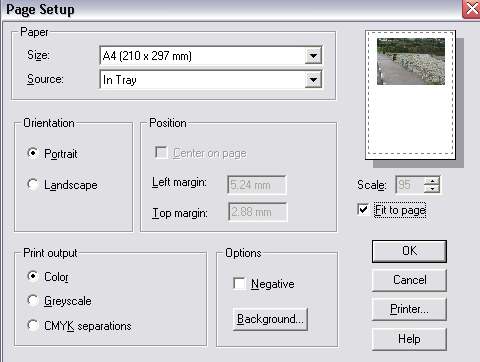
8. Now do the same with the second photo that you want to put on the page. 9. To print the images, go to File
and Page Setup, Select the correct paper size "A4"
and tick the box Fit to Page. Press OK
and go to File and select Print.
Tip: By having the template in landscape mode,
its ideal for putting four photos on one page.
|
||||
| Back to Page 1 | Part of Greater
Sites Web-Site www.greatersites.net |