Buy Kit
1 Available
€8.99
Buy PCB
2 Available
€4.99
LM75 temperature logger on the Raspberry pi

The LM75 board is also supported by Pilogger
As a follow up to the previous project and inspired by the excellent article in Magpi issue 5 by Dr Duncan Rowalnd, I decided to see if this technique would let me read temperature from the LM75 on the Raspbian operating system.
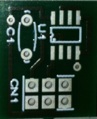
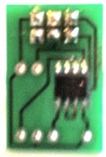
First I am assuming the hardware is constructed as shown in previous project and is connected to a first generation raspberry pi.
So start off with a clean install of Raspbian that can be downloaded from the Raspberry pi website here http://www.raspberrypi.org/downloads
Boot up Rapsbian and then enter the root terminal, I do this via the GUI under the accessories Tab.
The first thing to do is ensure that all the programs are upto date
root@raspberrypi:/home/pi# apt-get update
Next we need to ensure that the I2C port is enabled as default raspbian backlists them
First open LX terminal and type
nano /etc/modprobe.d/raspi-blacklist.conf
and place a hash before the I@C and SPI commands to enable them a full worked example can be seen here
Now we need a package called I2C tools
root@raspberrypi:/home/pi# apt-get install i2c-tools
When that is installed we need to Modprobe the broadcom chip and i2C-dev
root@raspberrypi:/home/pi# modprobe i2c-bcm2708
root@raspberrypi:/home/pi# modprobe i2c-dev
And finally grant permision for non root users to access the i2c commands
root@raspberrypi:/home/pi# usermod -a -G i2c pi
Exit the root terminal and reboot for the changes to take effect. After reboot we need to Modprobe again
root@raspberrypi:/home/pi# modprobe i2c-bcm2708
root@raspberrypi:/home/pi# modprobe i2c-dev
Now lets check the hardware is working using the i2cget command which returns the hex value of 0x7e16. If using a raspberry pi Rev A board
root@raspberrypi:/home/pi# i2cget -y 0 0x48 0x00 w
0x7e16
If using a Rapberry pi Rev B board
root@raspberrypi:/home/pi# i2cget -y 1 0x48 0x00 w
All good so far... we have at least got Raspbian talking to the device so the basic hardware is working. Now lets see if the Magpi code can convert that to a temperature, be very careful with the syntax here I got it wrong multiple times.....(Change the i2cget -y 0 to i2cget -y 1 if using a rev B Board.
root@raspberrypi:/home/pi# i2cget -y 0 0x48 0x00 w | \
> awk '{print( \
> ("0x"substr($1,5,2)substr($1,3,1))*0.0625) \
> }'
22.4375
Looks like it works, note the LM75 is only accurate to 0.5 Deg C so its a bit of an illusion so we need to limit it to 1 decimal place and round off to the nearest 0.5 Deg C .
Now we need to put this into a bash script file so open up a new nano file called LM75.sh and type:-
#!/bin/bash
while true;
do
i2cget -y 0 0x48 0x00 w |
awk '{printf("%.1f\n", (a=( \
(("0x"substr($1,5,2)substr($1,3,1))*0.0625)+0.1) \
)>128?a-256:a)}'
sleep 60
done
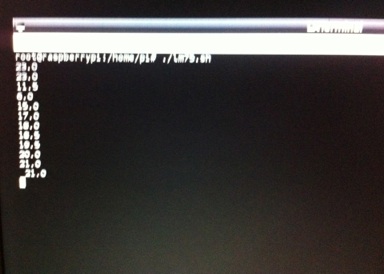
This file puts the i2c get command in a loop so every 60 seconds the terminal goes and gets a reading from the sensor and writes it to a new line in terminal like picture below that shows what happens when I apply freezer spray to the sensor.
We need to then type in the command
root@raspberrypi:/home/pi# chmod +x lm75.sh
And in order to run the script type
root@raspberrypi:/home/pi# ./lm75.sh
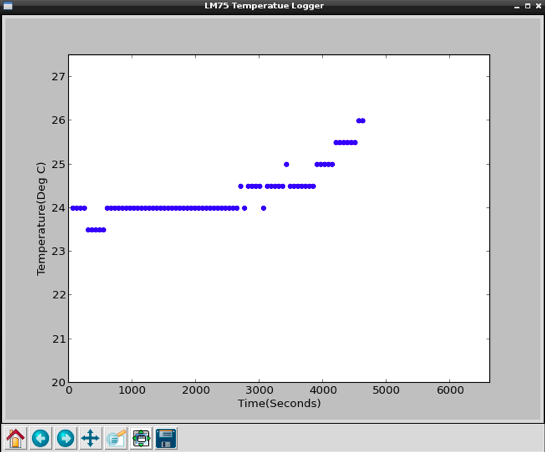
And just leave it to run... use ^C to exit when you are done. One of the really nice things of having this running on raspbian under the gui is you can just copy and paste from the terminal program into an email then paste it into a spreadsheet, add a minutes column and then plot a graph like the one at the top of page. This show’s the temperature of my lounge during the night and also where I got a bit carried away with a can of freezer spray....
For the next stage in the project see how to link a data feed to update to the web.
Data logging from python using Matplotlib
As a continuation to the above project I decided to try an read the LM75 from python and plot it using the matplotlib libary, in order to run this you will need to get the matplotlib, numpy and SMbus python extensions.
sudo apt-get install python-smbus
sudo apt-get install python-scipy
sudo apt-get install python-matplotlib
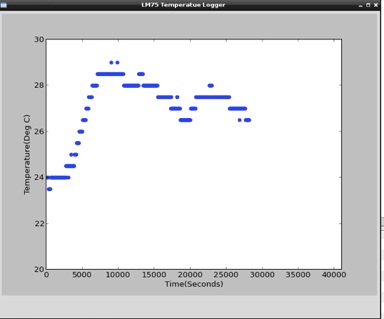
The picture opposite shows the result of
the plotter(click on it to see a larger version)
It automatically expands the time and
temperature access as measurements come
in above the current limit.
The sample rate can set by altering the tick
variable to set the logging interval in seconds.
Python listing below
#!/user/bin/env python
import time
import numpy as np
import matplotlib.pyplot as plt
import smbus
bus = smbus.SMBus(0)
fig=plt.figure(' LM75 Temperatue Logger')
Timex =100
Tempmin=20
Tempmax=25
elapsedtime=0
tick = 60
plt.axis([0,Timex,Tempmin,Tempmax])
i=0
x=list()
y=list()
plt.ylabel('Temperature(Deg C)')
plt.xlabel('Time(Seconds)')
plt.ion()
plt.show()
Oldtime = time.time()
while 1 :
if elapsedtime > tick:
Oldtime = time.time()
elaspedtime = 0
data = bus.read_i2c_block_data(0x48, 0)
TempMSB = data[0]
TempLSB = data[1]
temp_y = (((TempMSB << 8) | TempLSB) >>7) * 0.5
if temp_y > 125:
temp_y =(((((TempMSB << 8) | TempLSB) >>7) * 0.5) -256)
if temp_y > Tempmax:
Tempmax = temp_y + 2
plt.axis([0,Timex,Tempmin,Tempmax])
if temp_y < Tempmin:
Tempmin= temp_y - 2
plt.axis([0,Timex,Tempmin,Tempmax])
if i > Timex * 0.75:
Timex= Timex * 1.2
plt.axis([0,Timex,Tempmin,Tempmax])
print temp_y
i=i+tick
x.append(i)
y.append(temp_y)
plt.scatter(i,temp_y,color='blue')
plt.draw()
Currenttime = time.time()
elapsedtime = Currenttime - Oldtime
LM75 basic data logger on Raspbian on the raspberry pi