Word Project Tables |
Working with Graphics: Working with Text: Working with Tables: Word Tips - General |
|||
|
Tables can be used as the basis for a range of handy documents
for home and work.
|
||||
| 2. To add your table, choose Table, Insert, Table (in Word 97 choose Table, Insert Table). Set the number of columns to 2, the number of rows to 10, and click OK. Now, with your mouse, drag the lower border of the table down so it sits about lem from the bottom of the page (but not so far as it goes onto the next page]. | 3. Click somewhere in the table and choose Table,
Select, Table then choose Table, Menu AutoFit, Distribute Rows Evenly
and all the rows will stretch to fill the page. If you are using Word 97, choose Table, Select Table and then Table, Distribute Rows Evenly. |
|||
| 4. Drag the dividing line between the two columns
across so it sits in a position about two thirds of the width of the
page. Then click the first column of the table and choose Table, Select,
Column (in Word 97, choose Table, Select Column) and then Table, Merge
Cells. You now have a single large cell into which you can type your
notice, and if you wish, you can also add an image. |
5. To add an image, click the large cell on the
left of the page and choose Insert, Picture then choose From File
or Clip Art depending on the location of the image you plan to use.
When the image appears in the table, click it to select it and choose
Format, Picture, Layout tab, and set the Wrapping Style to Square
or Tight depending on your preference. You can also select Behind
text to place the image behind the text on the page. (If you're using
Word 97 you'll find images don't work quite the same when placed in
table cells. In this case, choose the Position tab and click Float
over text then choose the Wrapping tab and set the Wrapping Style
to None.) Click OK when you are done. You can now adjust the size
of the image and move it into position. |
|||
| 6. Type the text for your notice using a font and font size that can easily be seen at a distance. Use mixed case (rather than all capitals} and draw attention to the most important words. If you are using Word 97 and you want your text to appear over the image, right-click the image and choose Order, Send Behind Text. | 7. The information for the tear-off strips goes
in the cells down the right of the page. Begin in the first cell and
type your text. Format it using a font and size that enables you to
fit all the information in the one cell without making it any larger.
Now highlight the text in this cell and click Copy, select all the
cells below and click Paste to paste the details into all the other
cells. |
|||
| 8. When you have completed your notice, remove all the borders from the table by clicking somewhere in the table and choose Format,Borders and Shading, Borders tab. Click the None button on the left, and from the Apply to list, choose Table and click OK. Save and print a copy of your notice. Using scissors, cut along the spaces between the information down the right of the page so that the small strips are easy to tear off. |
 The merge tool enables you to join cells from a number of rows and columns to make one large cell. |
|||
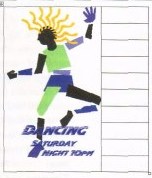 You can set the image so that it appears underneath the text for a more interesting effect. |
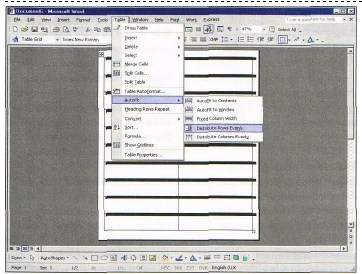 Using Word's table tools enables you to quickly create even-sized rows for the notice. |
|||
|
|
||||