B
BUBBLE MAKER
1) Take a
polystyrene disposable cup.
2) Cut a circle
out of Clear contact paper (sticky on one side – usually used to cover books)-
bigger than the opening of the cup
3) Cut small slits
in the edges so as to make the circle fit properly onto the cup and put over
mouth of cup so it is sealed. Also put a rubber band around the top to keep
Contact in place
4) Pierce a hole
in the bottom of the cup and about 12 small holes in the contact.
5) Dip the contact
into a detergent solution
6) Blow through
the bottom of the cup and watch the bubbles come out the other end
C
CORK LIGHTHOUSE
A
simple "cork" craft from the Maritimes... Glue your cork large end down, onto a
small piece of blue felt. Glue a small piece of cotton around the bottom of your
cork, and make it kind of wispy, like your cork is sitting on a cloud on top of
the blue felt. By the way, these are actually waves.
Take
a yellow, plastic bead: the kind that is shaped like a daisy or a six pointed
star and attach to the top of your cork. (You can use a yellow headed pin to
attach if you like.)
Now
paint the windows and doors on your LIGHTHOUSE with a black felt pen.
VOILA!!! (Obviously, you can make your doors and windows first, if you like -
might be easier.)
A pin will attach
to your camp-hat.
F
FRIENDSHIP STICK
Take an ice-cream stick
Draw on the top end a smiley face and at the bottom six bands- one green, then a
space then red, yellow, black and white all together, then a space then green at
the bottom. In the middle draw a
Brown cross.
This little stick means friendship of a special kind. It is a symbol of
belonging to a living group. It can be hung on your camp hat or around your
neck.
The symbolism serves as a personal communication to overcome barriers of
language, race and culture.
Green at the bottom is for faith in God and one another. It is the basis of a
happy and meaningful life.
The next four bands represent the races of the world; red, yellow, black and
white. They stand close together indicating all people are equal.
The green band above the four races stands for the hope for the future and the
brown cross shows how four races can come together and work for peace.
The smiling face is the result of friendship based on faith and unity. One eye
is brown and the other is blue to represent all races and the red mouth in a
smile means joy.
May the smile never be false. A smile is a trademark of a friend. To be greeted
by the smiling face of a friend is one of the greatest joys we can experience.
The face is crowned by girl guide blue indicating loyalty to guides.
G
GLITTER
PENS
You
need
- an
old pen
-
double sided sellotape
-
glitter
-
card/paper
How
to make
-
Wrap the double sided tape around the pen
-
Put the glitter onto the card or paper
-
Roll the pen in the glitter until the tape is covered. Shake it to remove the
excess glitter
K
KIWIFRUIT
FRIDGE MAGNET
You Need:
-
green and brown felt,
-
brown pompom,
- 1
pipe cleaner cut in half,
-
magnet,
-
PVA glue
- 2
wobbly eyes.
How
to make
-
Cut small leaf shapes (3 to 5) and a mouth out of green felt
-
Cut 4 mitten shapes and 4 Gumboot shapes out of brown felt
-
Paint seeds etc onto mouth with black and white paint (or felt tip pen)
-
One either end of a pipecleaner glue 2 gumboots together with pipecleaner end
inside
-
Repeat with mittens on the other pipecleaner
-
Glue legs, arms and finally magnet onto the back of the pompom
-
Glue leaves, eyes and mouth onto the front of the pompom.
M
Magnetic Note holders
You
need
-
clothes peg
-
coloured card or foam
-
glue
-
markers, glitter, fabric, lace (or any odd and ends you have) to decorate
-
magnet
How to
make
- Cut
a small shape from card or foam, just large enough to cover one side of the
clothes-peg.
-
Using markers, glue, glitter, fabric, lace etc decorate the shape.
-
Glue the decorated shape to the front of the clothes-peg.
-
Glue a (strong) magnet to the back side of the clothes-peg.
Put it
on your fridge -- it can be used to clip notes, artwork, or recipes to the
fridge.
Ideas
for shapes:
-
Apples or other fruit
-
sunshine
-
stars
-
hearts
-
any cookie-cutter shape that is large enough
N
NAPKIN
HOLDERS
You need
-
rectangle of crepe
paper approx 5" x 6"
-
1/3 of a paper toilet
roll
-
cotton wool for
stuffing
-
selection of coloured
paper
-
glue
How to make:
-
Glue the long edges
of the crepe paper together to make a tube
-
Glue one end of the
crepe paper inside the toilet roll
-
Flip the crepe paper
over so the toilet roll is inside the crepe paper
-
Stuff the space
between the toilet roll and the crepe paper
-
Glue in the other end
of the crepe paper
-
Decorate with
coloured paper
P
PAINTING IDEAS
BUBBLE PAINTING
Give each person
a straw (with a notch cut into its side) and a small container of soapy paint.
Invite them to
blow gently into the container until the bubbles slightly overflow the
container.
Place a piece of
paper over the container and the bubbles will burst onto the paper, making a
beautiful pattern.
Repeat several
times with different colours.
NOTE: the
notch in the side of the straw is to make it harder for
young
children to suck up paint instead of blowing out.
SPONGE PAINTING
Cut sponges into small pieces about one inch square.
Use spring-type
clothes-pegs for handles.
Place thick paint
in small containers (baking tins, shallow plastic cups, plastic cereal bowls).
Provide large
sheets of shelf paper or butcher paper for painting surfaces --> you can use
these for wrapping paper when the paint is dry.
STRING PAINTING
Apply string, wet
with paint, to large pieces of paper to make graceful, free form designs.
Strings with many
different colours can be used for each design.
STAMP PRINTING
Create your own
stamps by cutting shapes or simple designs out of potatoes, pieces of sponge,
wads of cloth, foam hair curlers, styrofoam, or pencil erasers.
Stamp away to
create pictures, messages, greeting cards, or wrapping paper.
PIERCED PAPER
You
need:
-
white paper;
-
tracing paper;
-
cork;
-
large sewing needle;
-
pencil;
-
tape;
-
kitchen paper or tea-towel;
-
stationery
How to
make
·
Draw a simple design on
regular white paper (snowflake, stars, scallops etc).
·
Trace onto
tracing paper.
·
Tape tracing
paper to stationery (bought or homemade)
·
Place kitchen
towel or tea-towel under paper
·
Insert eye
end of needle into cork (use glue if necessary)
·
Use it to
poke tiny holes in the paper through the tracing paper
You can make bookmarks, place cards, gift tags, stationery
S
SHUTTLECOCKS
You can make shuttlecocks (badminton birds) by putting feathers into the corks.
You need:
- Three or more
feathers of roughly equal size and stiffness
How to make
- decorate the
corks
- place feathers
evenly in the top of the cork to make it into a bird.
You can hit them
with paddles, or just with your bare hand.
These tend to be
fun to play with since if the feathers are not exactly evenly spaced they fly
off in unpredictable directions.
SOCK
DOLLS
AGE: Guides upwards
You need:
-
one pair of socks
(preferably new and brightly coloured )
-
rice
-
fiberfill stuffing
-
assorted leftover
craft items and scraps - the more, the better
-
googly eyes
(optional)
-
hot glue gun and glue
sticks
-
tacky glue
How to make:
-
Have the girls trade
one of their socks with someone else.
-
One sock will be used
for the body of the doll, and the second for making clothes or accessories.
-
Pour approx. 1/2 cup
of rice into the toe of the sock.
-
Your goal is to have
enough rice in the bottom of the sock so the doll will stand up on its own.
-
Next start stuffing
the rest of the sock with the fiberfill stuffing.
-
When you get near the
top of the sock, tie a tight knot in it.
-
Now for the fun
part!! Decorate your doll with the craft items, and googly eyes. Also,
cutting the tassle of the sock (which was made by the knot) into strips, makes
cool hair!
-
Use the second and
contrasting coloured sock to make clothes for your doll.
-
Use your imagination
and have fun!
-
Remember, there is no
right or wrong way to do this.
You'll be surprised with what your girls will come up with. Each Guide will
make a doll, but each one is uniquely different, just like the girls themselves.
This makes an excellent rainy day craft as it is time consuming
SQUISHY MOO
You need
· flour
· squeezy sauce bottle
· balloons
· markers
· ribbon
· eyes (optional)
How to make:
-
Take a balloon, any shape will do.
-
Fill a plastic squeezy sauce bottle with flour and squeeze the flour into the
balloon. (Alternatively use a funnell and a fine skewer and poke the flour
in.)
-
Tie the balloon off in a knot and put ribbon around it in a bow.
-
Using a felt tip pen, draw on a mouth, nose etc and glue on eyes.
-
You can also tie the ribbon in the middle of the balloon and decorate bottom
half with drawn on buttons etc.
SWEET BASKET
You need: 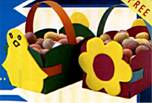
·
Coloured
card
·
Glue
·
Foamastic
·
Scissors
·
Cotton
wool/straw
How to make
-
Enlarge template to
A4 size and copy onto coloured card, including slit positions.
-
Cut out basket shape
and make slits where marked.
-
Cut three strips from
contrasting coloured card 7 ½ inches(19cm) long and ½inch (1.25cm) wide.
-
Fold edges of basket
in and starting at an end thread one strip in and then out finishing at the
other end. Now thread another strip in and out the other side starting by
coming out of the same slit as you finished in. Fold the edges of the strip
back on the inside of the basket and glue in place. These strips hold the
basket together and should be on the outside of the basket on the corners.
-
Glue the third strip
in place as a handle.
-
Cut out shapes of
chicks or flowers from foam and glue to the ends of the basket.
-
Place cotton wool or
straw in the basket and fill with whatever seasonal gift or food you wish.