Basic Principles
Correct Grip
As soon as possible children should be encouraged to adopt
a satisfactory pencil hold which will enable them to write effectively in a
relaxed manner and which will not result in problems at a later stage. It would
be wrong to suggest that there is a precise method of holding a pencil that must
be adopted by all, but there are basic principles which are generally accepted.
Right-handers
In the natural tripod grip the pencil is held lightly
between thumb and forefinger, about 3 cm from the point, with the middle finger
providing extra support. The pencil (or pen) should rest on the end joint of the
middle finger. The other two fingers rest lightly on the paper along with the
side of the hand. It is important that the pencil hold is so light and relaxed
that the pencil can be pulled out of the grip easily. The pencil should point
along the line of the forearm to the right of the shoulder at an angle of 45
degrees (approximately) to the writing line. Similarly the angle of the writing
instrument to the plane of the paper should be 45 degrees (approximately).
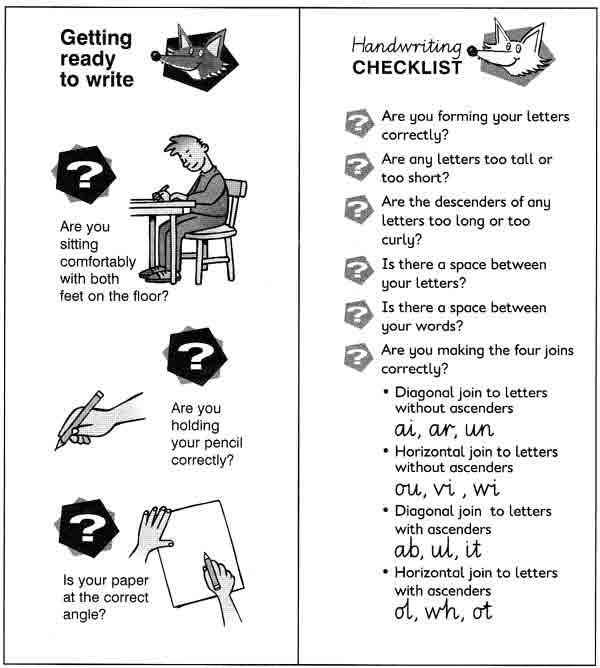
Left-handers
The method of holding the pencil is much the same as for
the right–hander except that the grip should be about 4 cm from the point
instead of 3 cm. This change makes it easier for the writer to see what is
written. Special care is needed to ensure that left-handers do not grip the pen
too tightly. Left-handers find the correct angle of pencil to paper more
difficult to achieve but can be helped through ensuring that the pencil is
neither too hard or too sharply pointed.
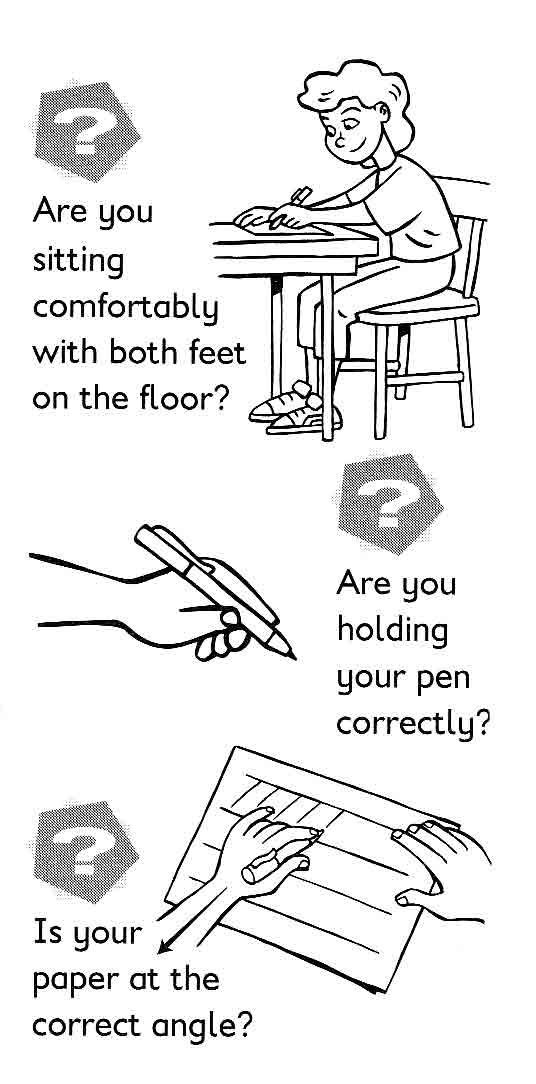
Directions for the teaching of correct grip
- Hold your pencil very lightly between your thumb and fore
finger.
- Your middle finger should also rest very lightly on the
pencil.
- Your other fingers and your hand can rest lightly on the
desk
- Do not press heavily on the paper
- The pencil should point along your arm. It must not point
up in the air or towards your body
- Use your left-hand to hold your exercise book steady.
Handwriting is a skill and like all skills, it may be
improved and refined through practice.
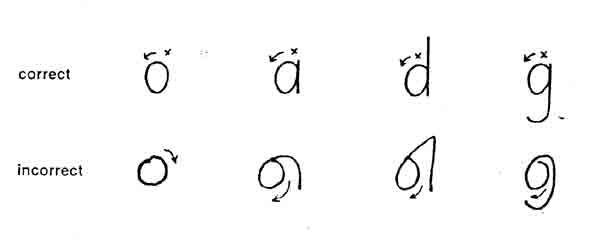
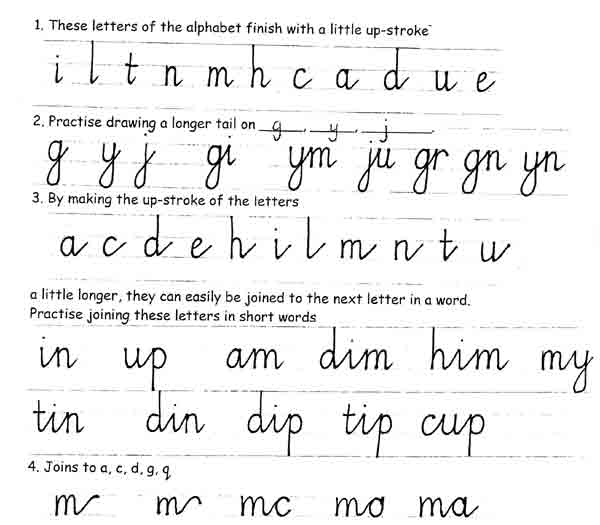
Letter Formation
- In teaching letter formation, the importance of
establishing correct movements cannot be overstated.
- Every letter has its own precise movement always starting
at the correct point and moving in a fixed direction. Families of letters have
certain starting points and movements in common, and should be taught together.
- Observe how the child forms his letters – be careful not
to be influenced by the finished product if done unobserved
- Incorrect letter formation leads to difficulties when
learning joined writing.
- The most common and troublesome error arises from the
practice of forming the letter o and its related letters as a clockwise circle.
Back to Top
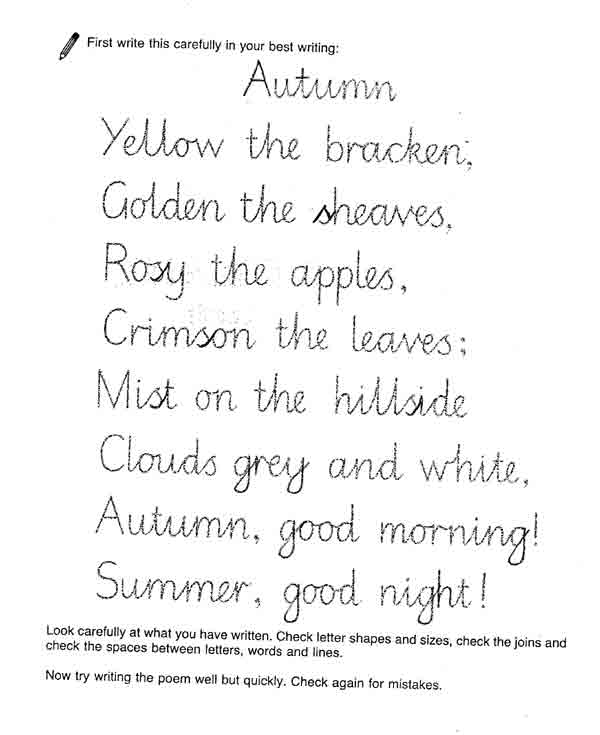
Criteria for assessing handwriting
A large part of any assessment of the quality of
handwriting is likely to be subjective, but there are criteria for assessing the
quality of handwriting, and it is important to foster in the
children an understanding of these criteria.
The main criteria for assessing handwriting are:
- Is it formed with the correct grip and the correct basic
movements?
- Is it written fluently and rhythmically ?
- Is it legible ?
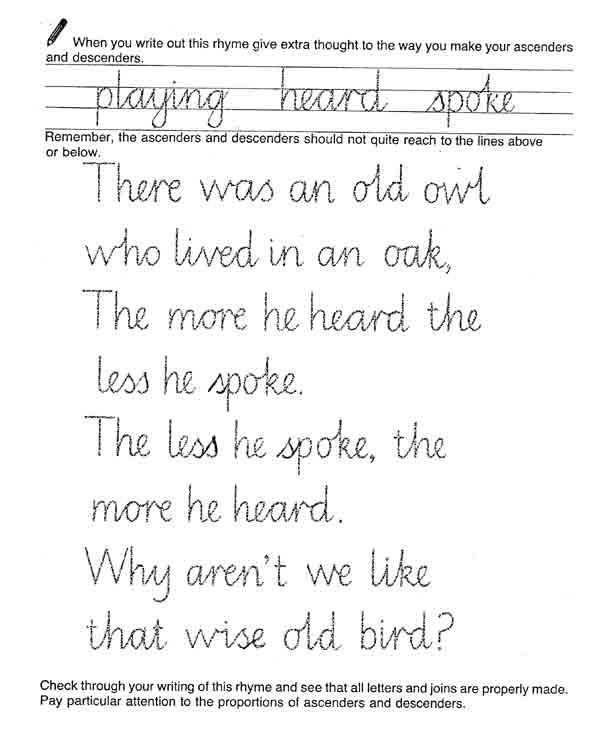
- Are the letters the correct shape and size ?
- Are the slopes of the letters right and consistent ?
- Have the letters the correct relative height ?
- Is the inter-letter spacing appropriate ?
- Is the inter-word spacing appropriate ?
- Are the joins the correct shape
- Are the slopes of the joins correct and consistent ?
Significant faults
- Faulty pencil grip – the pencil is gripped too tightly
and the pupils then have difficulty in producing rhythmic smooth writing.
Crooking of the forefinger is often a sign that the pencil is being held too
tightly. The cure is to make the pupil hold the pencil with the thumb and middle
finger and merely rest the forefinger on the pencil.
- Incorrect formation of letters
- Reversals and inversions
Underlying problems
- Lack of confidence
- Specific learning disability
General strategies for corrective teaching
-
Demonstrations
and instruction – provide additional and repeated demonstrations and
instruction. Such additional practice may be best organised for individuals and
small groups so that close supervision is possible
Sequence of preparatory writing activities
- Writing movements using paint brushes, felt pens or chalk
- Scribbling exercises with a pencil
- Recognising shapes and filling in outlines with coloured
pencils
- Rhythmic writing exercises to counting, music and rhymes
- Writing movements with pencil, making elements of letters,
figures and patterns
- Copying of letters, words and sentences
Back to Top
Back to Top
Infants
- Check for correct pencil grip, hand positions and sitting
posture.
- Before attempting to write any letter, the child should
first trace over it a number of times with the forefinger, while saying the
movement involved in forming the letter – e.g. for c, say “around and
stop”. (See full list of letters at another part of this document).
- The letter should then be written in the air a number of
times by the child while again saying the movement involved in forming the
letter
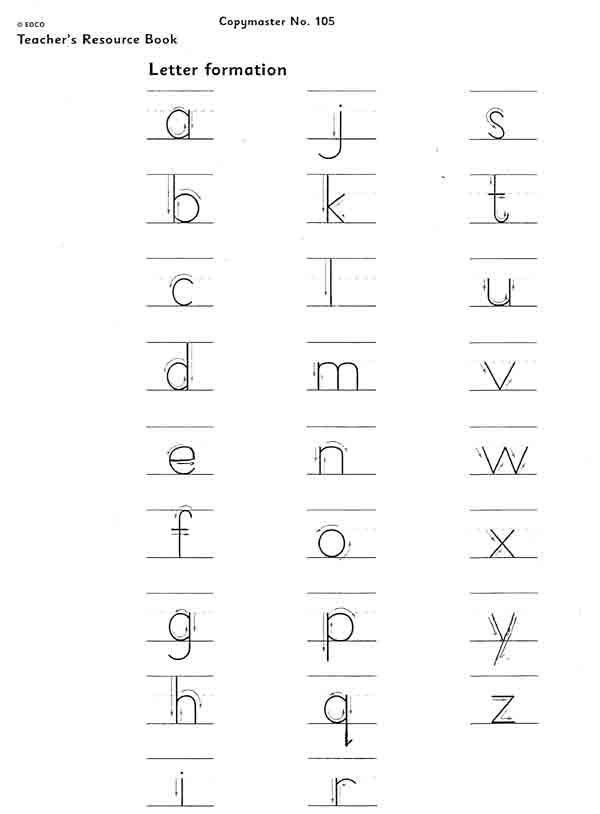
ORDER OF LETTERS

- Two movements are required to form

- Three movements are required
to form
Back to Top
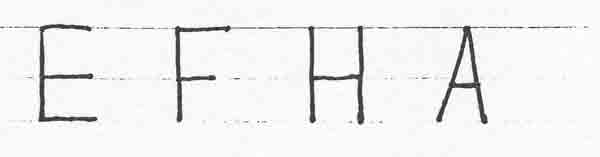
Capital Letters

- There are 2 movements required to form the letters, N, M,
T, Y, K, X, D, P, B, R, Q, G.
The pencil has to be lifted and replaced to finish the letter.
- There are 3 movements needed to form the letters, E, F, H,
A.
Note
As the children will encounter variations in some of their
letters (especially in print), they should be made aware of these variations in
Senior Infants. This should only be done when the children are comfortable and
confident with the letters as described above.
The following variations on letters should be taught:

Back to Top
Order in which Letters should be taught
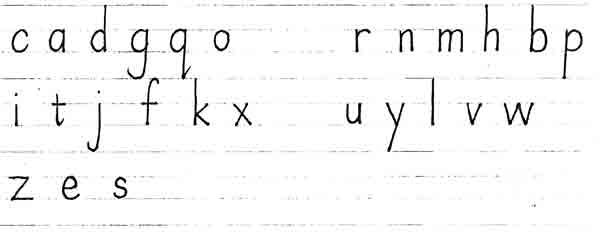
Junior Infants
c, a, d, g, q, o, r, n, m, h, b, p, i t, j, f, k, x, u, y,
l, v, w, z, e, s
| c: |
say - around and stop
|
| a: |
say - around, up and down
|
| d: |
say – around, up to the top and down
|
| g: |
say – around, up, down to the bottom and around
|
| q: |
say – around, up, down to the bottom and curve
|
| o: |
say – around and up around
|
| r: |
say – down, up, around and stop
|
| n: |
say – down and up, around, down and stop
|
| m: |
say – down and up, around, down and up, around, down and stop
|
| h: |
say – down from the top, up, around and down
|
| b: |
say – down from the top, up and around
|
| p: |
say – down to the bottom and up, around and stop
|
| i: |
say – down, lift and dot
|
| t: |
say – down from the top, curve, lift and cross
|
| j: |
say – down to the bottom, around, lift and dot
|
| f: |
say – around at the top, down, lift and cross
|
| k: |
say – down from the top and lift, back across and down across
|
| x: |
say – down across, lift back across
|
| u: |
say – up and around , up and down.
|
| y: |
say – down, around and up, down to the bottom and around
|
| l: |
say – down to the top and curve.
|
| v: |
say – down across and up across
|
| w: |
say – down across and up across, down across and up across
|
| z: |
say – over, back and across and over again
|
| e: |
say – up across, around and stop
|
| s: |
say – around and forward around.
|
Back to Top
All Classes from First to Sixth
First Class
- At the outset, revise all letters – small and capital.
- Introduce joined writing
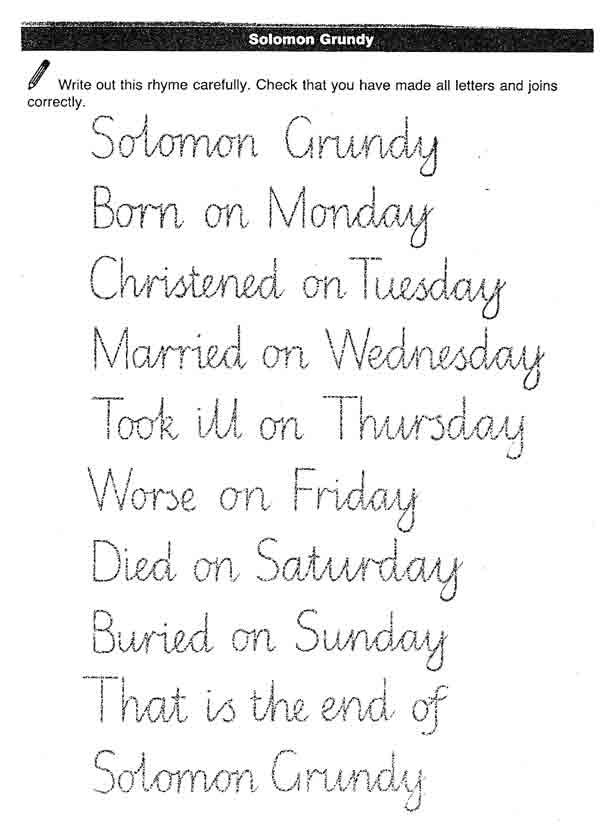
Joined Writing
Joined writing should be
taught in each class from 1st to 6th . The recommended stage for the
introduction of joined writing is towards the end of the second term of 1st
Class or the start of the third term of 1st Class. The first requirement is
readiness, but this can be a double-edged sword, and waiting for too long may
cause even greater problems with the introduction of joined writing.
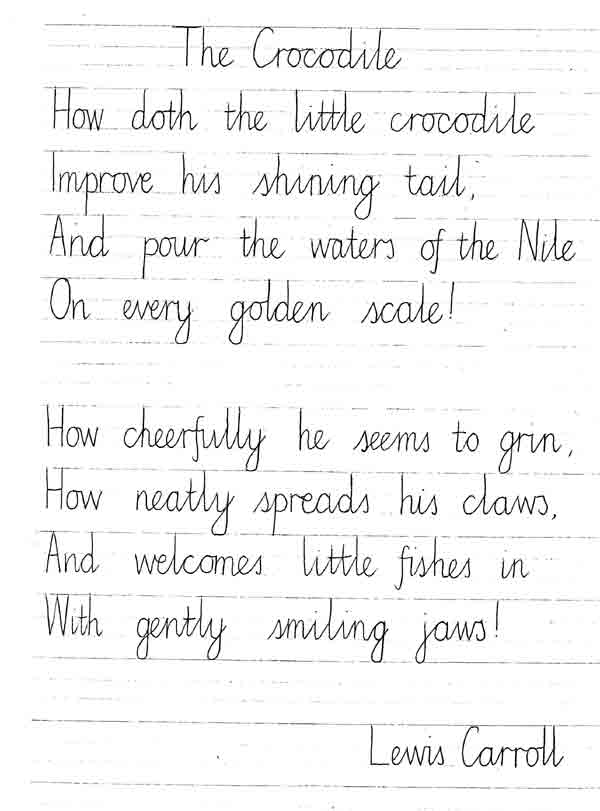
- The first priority is legibility
- The second priority is speed
- Check for correct pencil grip and
correct letter formation
The transfer of newly learned components
of handwriting into the child’s daily writing exercises will take
time and care. The changes in handwriting will interfere temporarily at
least with the normal flow of everyday writing.
- To minimise the time span required to
make this transition, the frequency and duration of handwriting sessions should
be increased for as long as is necessary to consolidate the changes.
- When the joins have been taught, and the
child is comfortable with joining his letters, handwriting lessons should move
from the special handwriting copies to the child’s regular copies.
- When the child had successfully
transferred his joined writing to his regular copies, he is then ready to use
joined writing in his everyday exercises.
- The timing of the change from pencil to
pen /biro will depend on readiness, and is at the discretion of the teacher, but
it is anticipated that this transition will have been effected by Third Class
(at the latest). The criteria for this change are that the child is using all of
the joins in his copies and his writing is of a good size.
- The child should be aware of what is
required in matters such as correct letter shapes, correct letter sizes,
appropriate spacing and margins.
- Individuality of handwriting style is
acceptable provided that the degree of legibility is adequate
- Higher standards can be achieved if
handwriting practice is continued into the senior classes and for many children
this practice is needed
- The teaching of handwriting is largely a
matter of teaching movement. Therefore, the importance of demonstration is
obvious. The teacher should model good rhythm and speed when joining writing on
the blackboard.
Joined Writing: 23 Steps
The up-stroke is continued around to
where a, c and d begin
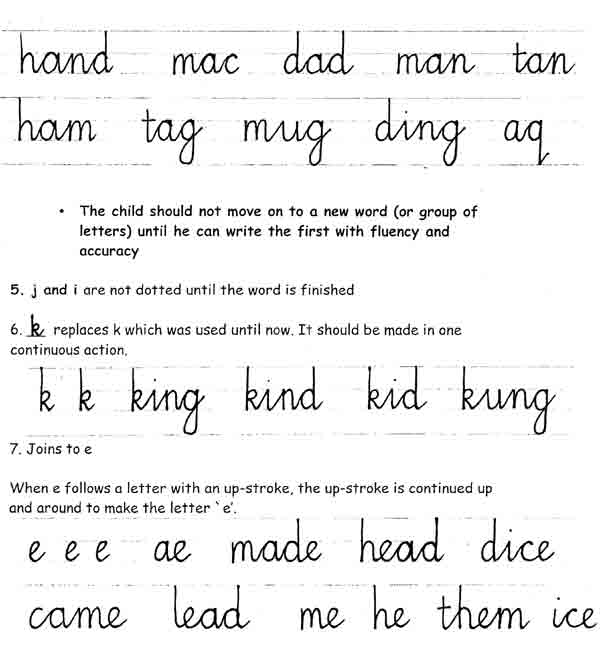
8. Joins to tall letters – b, h, l, k,
t.
When b, h, l, k and t follow letters
which finish with an up-stroke, the up-stroke is the same height as for small
letters, then turns to point straight up to where the tall letter begins and
comes down again to form the letter
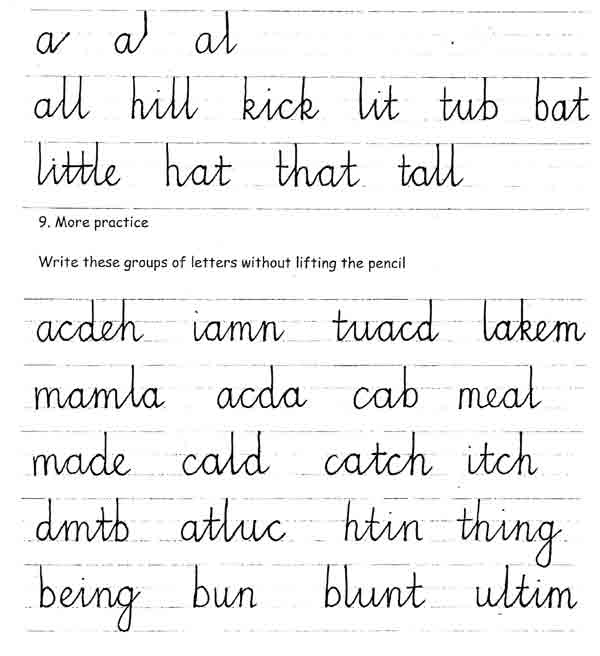
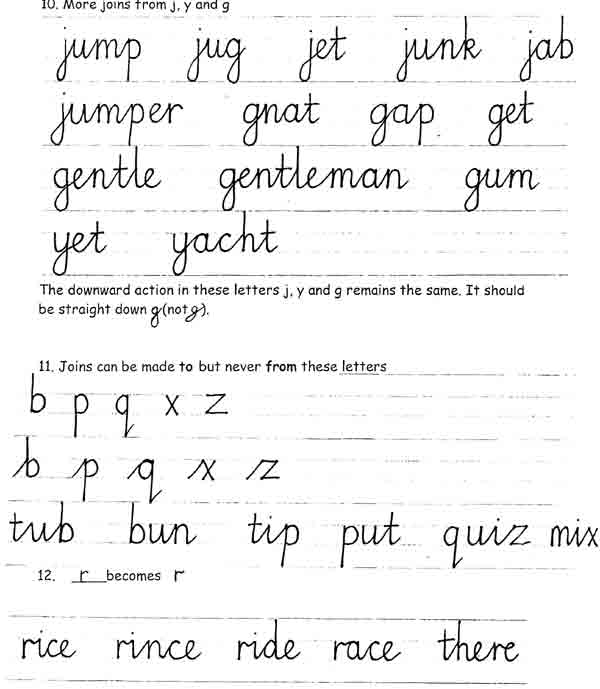
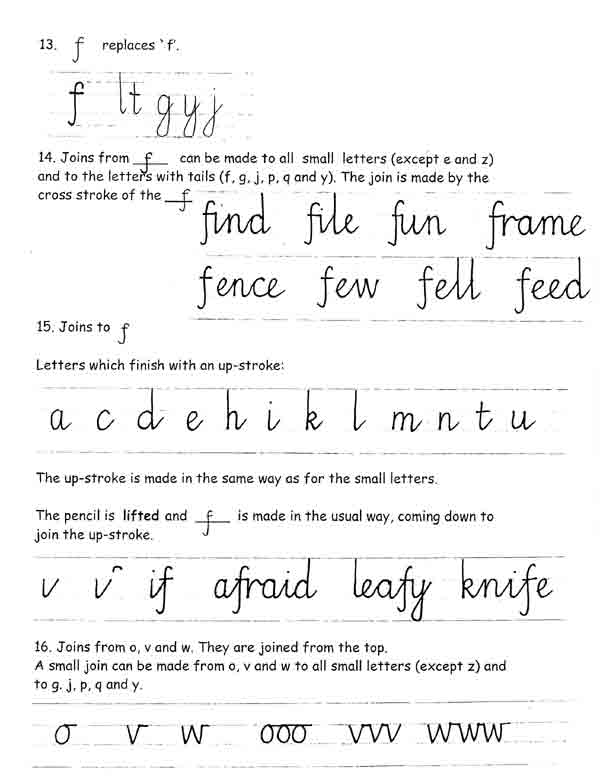
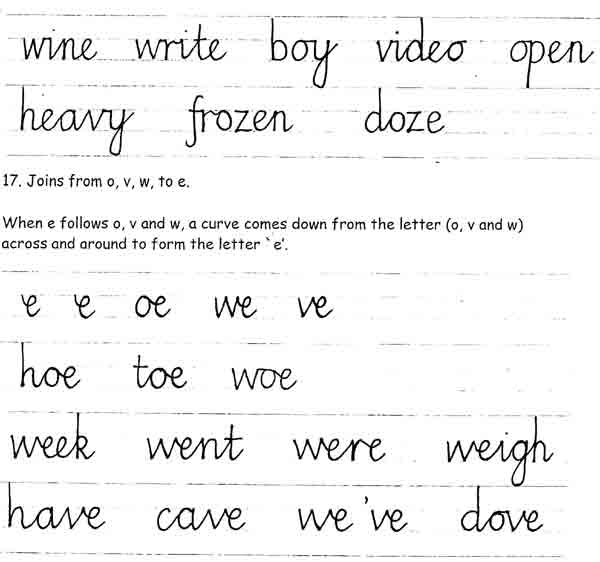
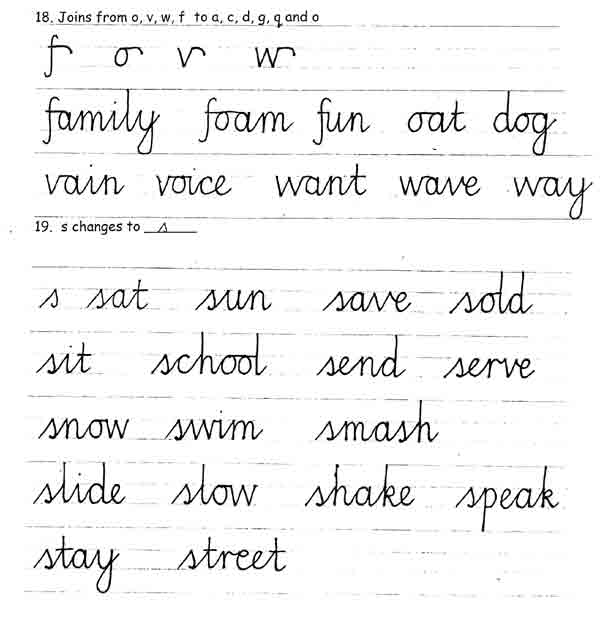
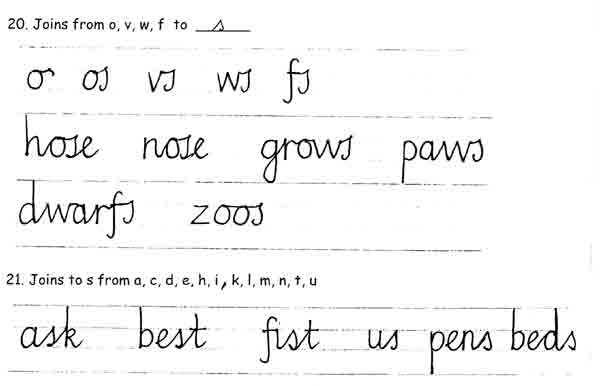
22. ff or ft – use one stroke to cross both letters

Back to Top
Resourcrs


Texts in Use,
2004 onwards
- Nelson Handwriting
- Junior Infants: Workbooks 1, 2, and 3 – Blue Level
- Senior Infants: Workbook 4
- First Class: Workbooks 5 and 6 + Developing Skills, Red
Book (bought by school)
- Second Class: Developing Skills, Yellow Book
- Third Class: Developing Skills, Book 1
- Fourth Class: Developing Skills, Book 2
- Fifth Class: Developing Skills, Book 3
- Sixth Class: Developing Skills, Book 4.
Back
to Top
|